

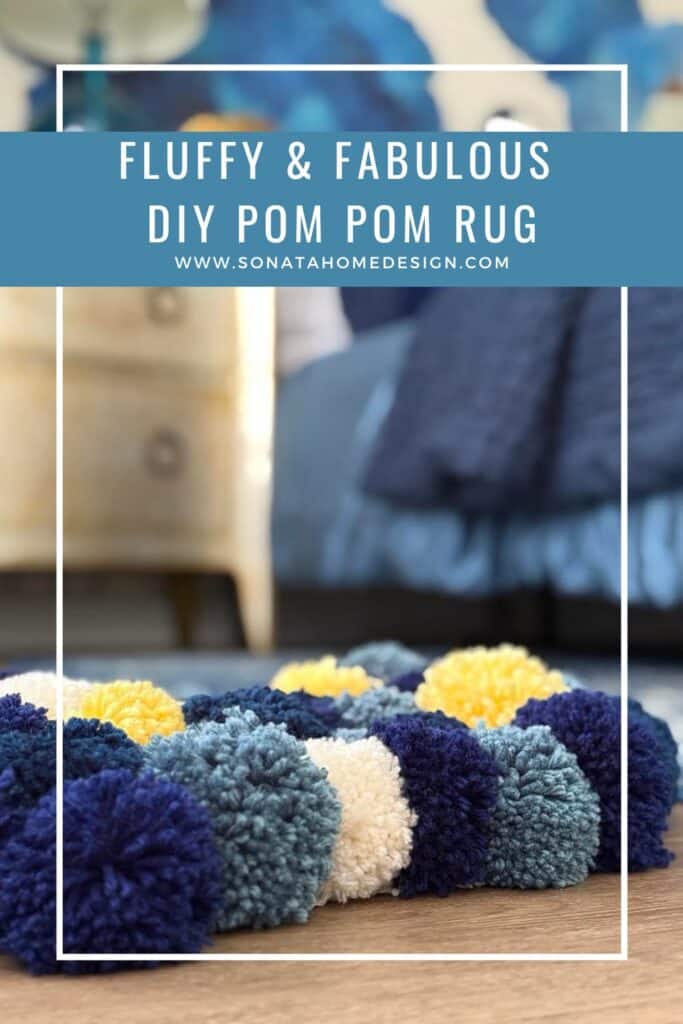
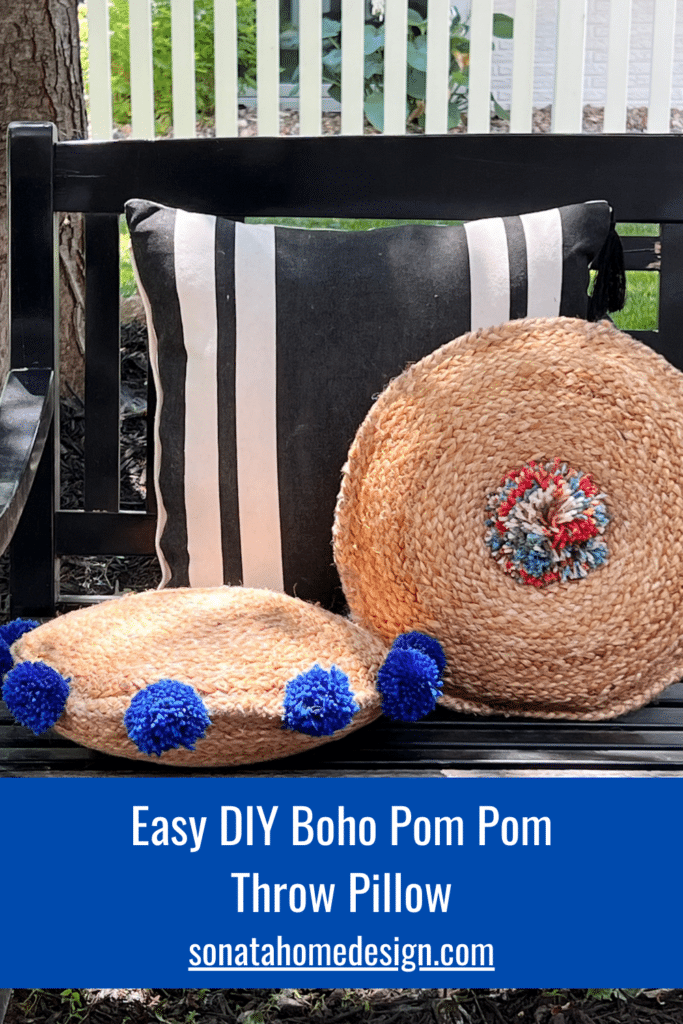
Fluffy & Fabulous: Make A DIY Pom Pom Rug for a Cozy Floor!
Who doesn’t love a little extra coziness underfoot? A pom pom rug is the perfect way to add texture, color, and a playful touch to any space—plus, it’s surprisingly easy to make! Grab some yarn, get comfy, and let’s create a rug that’s as soft as it is stylish!

This blog contains affiliate links. This means a small commission is earned if you make a purchase by using this link. The price you pay will be the same whether you use the affiliate link or go directly to the vendor’s website using a non-affiliate link. As an Amazon Influencer, I earn from qualifying purchases.
Visions of Pom Poms
Have you ever stepped onto a cloud? No? Well, friend, today we’re about to change that—at least in the form of a ridiculously soft, fluffy, and fabulous pom pom rug!
There’s something so satisfying about making a DIY rug that’s not only functional but also looks like it belongs in a whimsical design magazine.
And the best part? It’s easy (seriously, no advanced crafting skills required), and you can completely customize it to match your style.
The Handcrafted Society
It’s time for The Handcrafted Society!
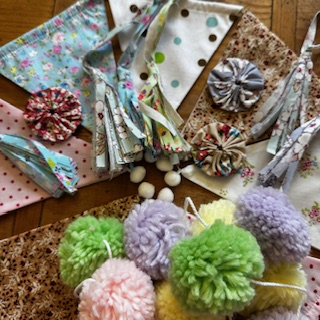
Designed by our host Wendy at WM Design House, this is a group of creatives who takes on a monthly project challenge with a specific medium or theme in mind. This month the medium is…Rick Rack and Pom Poms!
Since I love a fluffy pom pom, I decided to go with this. But since I have done projects with pom poms before, I needed to think outside the box. So I looked to the bare floor that needed a little cozy personality…and headed to my craft room!
Be sure to read to the bottom of the post to see all of the amazing projects by my fellow Handcrafted Society friends!
Wallpaper Inspiration for a Pom Pom Rug
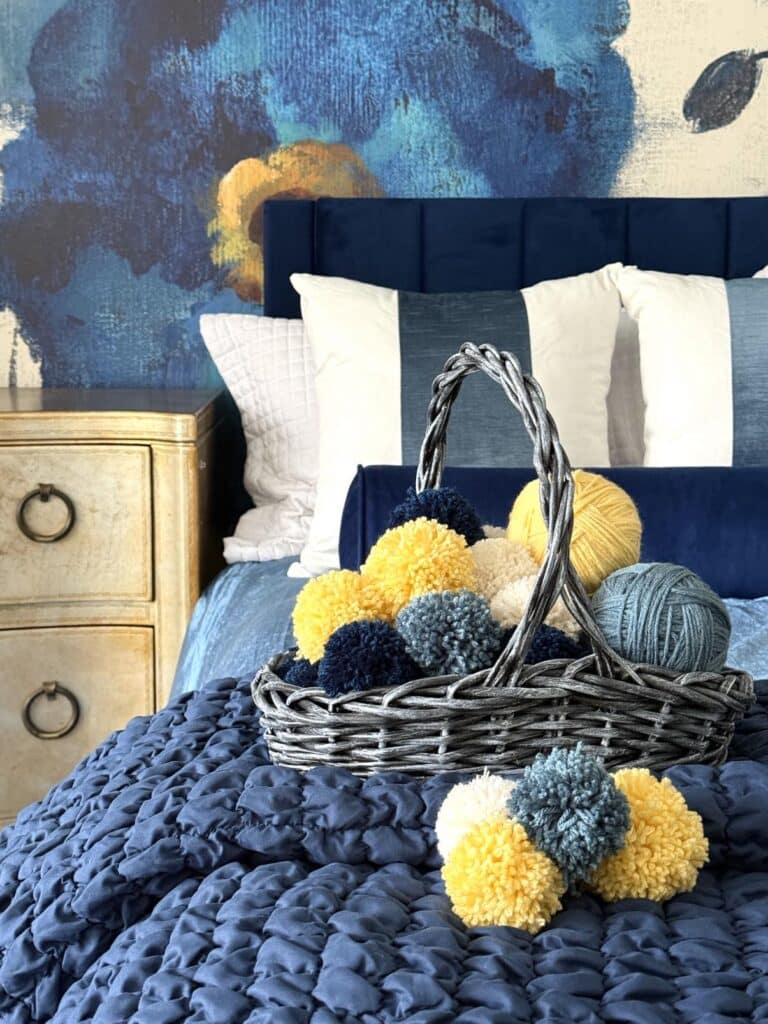
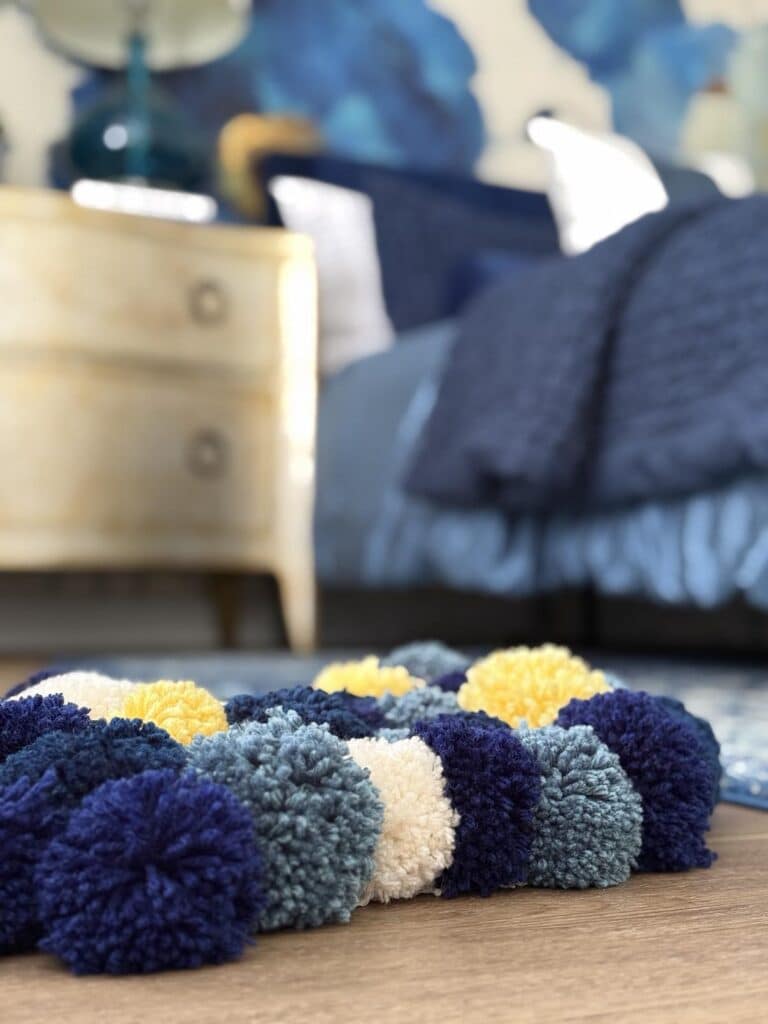
Last year, I gave our primary bedroom a refresh by installing a bold wallpaper mural behind the bed’s headboard. The big, bold flowers have an impressionistic vibe in lovely shades of blue, ivory, and gold.
This mural gives me such joy every time I walk into the room!
What a perfect color palette for a pom pom rug!
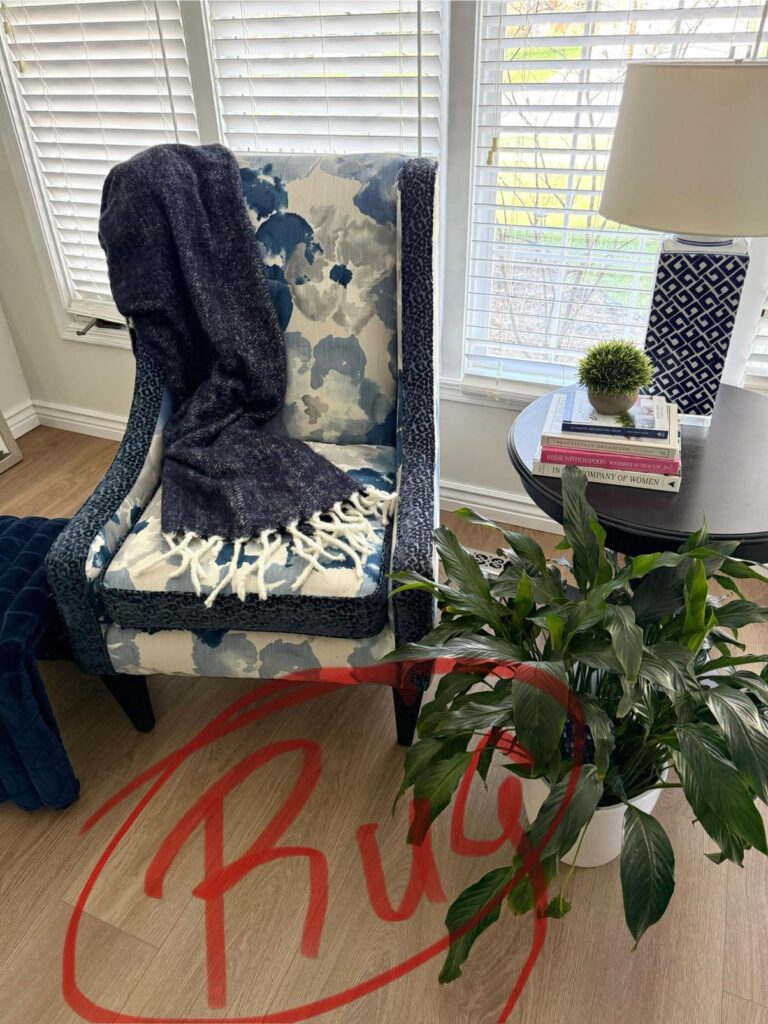
Over by the windows sits my reading chair…an upholstery project inspired by a $10 thrift chair find!
I love this little reading nook.
But it needs something…
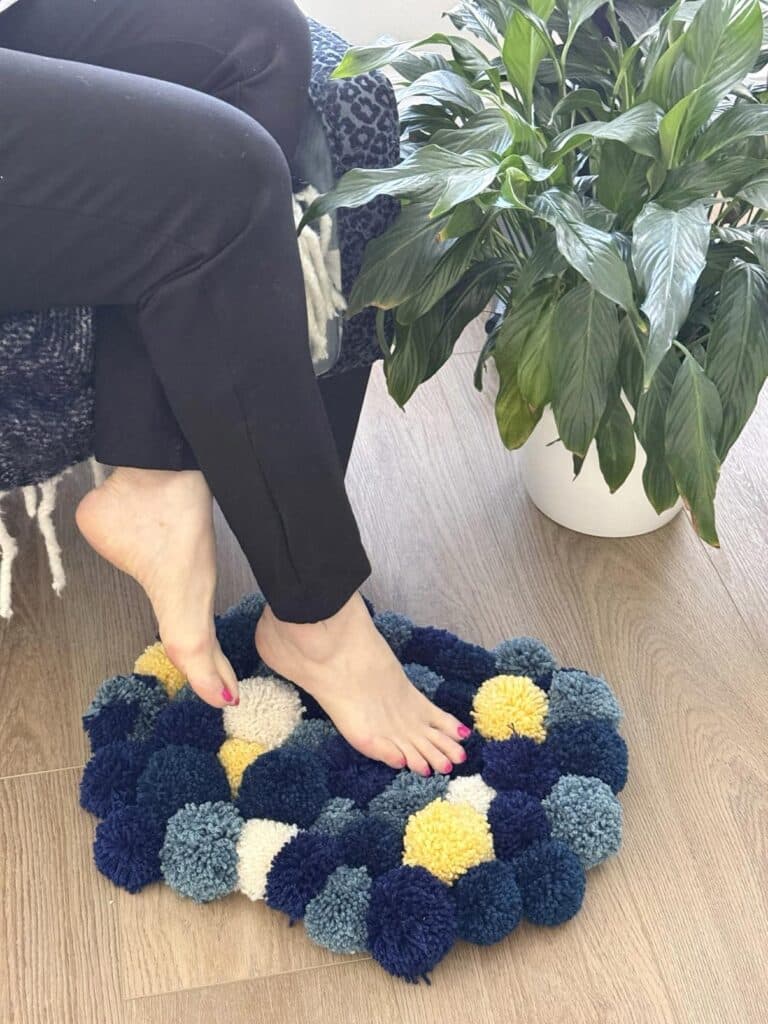
How about a little pom pom rug in which to nestle my tootsies?
I’m thinking you might have a similar space in your home that could benefit from a cozy pom pom rug mat. Let’s dive in!
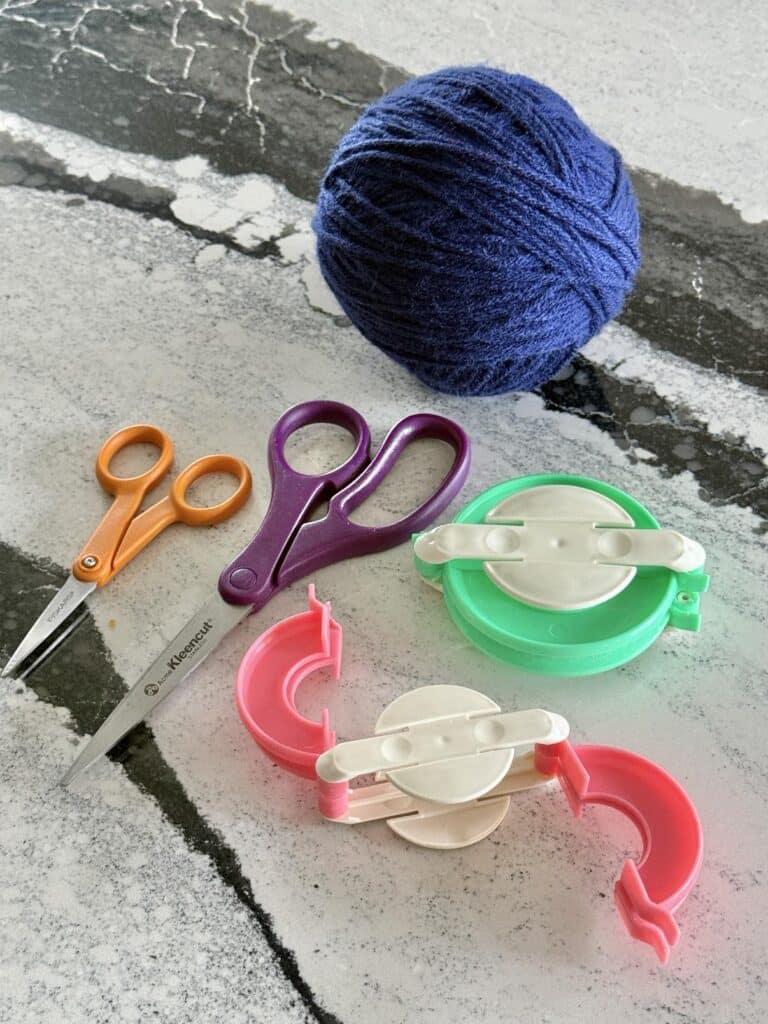
Supplies You’ll Need
Before we get started, here’s what you need to gather:
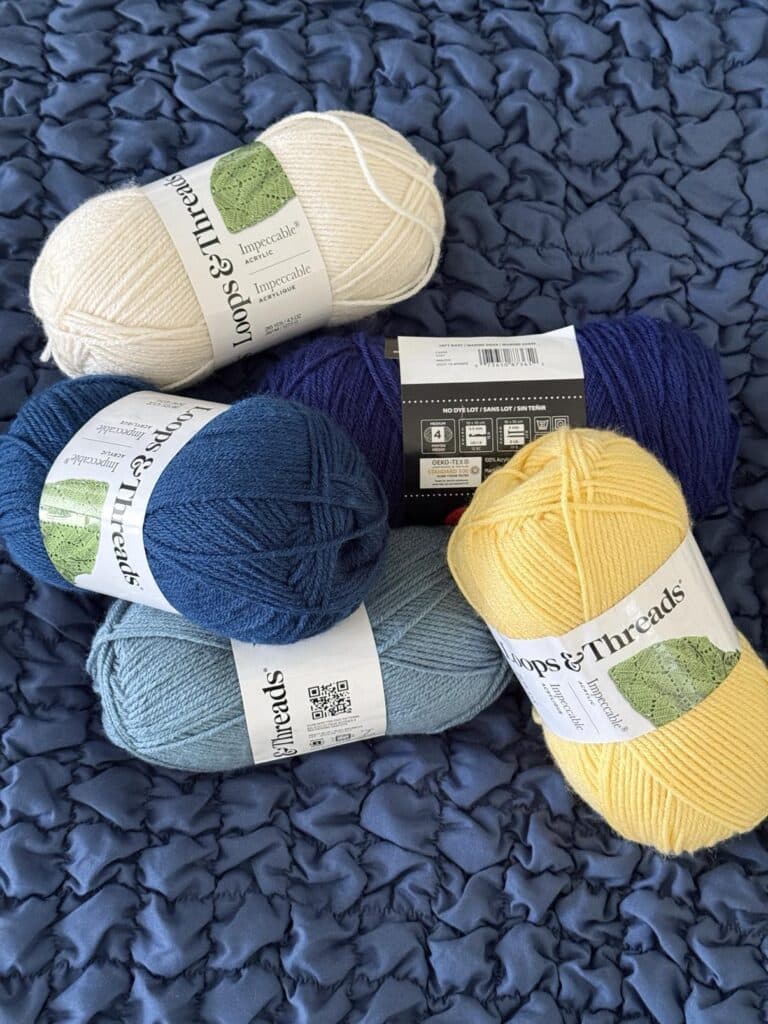
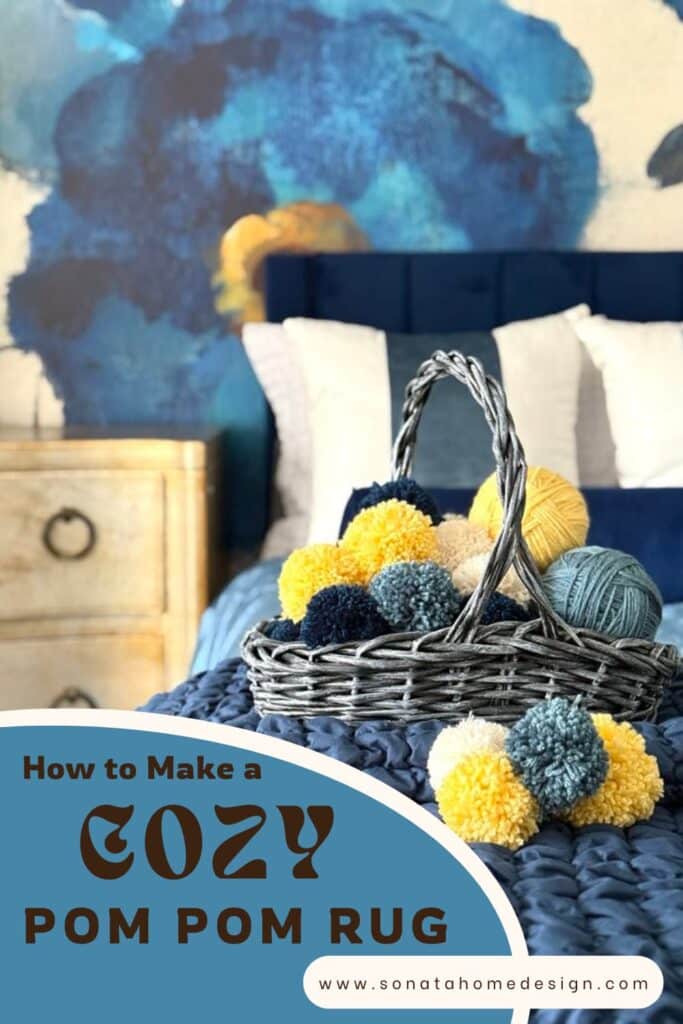
- Yarn – Any color and any texture, but the fluffier, the better!
- Pom-pom maker – These handy little tools make life so much easier. (But if you don’t have one, don’t worry—I’ll give you an alternative.)
- Scissors – A sharp pair will make trimming those pom poms a breeze.
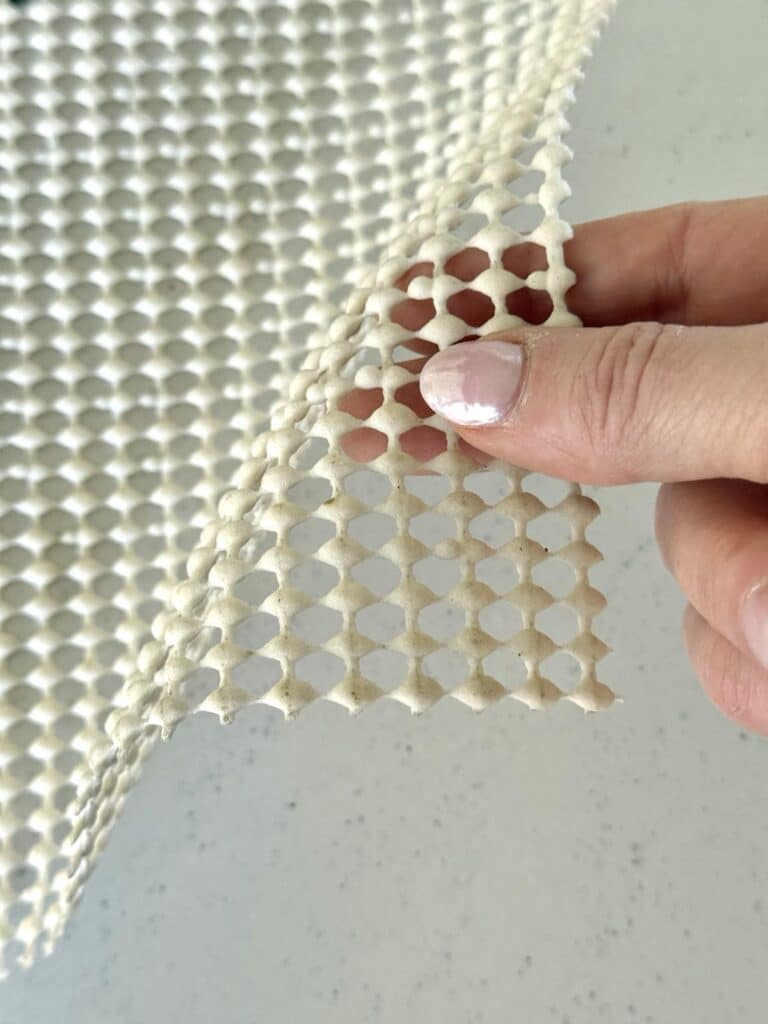
- Rug pad or rug mat – This will be the base of your masterpiece. A non-slip rug mat works best.
- Optional: Large tapestry needle – If you use a rug pad with a honeycomb weave, you don’t need this. If your rug pad is tightly woven, this needle will be your best friend!
Want all neutrals? Go for it!
Dreaming of a rainbow rug? Absolutely!
Feeling extra? Add some oversized pom poms for texture!
Got everything? Great! Now, let’s start making some pom poms!
How to Make Perfect Pom Poms
If you’ve never made a pom pom before, welcome to your newest obsession. Once you start making them, it’s hard to stop.
If you use a pom maker, there will be instructions that come with the kit. But honestly, I do love to have a friend show me how when I am learning a new tool.
I’ll be your pom pom maker friend!
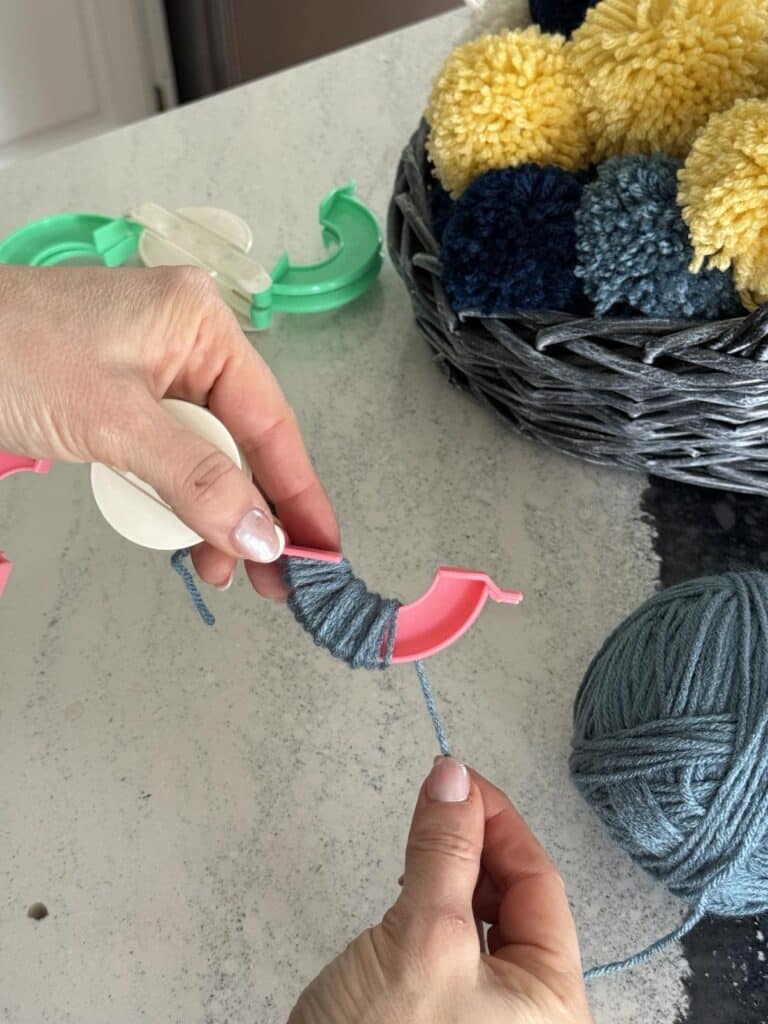
Here’s how to do it with a pom-pom maker (trust me, it’s worth getting one!):
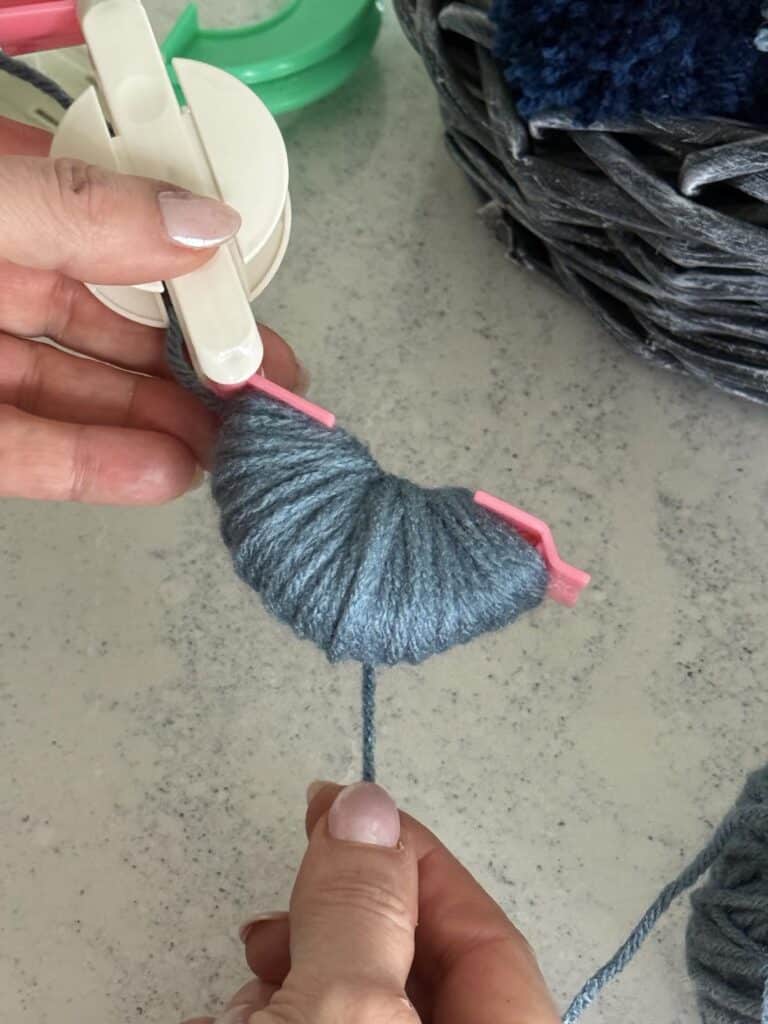
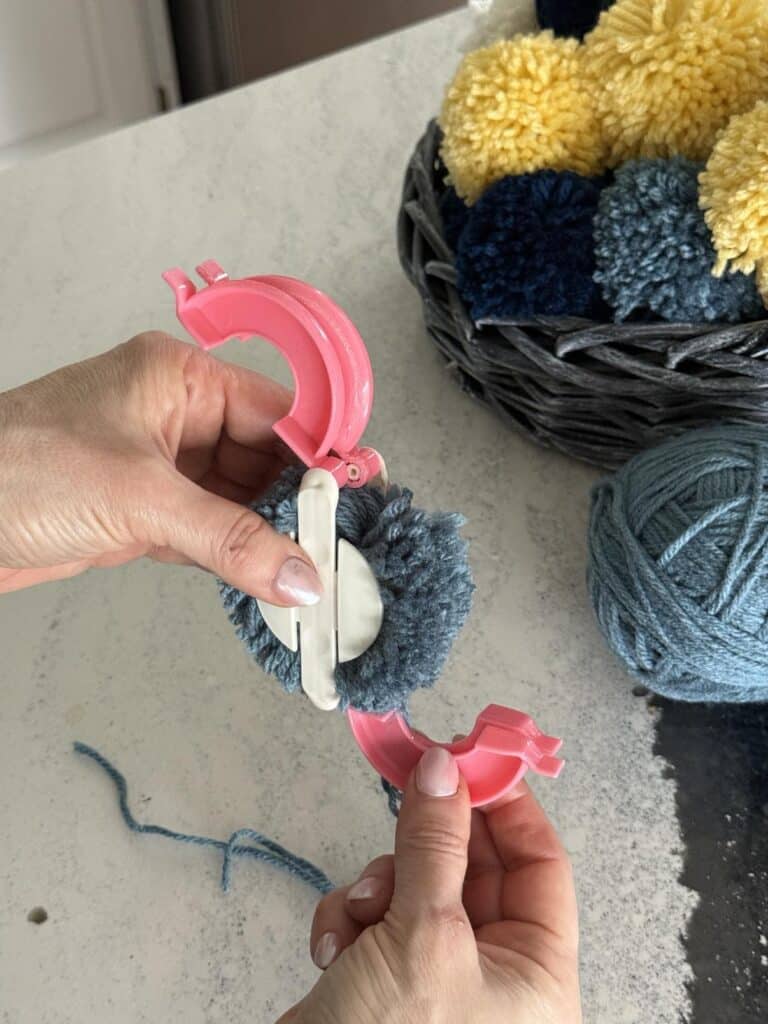
- Open your pom-pom maker and start wrapping yarn around one side. The more you wrap, the fluffier your pom pom will be!
- Close that side and repeat on the other half.
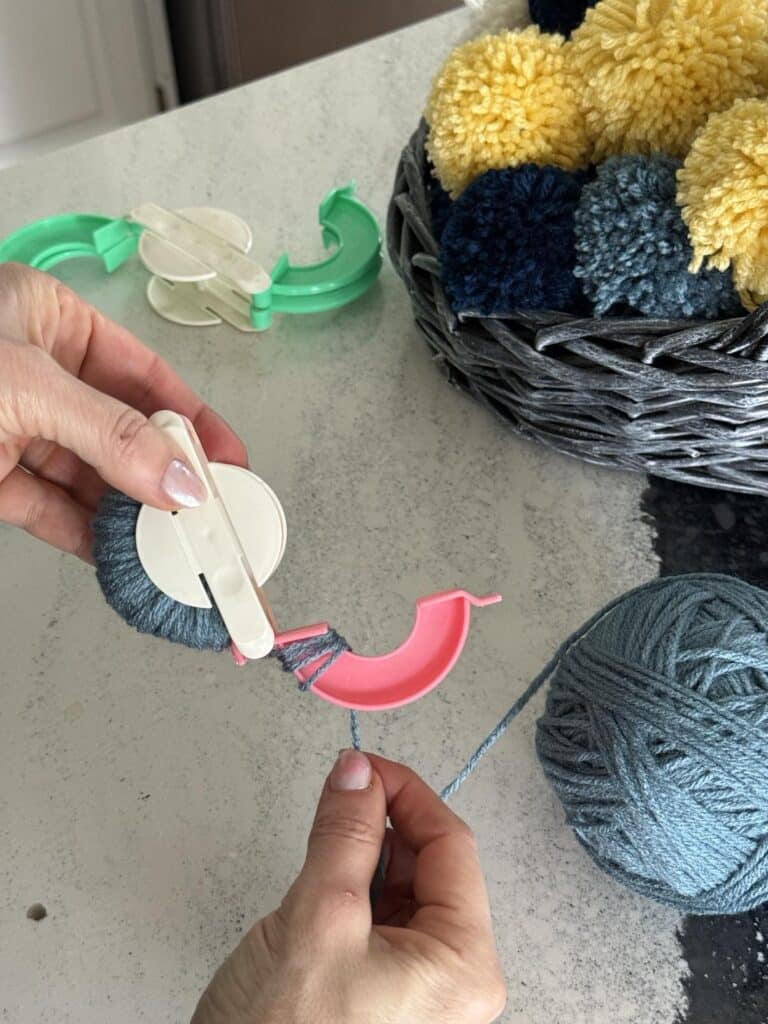
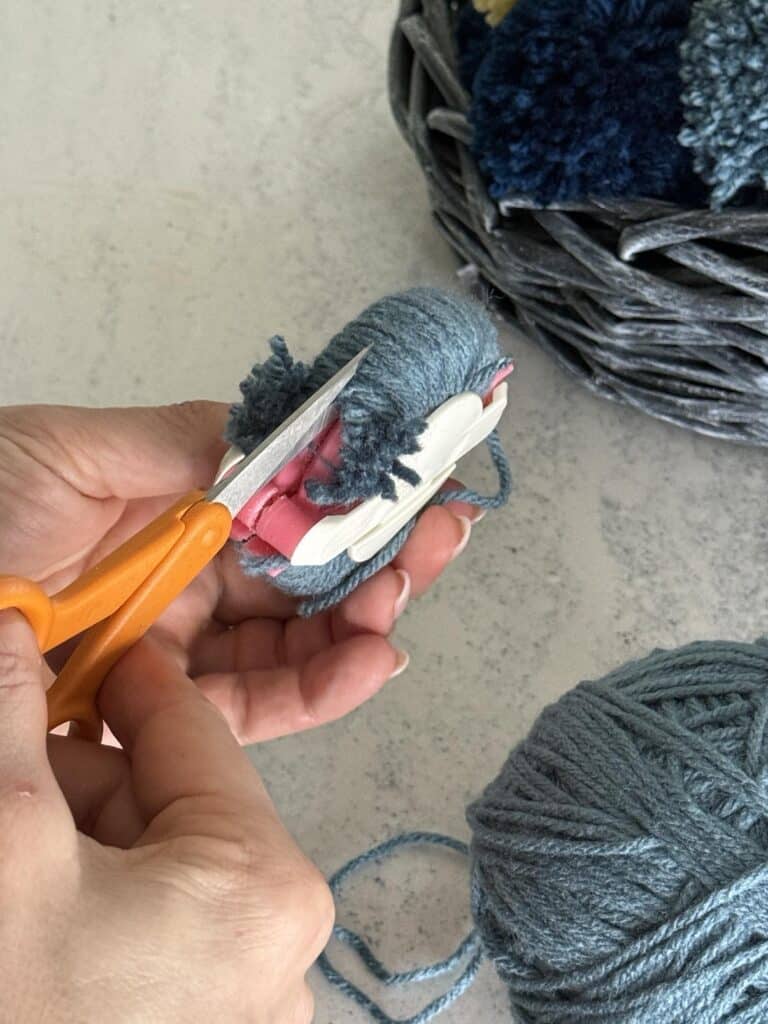
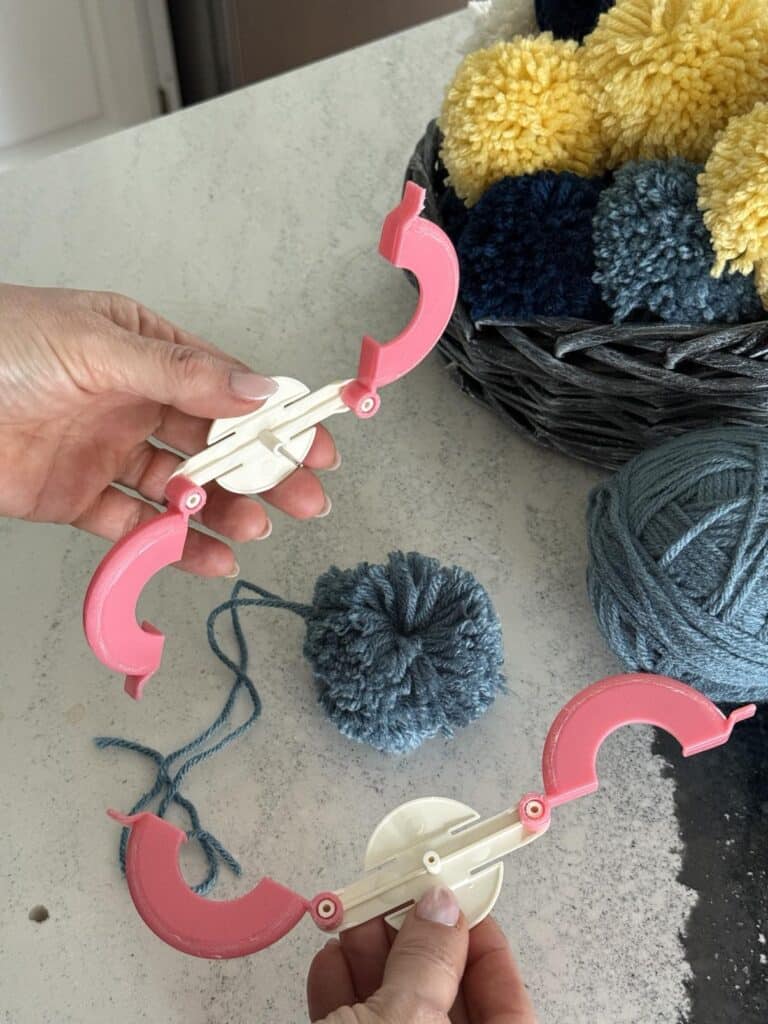
- Once both sides are wrapped, grab your scissors and carefully snip along the middle groove. The sharper your scissors, the easier this task will be! Dull scissors don’t work!
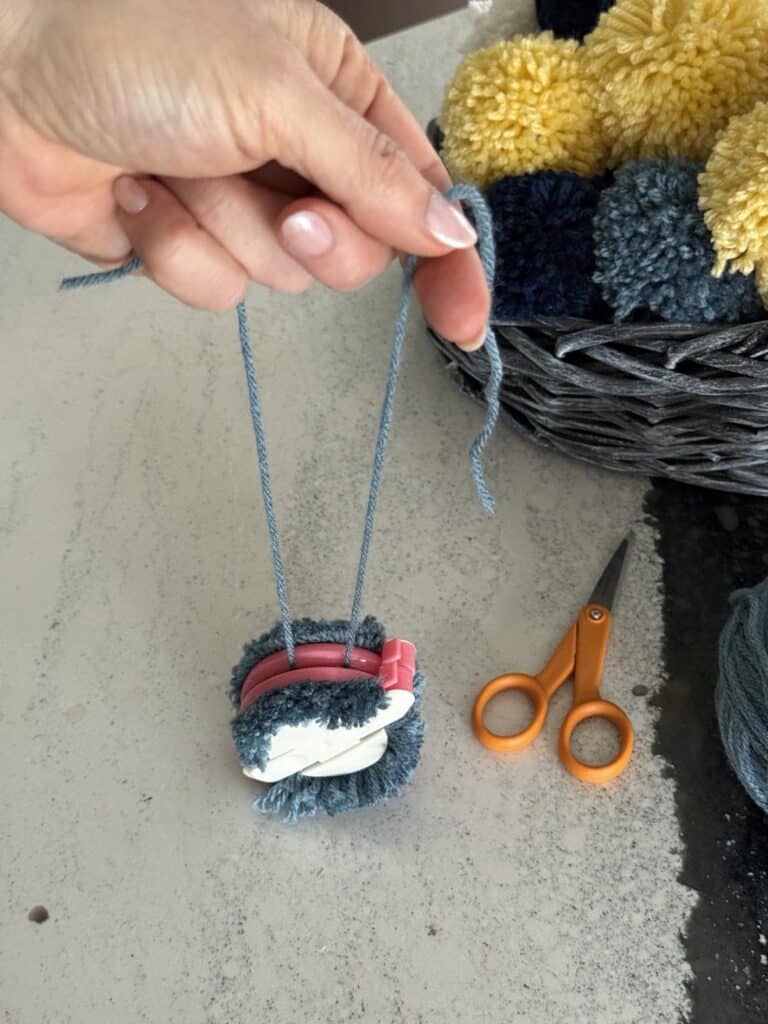
- Take a piece of yarn, slide it into the groove, and tie it super tight in a double-knot.
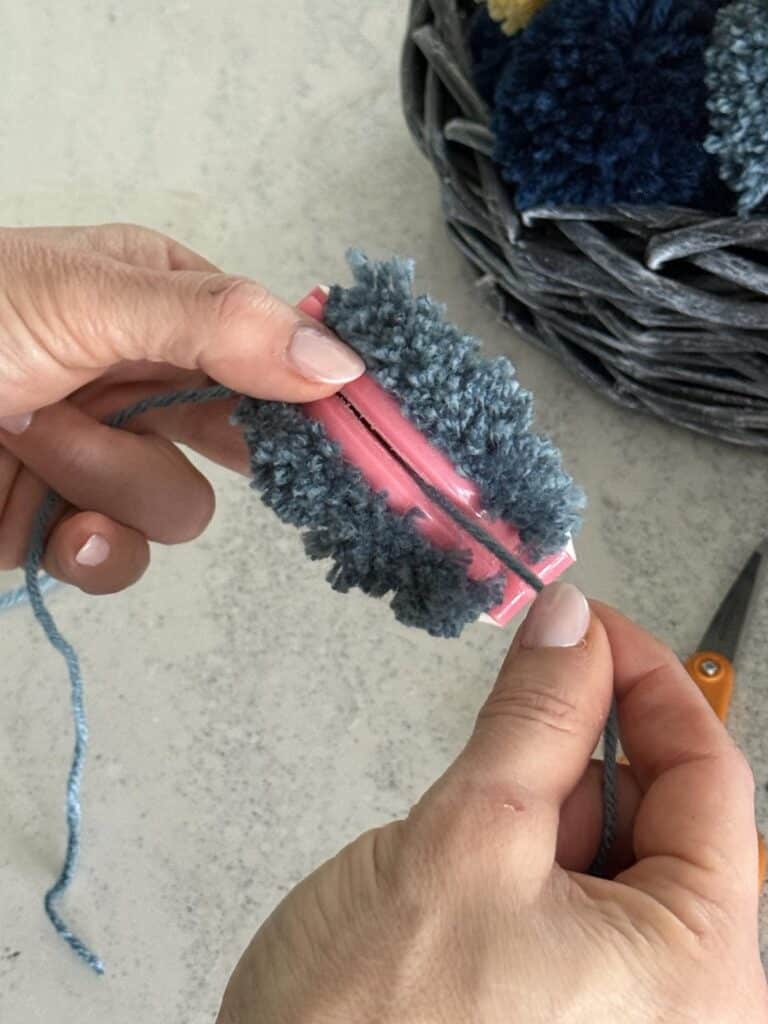
- Open the maker, fluff up your pom pom, and give it a little haircut with some scissors to shape it.
No pom-pom maker? No problem! Just wrap yarn around your fingers (or a fork for mini ones), slide a string through the middle, tie it tightly, and cut the loops. Boom—instant pom pom!
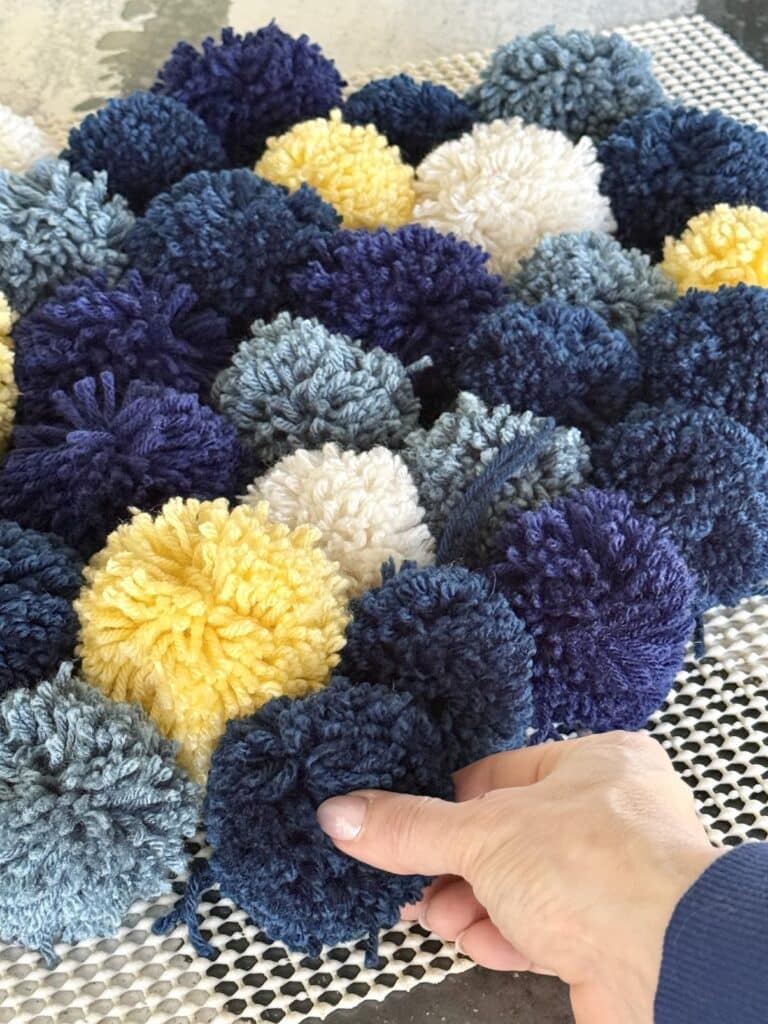
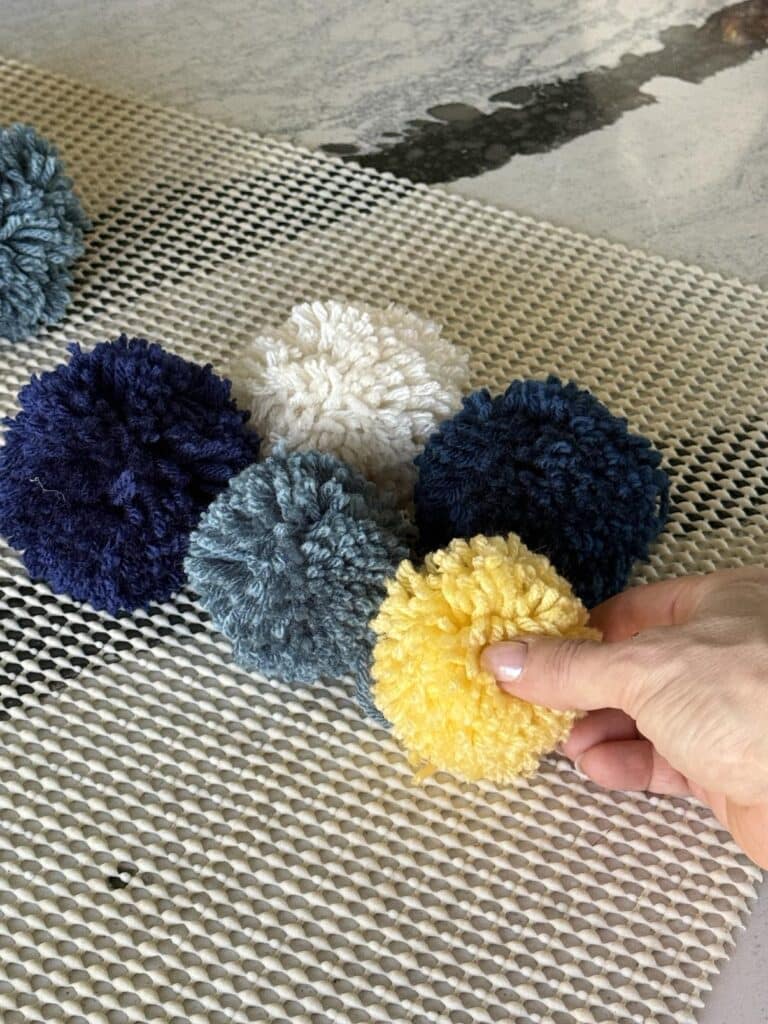
Now, make a lot of these little cuties. I made about 40 pom poms in two different sizes for my rug. Don’t be afraid to mix colors and sizes for extra personality!
This is a great activity to do while watching TV…or hanging out in the kitchen!
Attaching Pom Poms to the Rug Pad
Okay, you’ve got a mountain of pom poms—now what? Time to transform them into a cozy DIY rug!
- Lay out your rug pad and decide on your pom-pom placement. You can go for a random mix or a pattern if you’re feeling fancy.
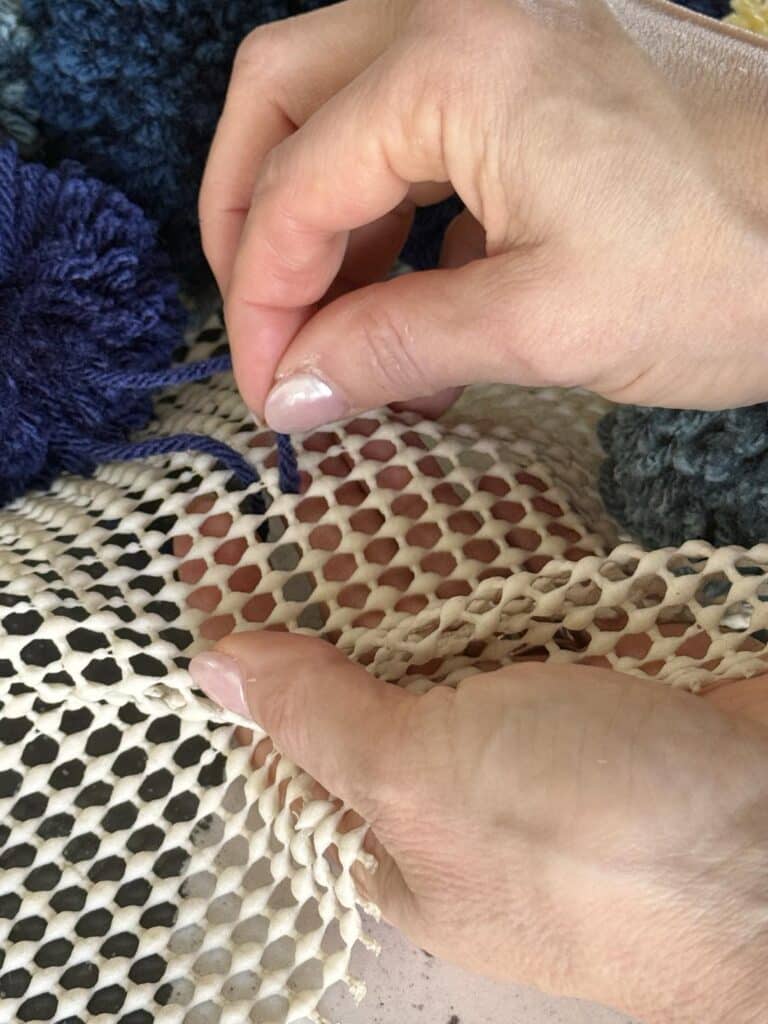
- Take a pom pom and thread the yarn tails through adjoining holes in the rug pad. (If a tight weave you will need to use a tapestry needle or other needle with a large head.)
- Flip the mat over and tie the two tails super tight in a double knot. You want these little guys to stay put!
- Repeat, repeat, repeat until your rug pad is completely covered. (Yes, this part takes a little bit of time, but it’s totally worth it!)
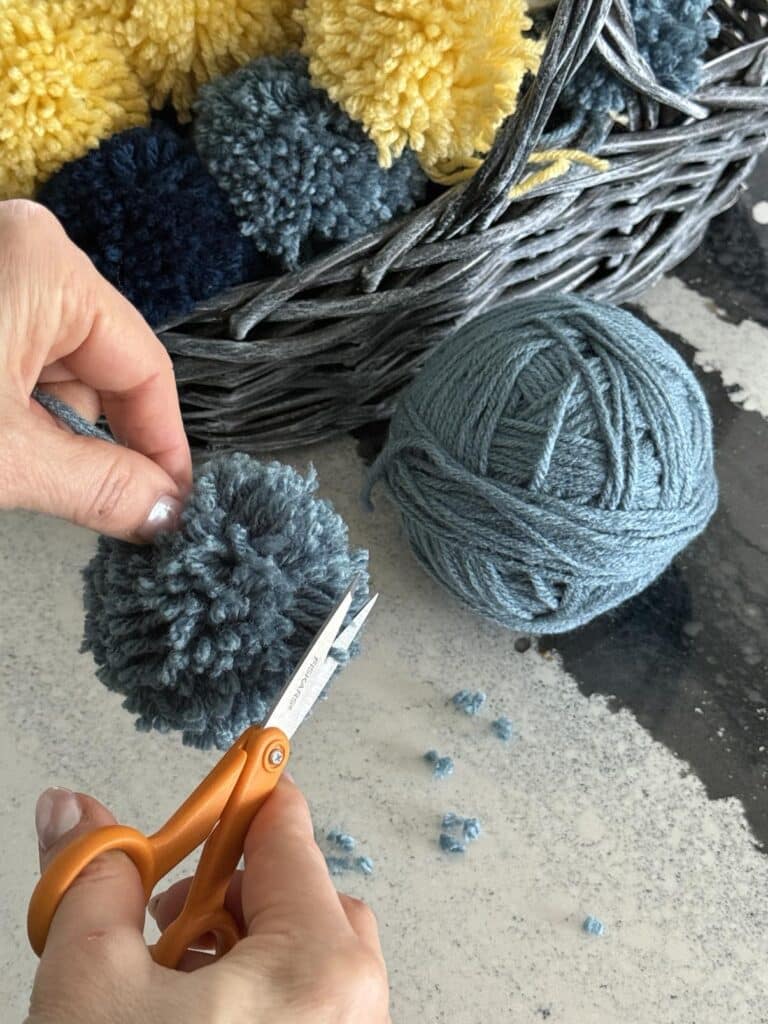
- Give your rug a final fluff and trim any stray yarn pieces.
Pro tip: If you want an ultra-thick pom pom rug, layer the pom poms even closer together for that extra plush feel!
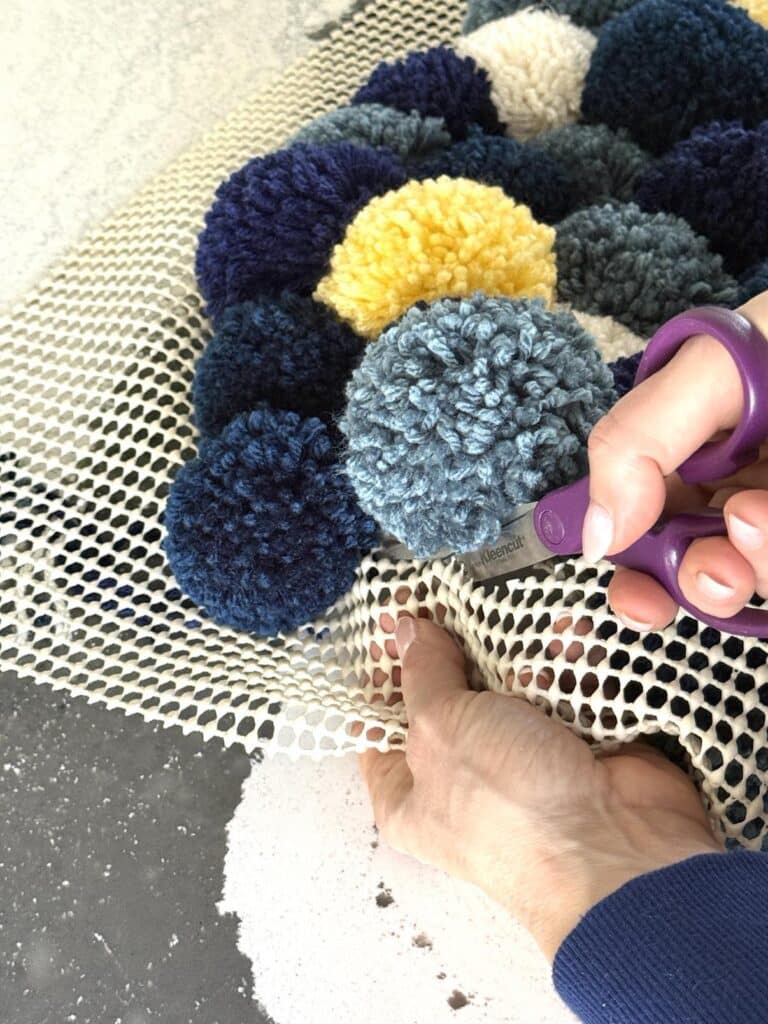
Last, cut the rug mat around the outer edge of the pom poms to create your final shape. Just be careful not to cut through pom pom tied tails!
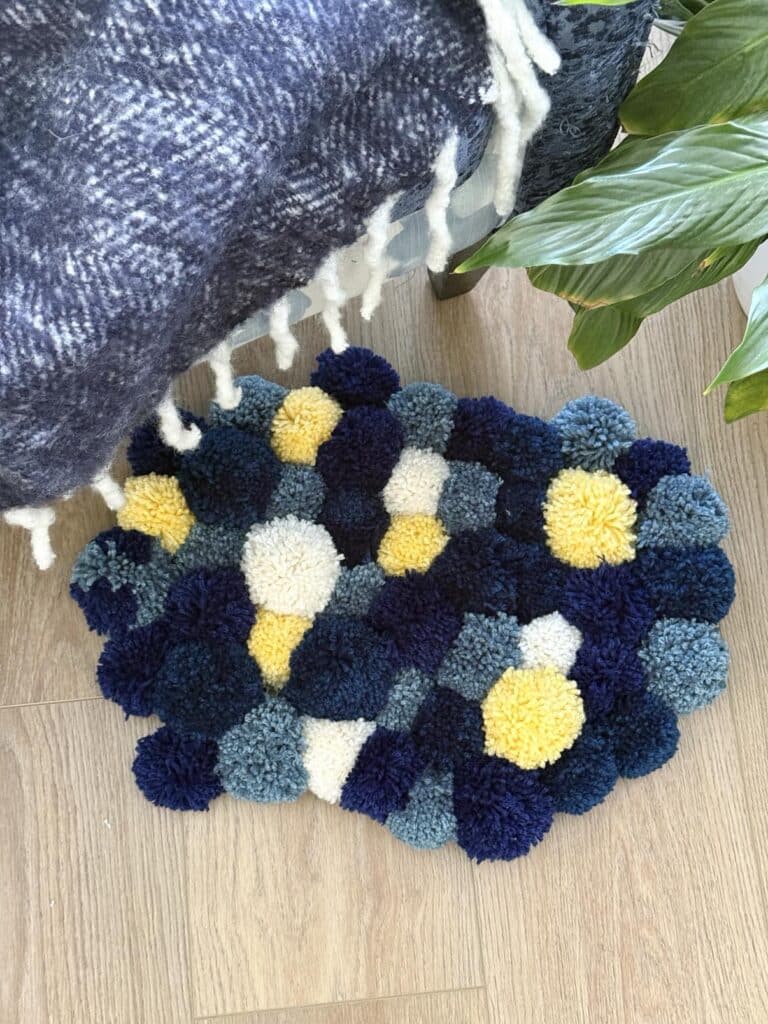
This makes me want to take off my shoes and enjoy all of the pom pom fluffiness!
What I Would do Differently…
I have gone BIGGER!
As I tucked and tied pom poms into the rug mat, I realized that my design placement was becoming more compact and the intended size of my rug shrank.
One of my daughters want to try this project in a large size and promised to let me share her results when she finishes it! Something to look forward to!
Where to Use Your Pom Pom Rug
Now that you’ve crafted the coziest DIY rug ever, where should it go? Here are some perfect spots:
- Nursery or kid’s room – Because little feet deserve maximum fluffiness!
- Bedroom – Step onto softness first thing in the morning? Yes, please.
- Bathroom – Just make sure it stays dry (pom poms don’t love puddles).
- Reading nook – Because every cozy corner needs a little extra comfort.
- Office or creative space – A pop of color and texture makes work way more fun.
Basically, anywhere that could use a little bit of extra coziness is fair game!
Pom Pom Rug Care Tips
Now that you have your dreamy, fluffy pom pom rug, here’s how to keep it looking fresh:
- Shake it out every so often to keep the pom poms fluffed.
- Spot clean if needed (because life happens).
- Trim stray yarn pieces as your rug settles in.
No Sew Pom Pom Rug
This isn’t just any rug mat; it’s a labor of love, a burst of personality, and a ridiculously comfy addition to your home.
So, are you ready to make your own pom pom rug? If you do, I’d love to see it! Share your DIY creations in the comments or tag me on social media. Let’s keep spreading the fluffy rug love!
Be sure to dig into the other Handcrafted Society project below. Pom poms and rick rack galore!
Cheers!

A Little About Me
Hi! I’m missy. So happy to meet you!
“Decorate with Joy! Live with Happiness”
I truly believe that your home should be a reflection of your personality, a space where you feel free to express yourself and create a sanctuary that feels uniquely yours.
I love creating mood boards, hunting down unique home décor treasures, tackling easy DIY projects, and gathering with family and friends. Homes are meant to be enjoyed, filled with laughter, and shared with the people you love!
– cheers –

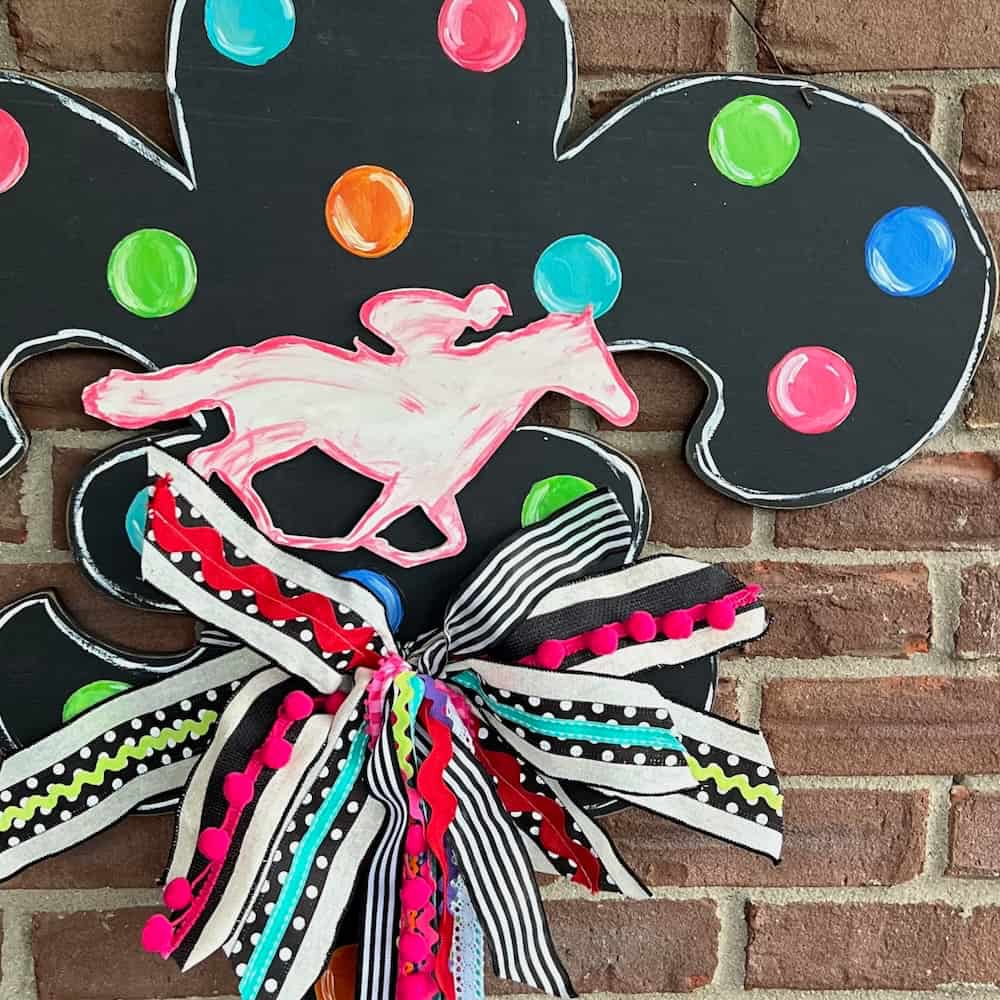
Handcrafted Society Projects

Don’t Forget to Pin It!
Pin the image below to your boards on Pinterest (just click the Pin button in the top left corner). You can also follow along with me on Pinterest!
Shop Till You Drop

So cute Missy! Your colors (of course) are spot on!!! And that looks so cozy and inviting — perfect for a reading nook!!!
Thanks, Diane! I love seeing everyone’s retro projects!
This is such a clever idea Missy. It looks fabulous. Well done and I love the colors you chose. XO- MaryJo
Thank you so much, MaryJo! It was fun to pull the colors from the wallpaper!
Such a cute project, Missy!
Thanks so much, Kim! Wishing you a great week!
What a cozy and soft rug!! AMAZING project, Missy! The colors coordinate perfectly with your little nook!
Thanks, Rachel! Always nice to have a soft landing for the feet!
Missy, your rug is so cute and comfy! I adore how it perfectly mimics your wallpaper! I enjoy making pom poms, but I never thought to make a rug with them! Thanks for the inspiration! I’m pinning it now!
You are always so industrious Missy and can tackle creating anything…even rugs! I’m loving how your pom pom rug coordinates with your room, and it looks just darling with that chair! Well done!
Missy, what a fun and clever idea! Your pom pom rug is so cozy and adds a perfect pop of color to your beautiful room! Thanks for sharing this idea!
Missy, how creative! I love the idea and your color choices. What a great idea and fun too!
I never would have thought to make a rug! What a great idea! I love your colors! I love your hydrangea wall art with pom poms too! I might have to give that a try!
What a fun project! I love how the rug colors can be customized to your space.
Missy – You never stop amazing me. I love your idea of making a pom pom RUG! How soft, cozy and inviting it would be. Thanks for the step by step instructions and for the extra tips. Always fun participating in the HCS with you.