

How to Make a Simple Reversible No Sew Placemat
Who needs boring placemats? We can all learn how to make a placemat that is quick, simple, stylishly reversible, and uses fun bandanas!
No sewing machine? No problem! Today’s easy project is all about creating awesome no-sew reversible placemats that’ll instantly upgrade your table!

This blog contains affiliate links. This means a small commission is earned if you make a purchase by using this link. The price you pay will be the same whether you use the affiliate link or go directly to the vendor’s website using a non-affiliate link. As an Amazon Influencer, I earn from qualifying purchases.
Celebrate the Seasons
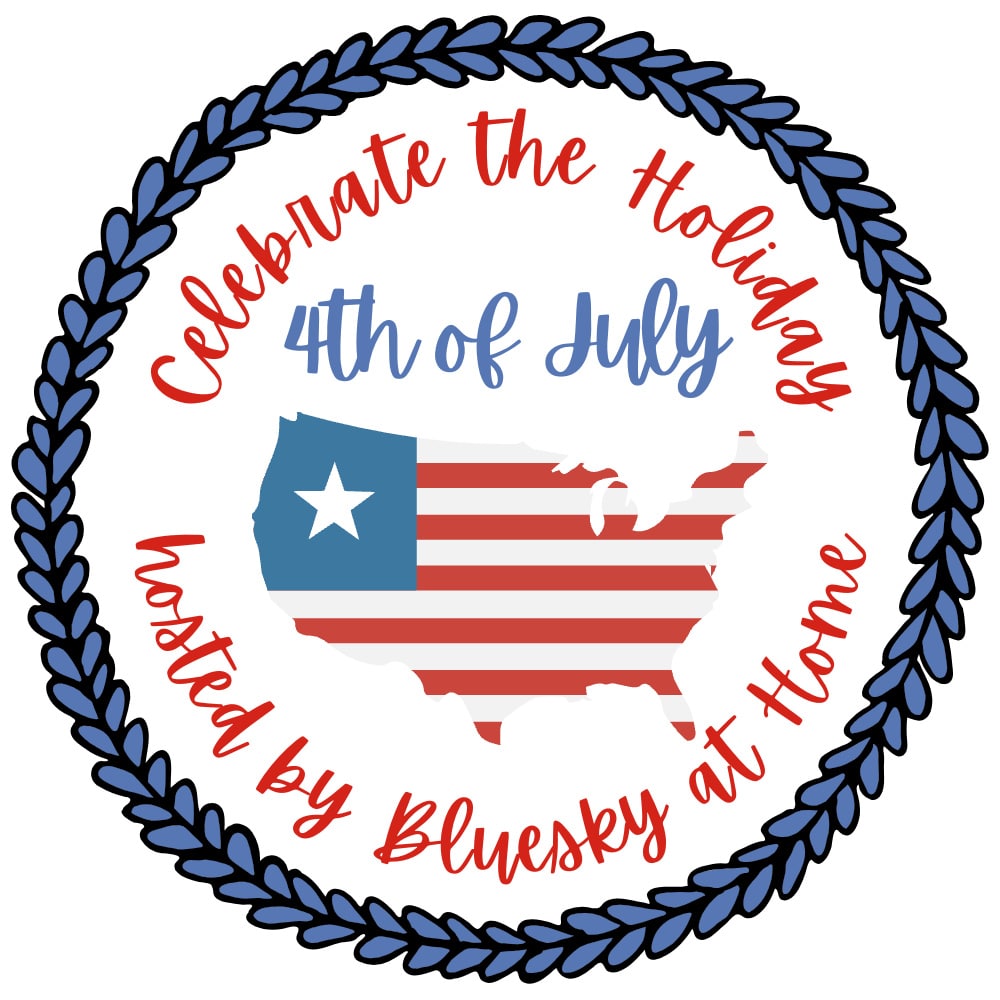
I’m so excited to be a part of the Celebrate the Season blog hop! This month we are celebrating Independence Day and all of the summertime activities that go with it. If you are joining from Masterpieces of My Life, welcome! MaryJo’s ribbon flag is so clever and so charming!
Welcome to Sonata Home Design! I’m Missy, and here you’ll find a vibrant community all about creating spaces you love at home. I’m passionate about adding a pop of color to your décor, inspiring you with easy DIY projects, and sharing mouthwatering recipes that make entertaining a breeze. Let’s turn your living space into a symphony of style and comfort – together!
Growing up, setting the table for dinner was my job.
I learned early on which side the fork goes on and which direction to set the knife blade.
I also learned what a difference changing up the placemats could make!
My husband didn’t realize when he married me that I have an addiction to two things: throw pillows and placemats!
Today I’m sharing a fun way to make inexpensive (actually super cheap!) reversible placemats without a sewing machine.
Supply List for Reversible Bandana Placemats
You are going to love how inexpensive it is to make these placemats!
- 2 coordinating bandanas for each placemat
- Heat ‘n Bond Iron-Adhesive
- Iron
- Scissors
- Thrifted or ready-to-be-donated old jeans
- Hot glue gun and glue sticks
Bandanas Have Come a Long Way
No need to mess with multiple layers of fabric when a couple of bandanas will do!
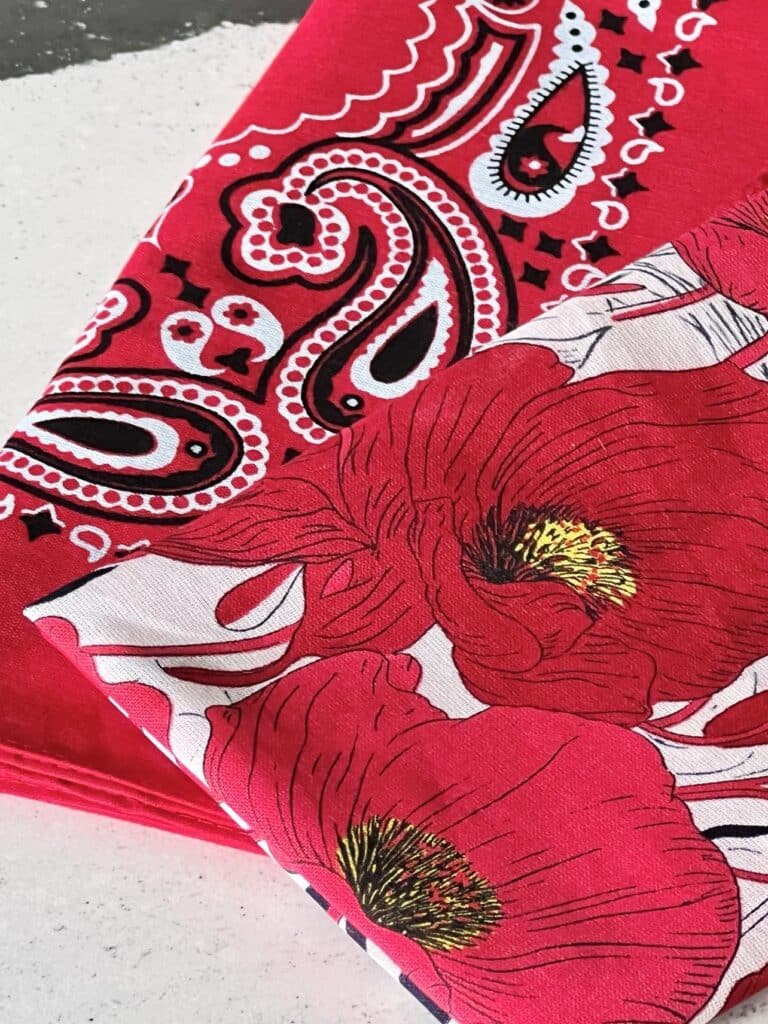
The classic red bandana will always be a versatile accessory…tied around your neck to add a pop of color to your outfit, or worn on your head to keep the sun at bay.
For these dining table placemats, I wanted the traditional bandana for one side. But for the other side?
Oh, the possibilities! Bandanas now come in all sorts of colors and patterns!
To go with my “Cowboy Missy” bandana, I chose a coordinating bandana in a red poppy pattern. You can’t go wrong with red poppies!
How to Make a Placemat from Bandanas
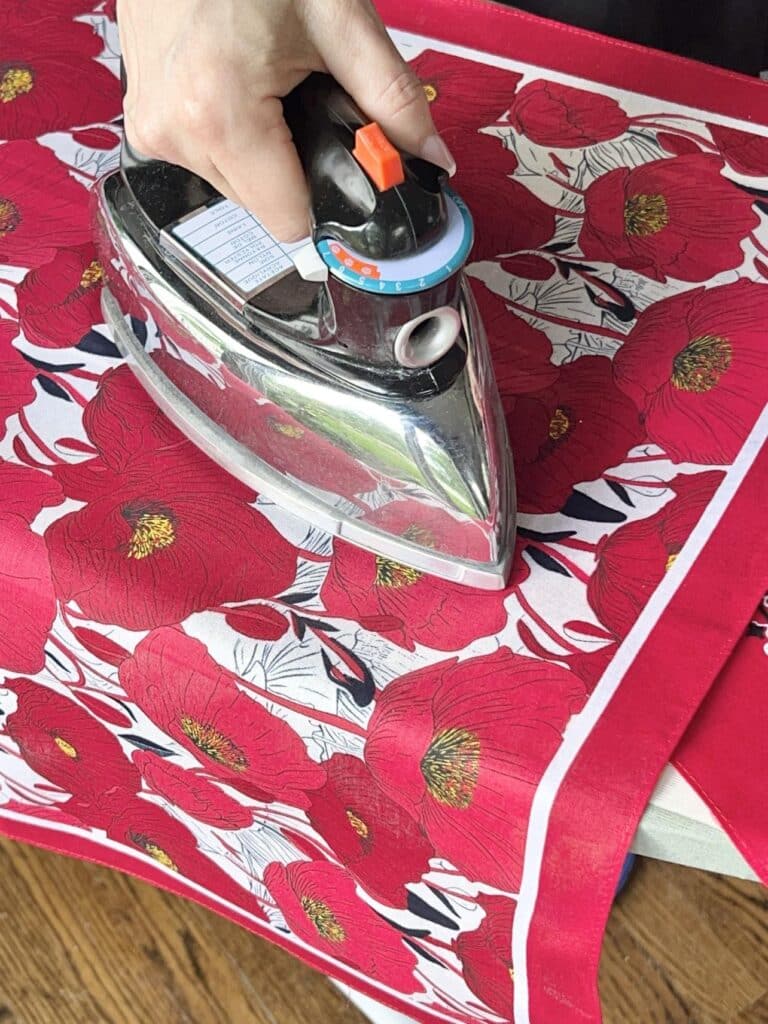
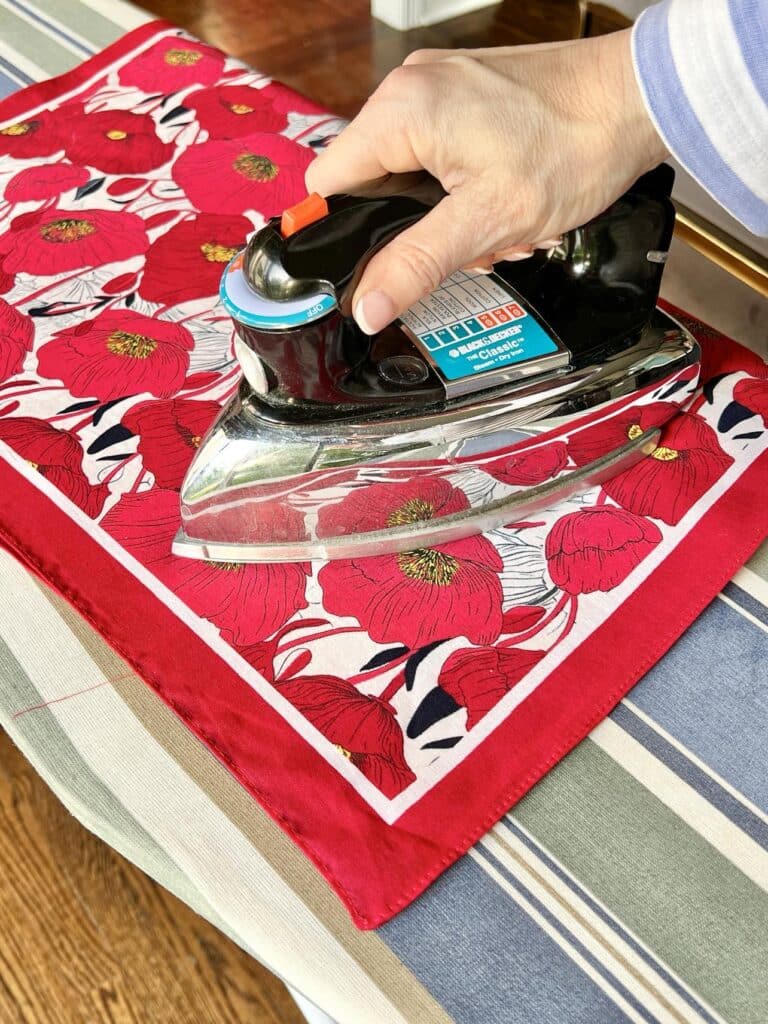
The first thing to do is to get rid of any wrinkles in the cotton fabric. A gentle press with the iron will quickly take them out.
Next, you will love a product called Heat n Bond, a wonderful iron-on adhesive specifically designed for fabrics.
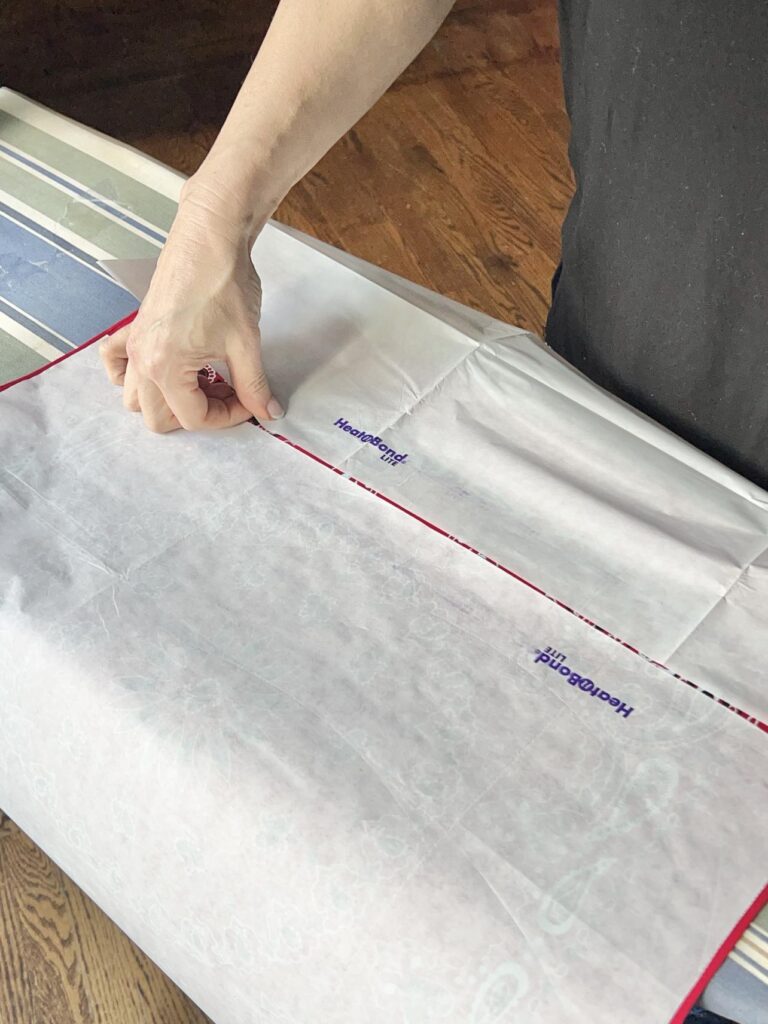
Using sharp scissors, carefully cut a piece to fit your bandana as closely as possible to the edge of the fabric. Don’t worry if there are small areas that don’t get covered. Simply cut and add another piece of Heat n Bond to fit the spot.
The next step is to place the Heat ‘n Bond sheet on top of your piece of fabric with the paper side up. If your bandana has a “wrong side”, this is the side you place the paper on.
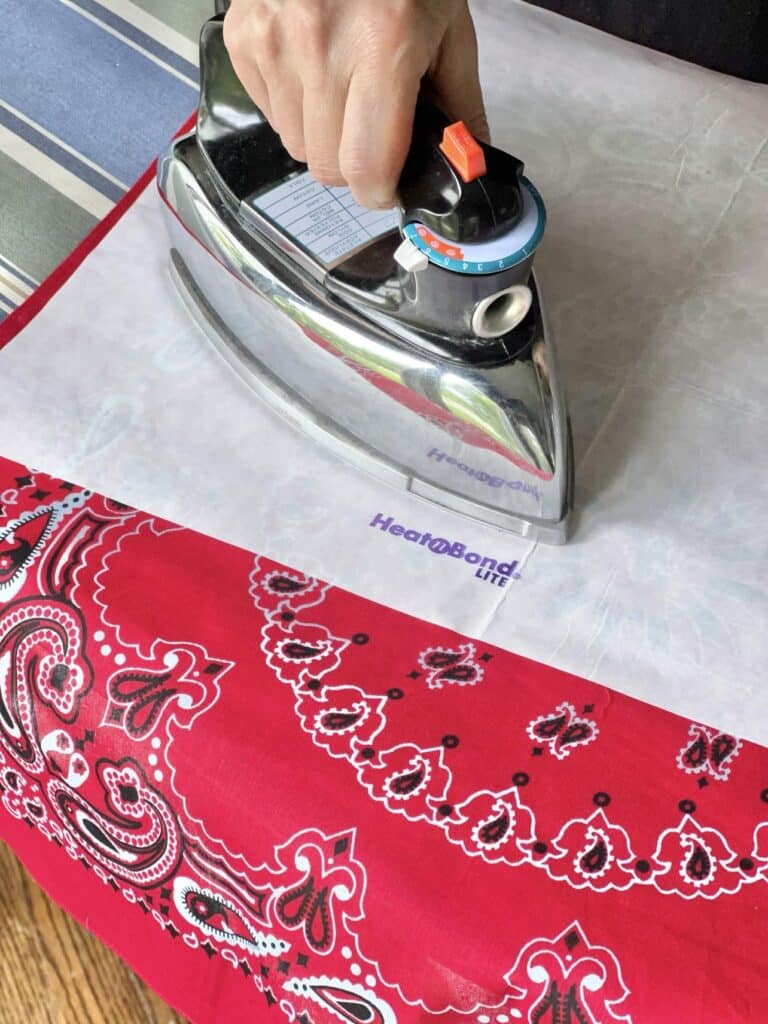
Then take an iron set at medium heat and iron the paper onto the top of the bandana.
It works best if you press the iron and hold it for a couple of seconds in each area instead of sweeping the iron across. Make sure that you iron all areas of the paper.
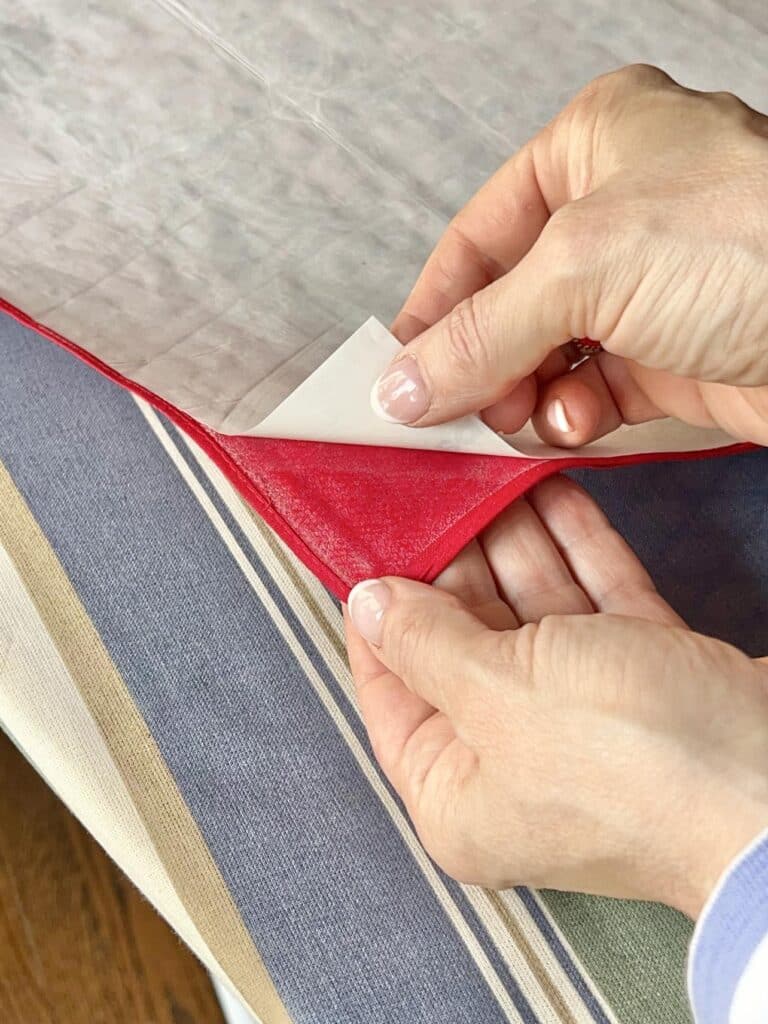
Once the paper has cooled, grab a corner of the paper…
…and peel!
Ah! So satisfying!
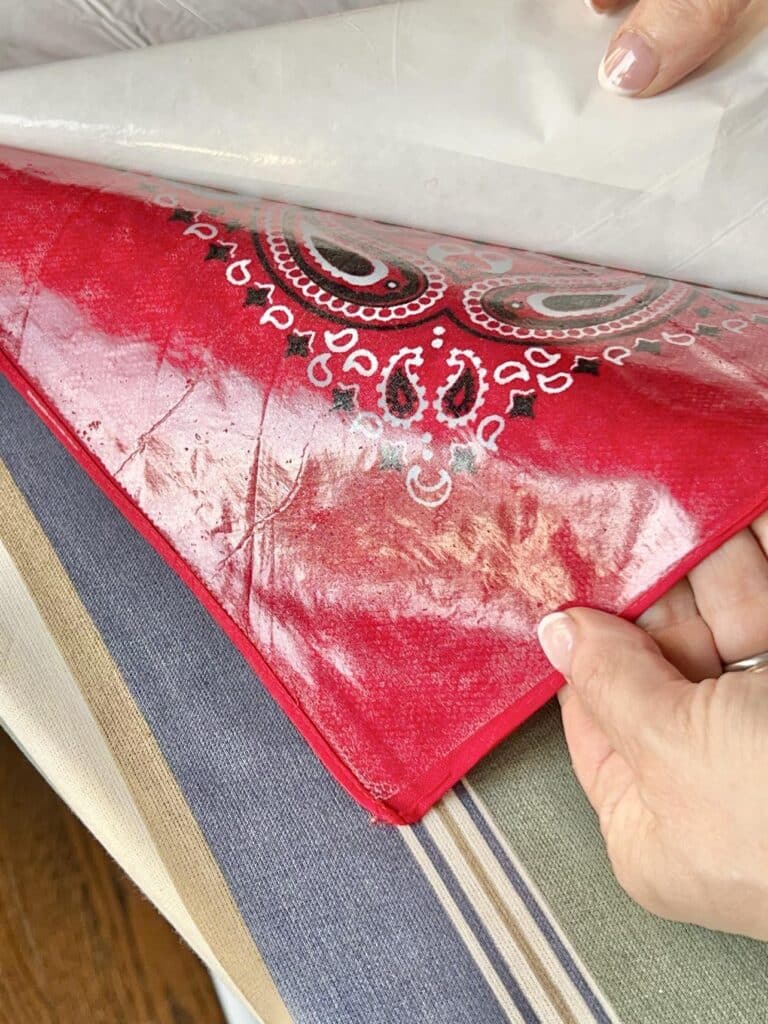
You will be left with a shiny coat of adhesive on the bandana.
Making the Placemat Reversible
Next, take your coordinating bandana and position it over the bonded bandana with the print side up.
Keep in mind that bandanas are almost never evenly square. So the edges and corners of the fabrics will not match exactly in a straight line on the edge of the placemat. This uneven raw edge is ok and actually adds to the look of the placemat.
Once you have the two pieces of fabric positioned, the last step is to flip everything over and iron over the non-adhesive side of the first bandana. Spend a few extra seconds with your iron on the outer edges so make sure everything is bonded. For best results, …about 5-6 seconds on each area.
The Heat ‘n Bond not only bonds the two bandanas together but also serves to give the fabric a thicker, beefier feel…perfect for a placemat!
Adding Denim Flair to Your DIY Placemats
To make the traditional bandana side of the placemat a little more unique, I added a little denim flair!
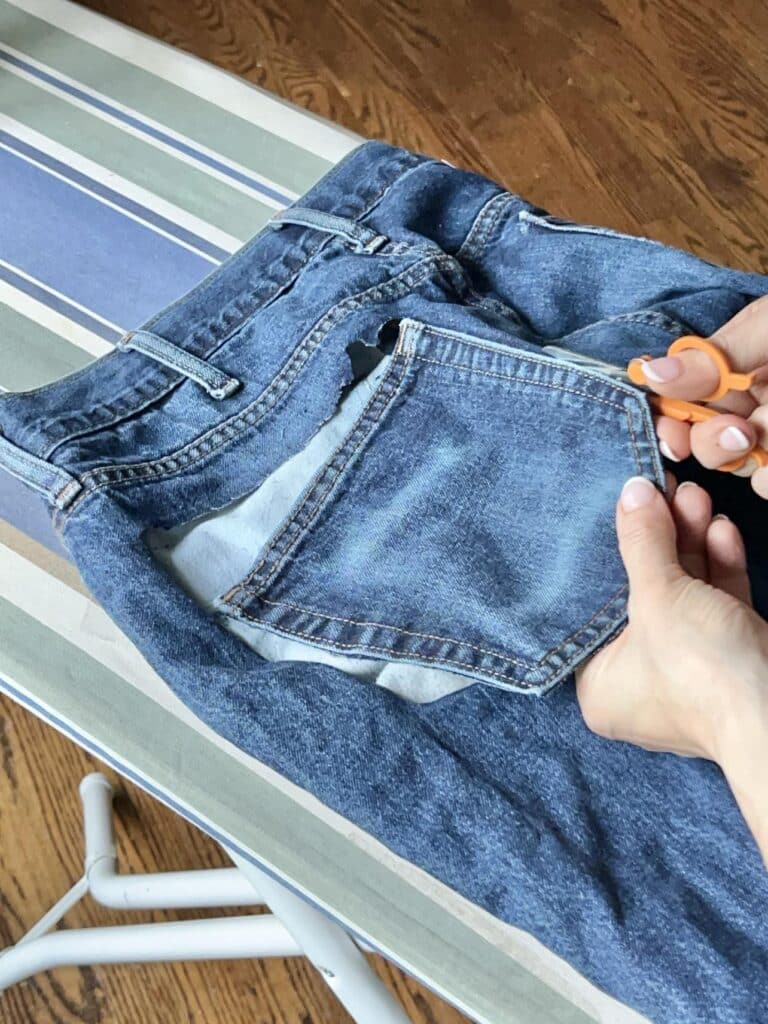
Head to your closet and pull out those old jeans that you’ve been meaning to donate.
Or head to a thrift store and pick up some cheap jeans.
Your purpose? We want the pockets!
With some sharp scissors, cut the pockets off the jeans. Simply cut close to the pocket edge and around the perimeter of the pocket.
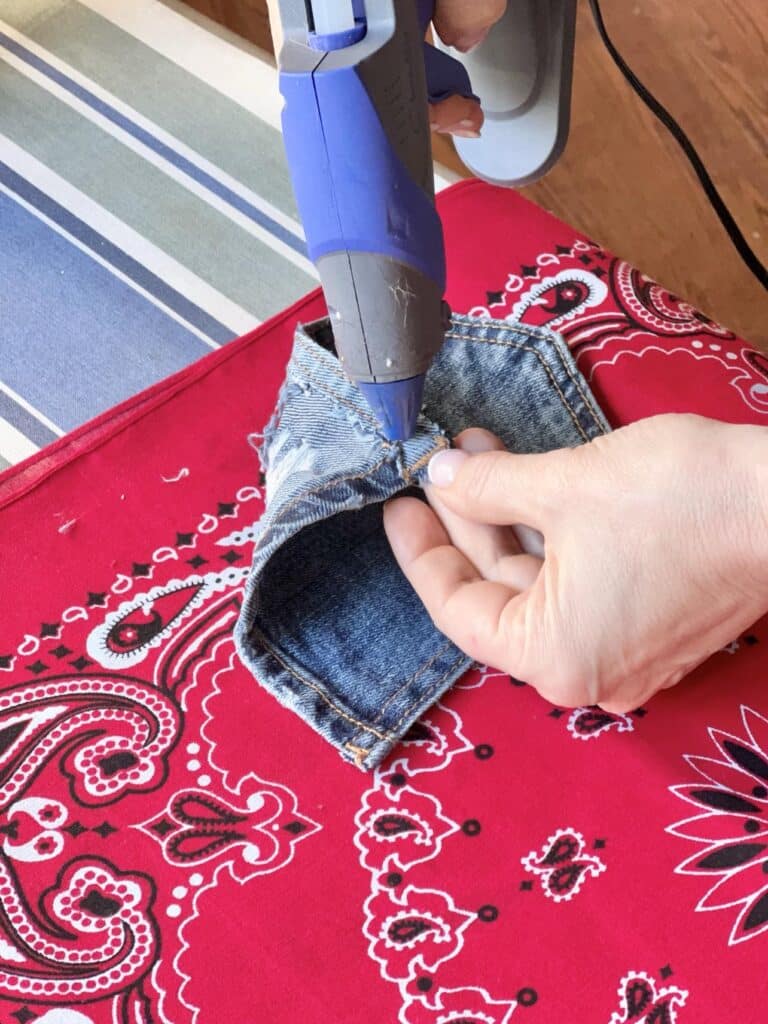
Then position the pocket on the right side (in the general center) of the traditional bandana pattern. Using a hot glue gun, apply a bead of hot glue to the back side seam of the pocket and press it down onto the placemat.
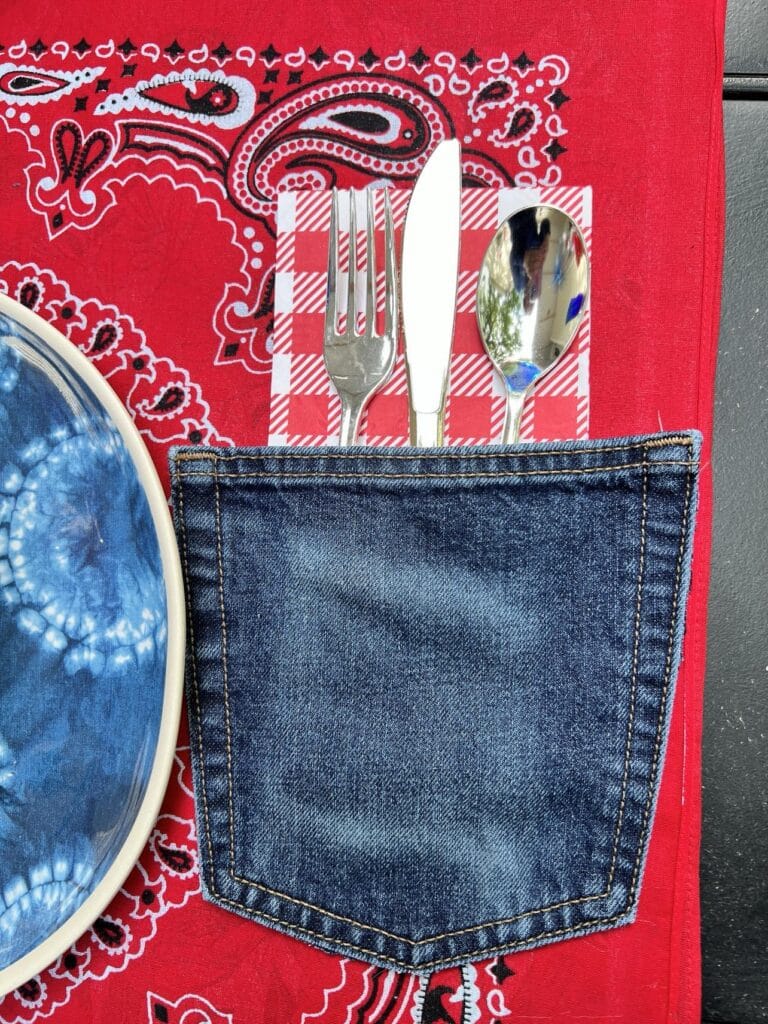
Are you wondering what the pocket is for?
Silverware, of course! And napkins!
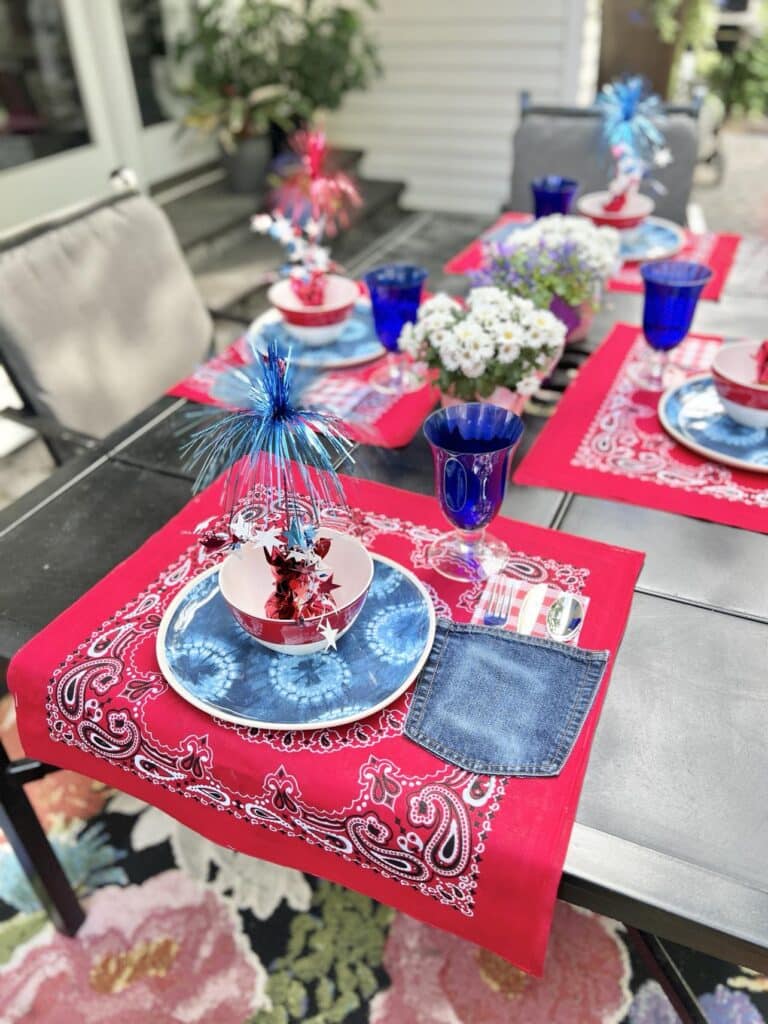
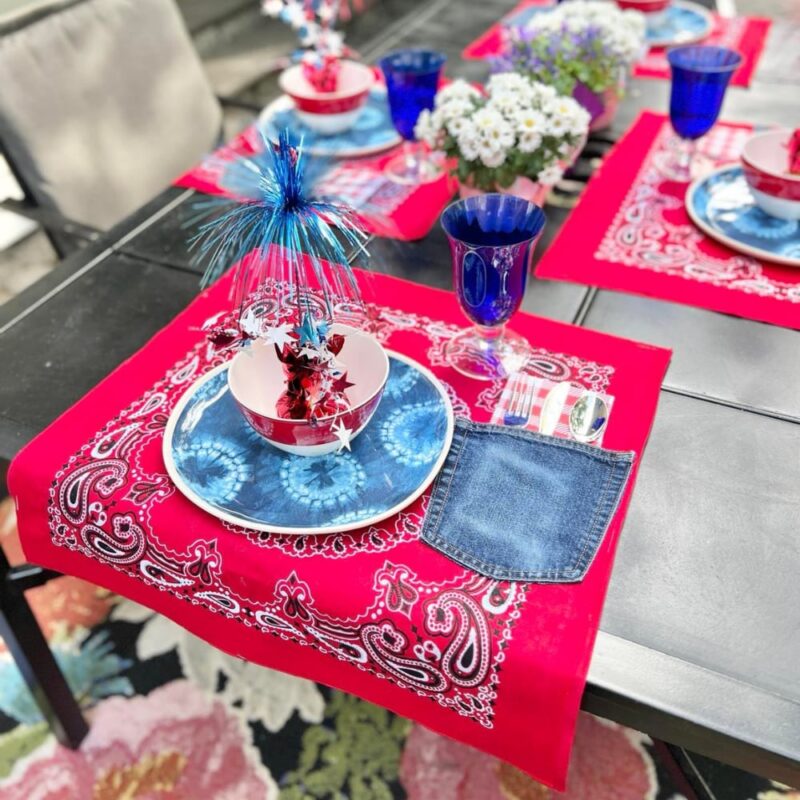
Let’s Set a Patriotic Table
I’m ditching the tablecloth and embracing a touch of down-home charm for our Fourth of July table with my DIY placemats!
You might have noticed something…
These are not rectangular placemats. Rather they are square and the finished size is BIG!
Initially, I thought about cutting them down to a more standard size for a placemat.
Then, I decided to have a little fun with the size of the placemats. Let’s start with a typical summer BBQ table setting!
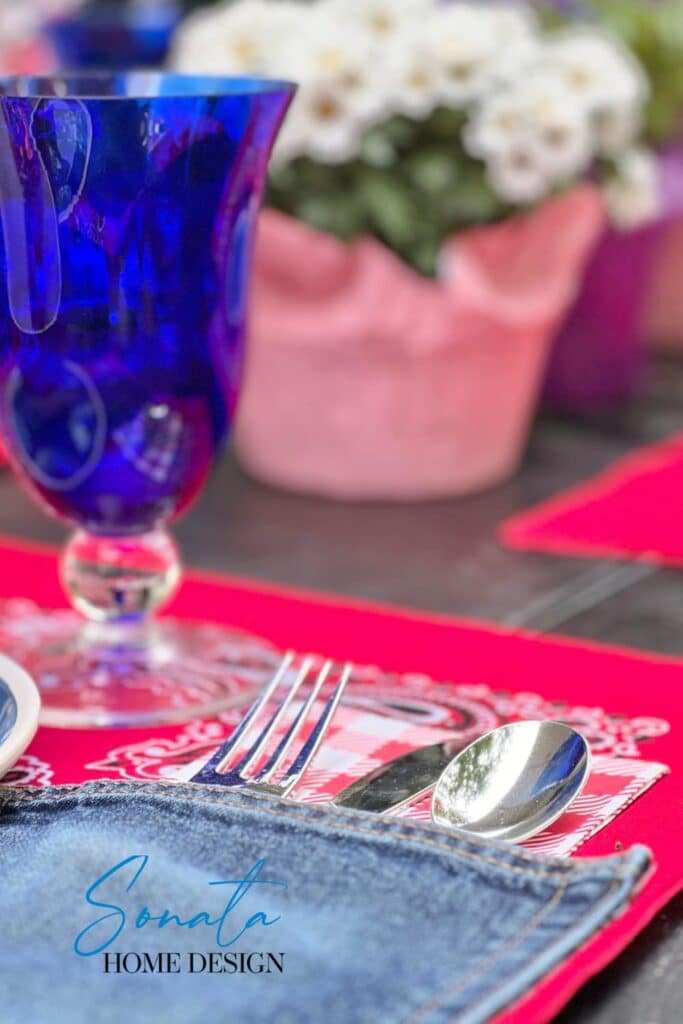
It all starts with the reversible placemats, bandana side up. I intentionally let about a third of the placemat hang over the table edge so you see the pattern from all angles.
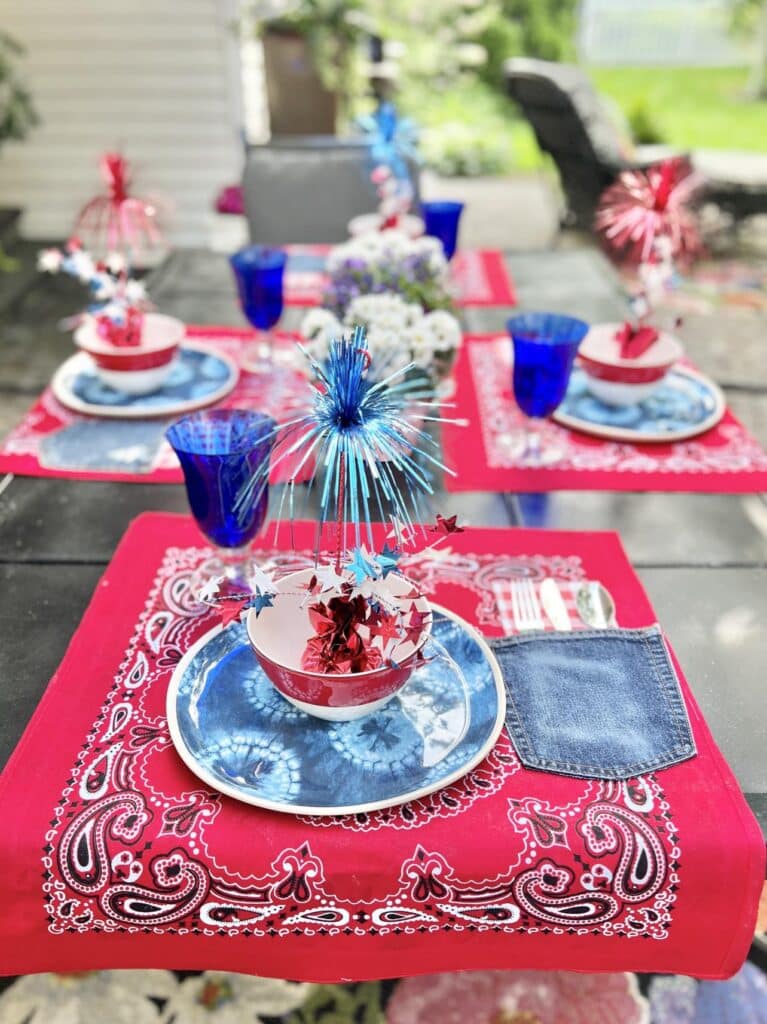
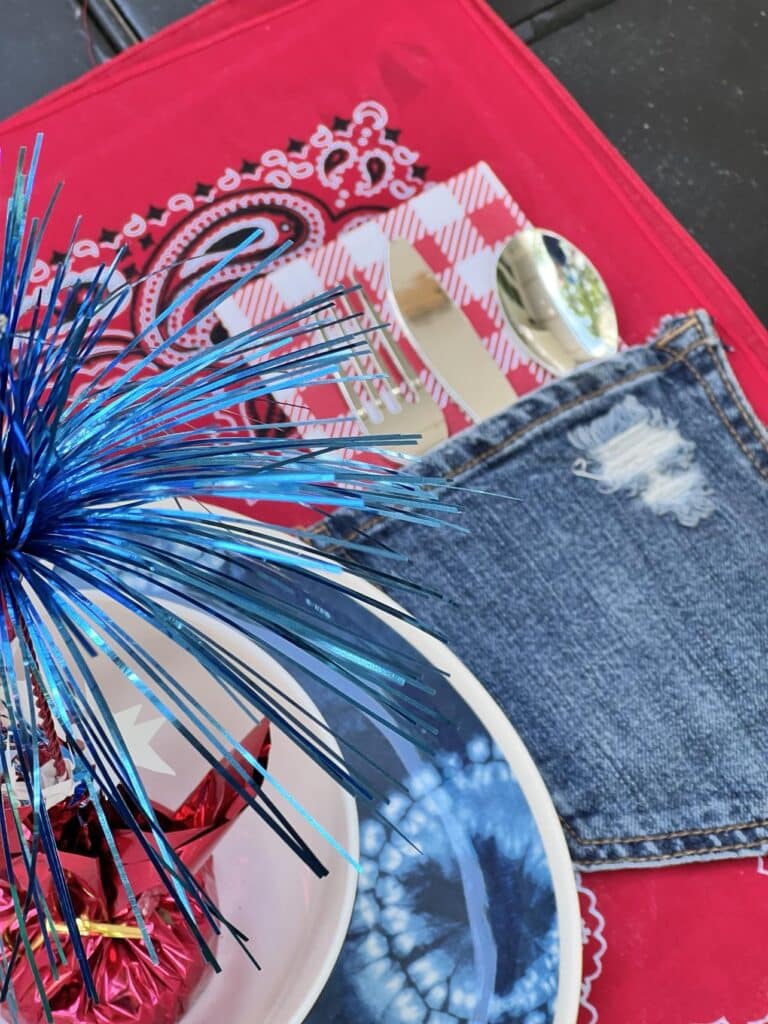
The denim pockets are loaded with some gingham check red paper napkins behind the knife, fork, and spoon.
Pretty handy!
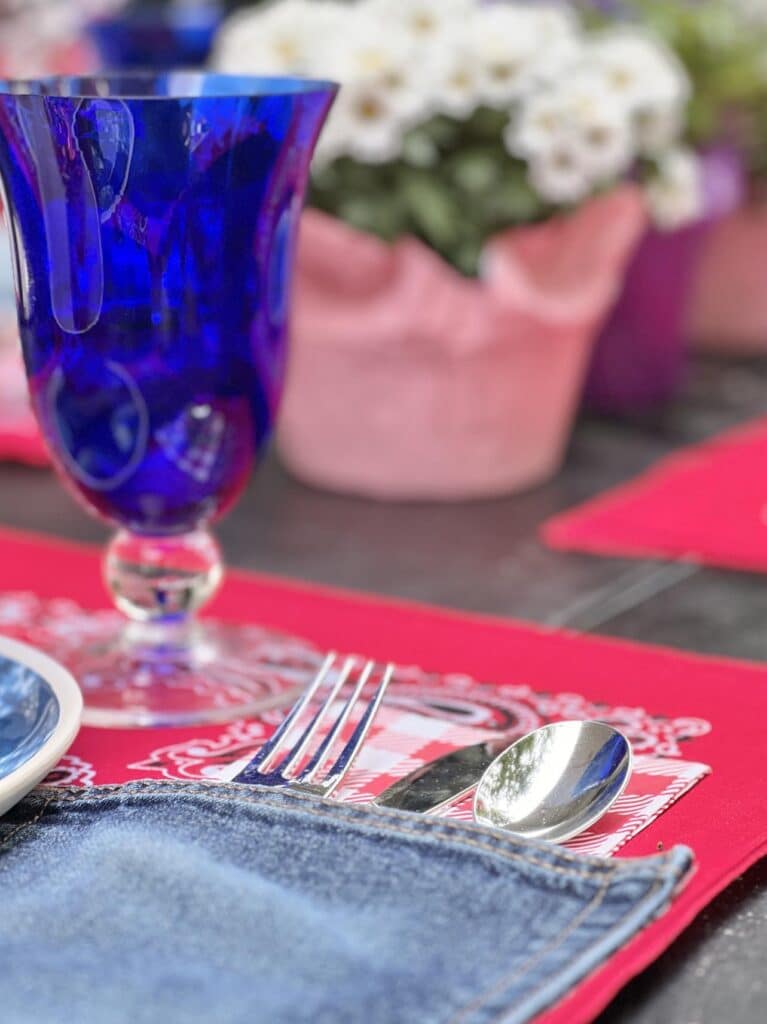
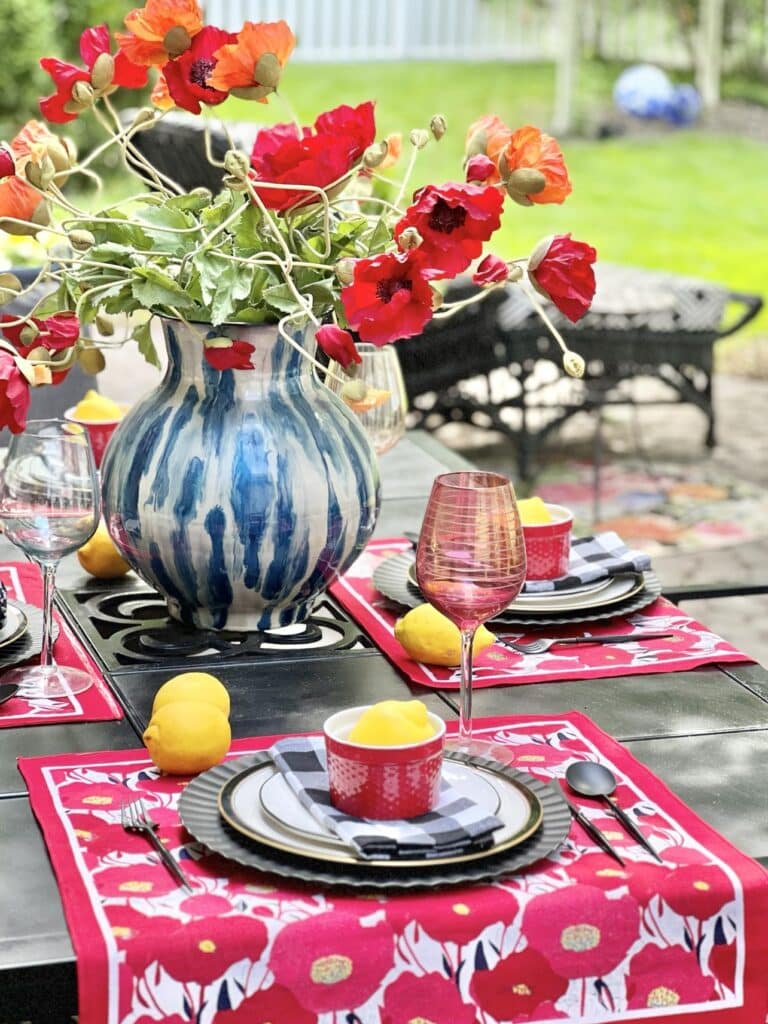
On top of the placemats, the table setting consists of layered cool blue melamine ikat plates, festive red and white bowls (perfect for barbecue sides!), and cobalt blue goblets.
Independence Day is honored with pops of sparkle on each plate! I purchased these red and blue tinsel “sparklers” from the dollar store and use them every year. From the patriotic front porch to the patio table, these red and blue tinsel firecrackers always add a touch of holiday whimsy.
Last but not least, an easy centerpiece of gathered potted white daisies brings a touch of nature’s charm.
It’s a celebration that’s both fun and functional – all wrapped up in Americana style!
Now Flip It Over!
Craving a more formal twist?
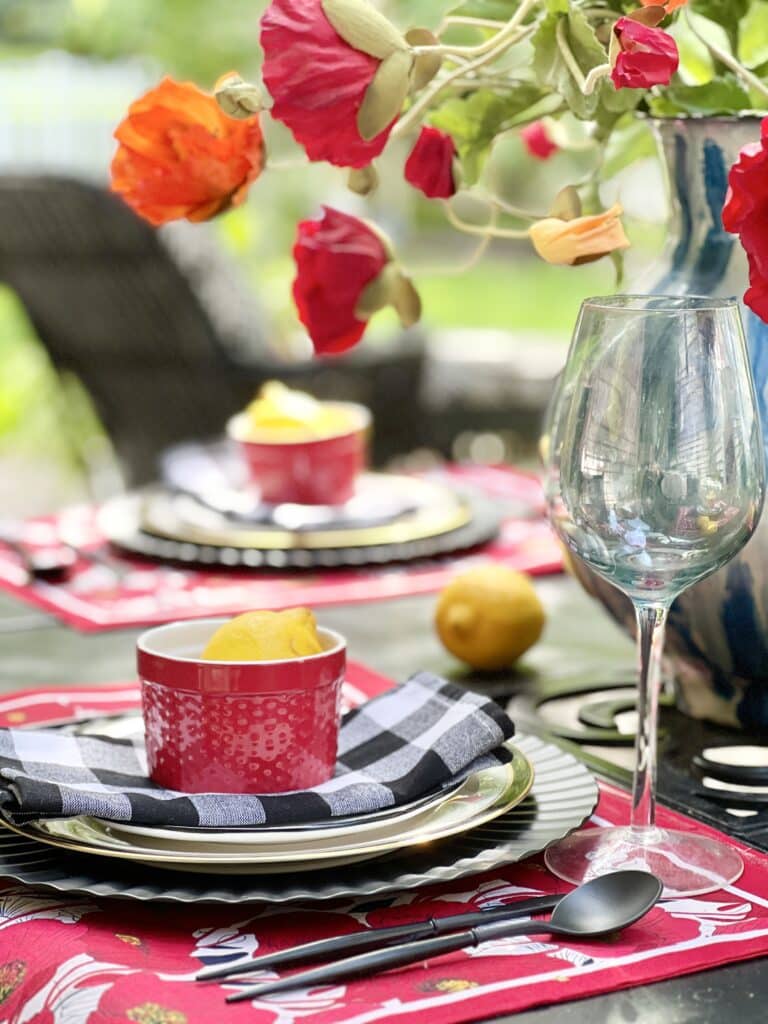
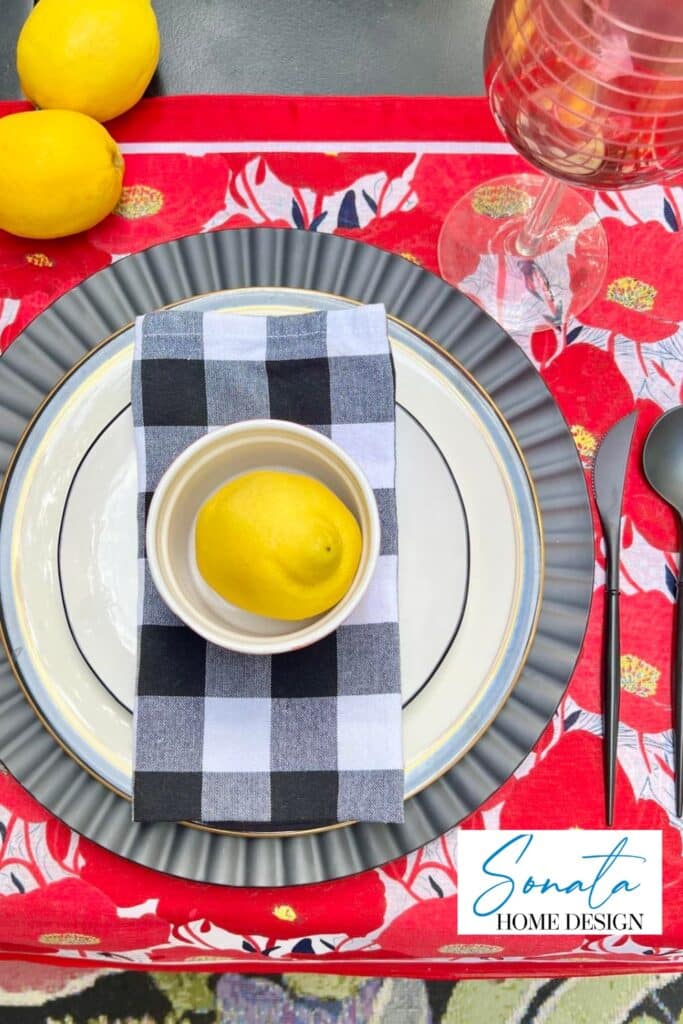
I simply flip the bandana placemats to reveal their stunning floral red poppy pattern, adding a touch of elegance on our black patio table.
Once again, I did not place the entire placemat on the table but rather let the bottom drape over the edge.
The table comes alive with black ruffled charger plates and my black, ivory, and gold wedding china.
Got china? Use it!

I layered on some white salad plates as well as some crisp, folded black and white buffalo plaid cloth napkins for a touch of graphic charm.
The black silverware?
Shh! It’s plastic!
It still looks so elegant!
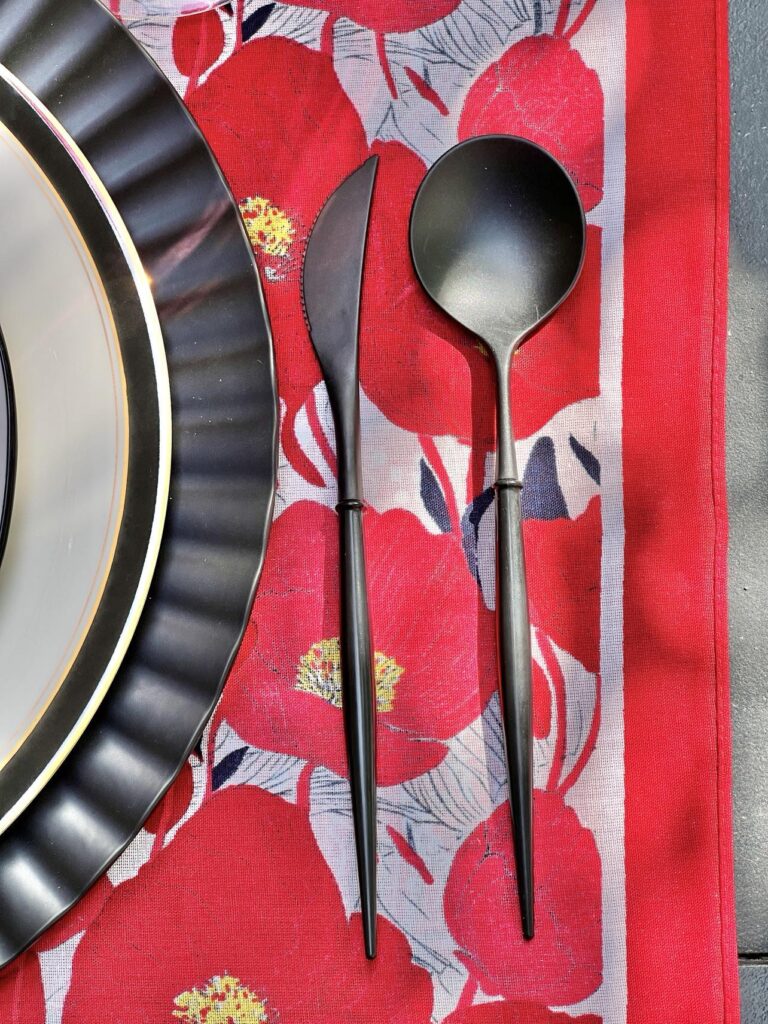
Finally, I added a pop of color with red ramekins filled with bright yellow lemons, adding a delightful summertime touch to this surprisingly versatile table setting.
More Fabric Placemat Ideas
Making your own placemats give you the chance to customize your dining room table with your own personal style. Here are some additional ideas for projects with homemade placemats:
- Make a whole set of placemats with each placemat made from a different color bandana.
- Connect your placemats with more iron-on adhesive to create a bandana table runner.
- If you are really ambitious, continue to adhere more placemats to create a full tablecloth.
- Experiment with different types of fabric. I think cotton is the easiest and best fabric to use with the iron-on adhesive. So any cotton fabric rectangles will work. But don’t feel restricted in your fabric choices. You may have a different fabric that is a favorite to work with. Fat quarters are also a wonderful option.
- Want a festive touch for the holidays? Choose red and green bandanas!
Double the Fun: Your Reversible Placemat Masterpiece
Boom! Just like that, you’ve got yourself some incredible reversible placemats that are ready to take your table from drab to fab.
A great way to use inexpensive bandanas, these beauties are perfect for anyone who wants a quick and easy way to add some personality to their dining space.
So ditch the boring store-bought options, whip up a set of these bad boys, and impress your guests with this fantastic DIY!
Feel free to get wild with your bandana choices – mismatched patterns are totally welcome here!
Take a few snaps of your new placemats and share them in the comments. I can’t wait to see what you come up with!
Now head over to Blue Sky at Home and see the beautiful patriotic DIY flag display that Carol has created! This project deserves a patriotic salute!
Cheers!

Don’t Forget to Pin It!
Pin the image below to your boards on Pinterest (just click the Pin button in the top left corner). You can also follow along with me on Pinterest!

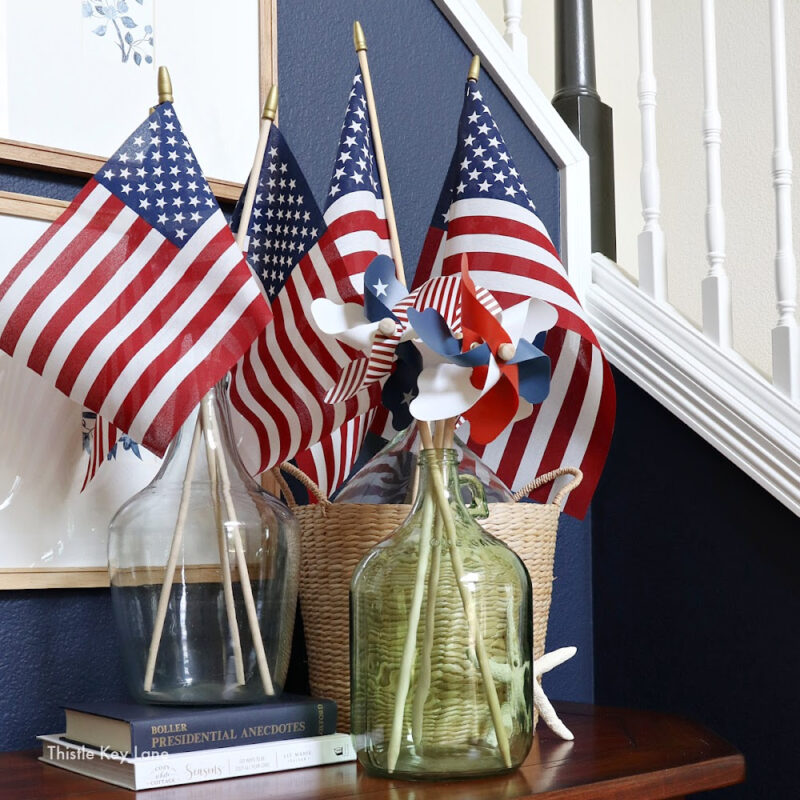
Bluesky at Home – Flags for Cloche Patriotic Vignette
Thistle Key Lane – Favorite 4th of July Decorations
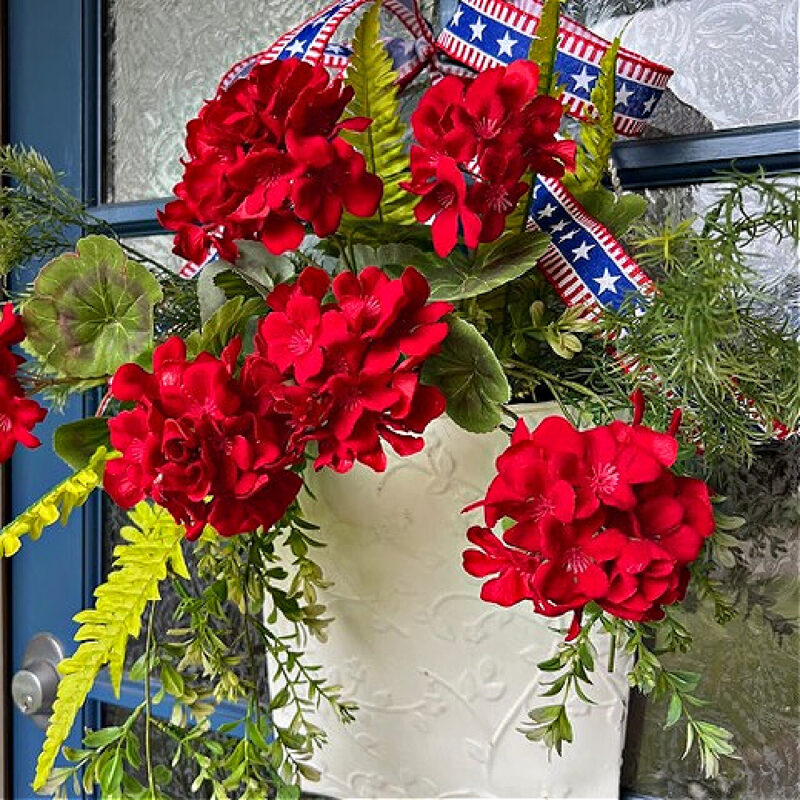
Perfecting Places – Patriotic Front Door Flower Bucket
Hen and Horse Design – 4th of July Tablescape Ideas
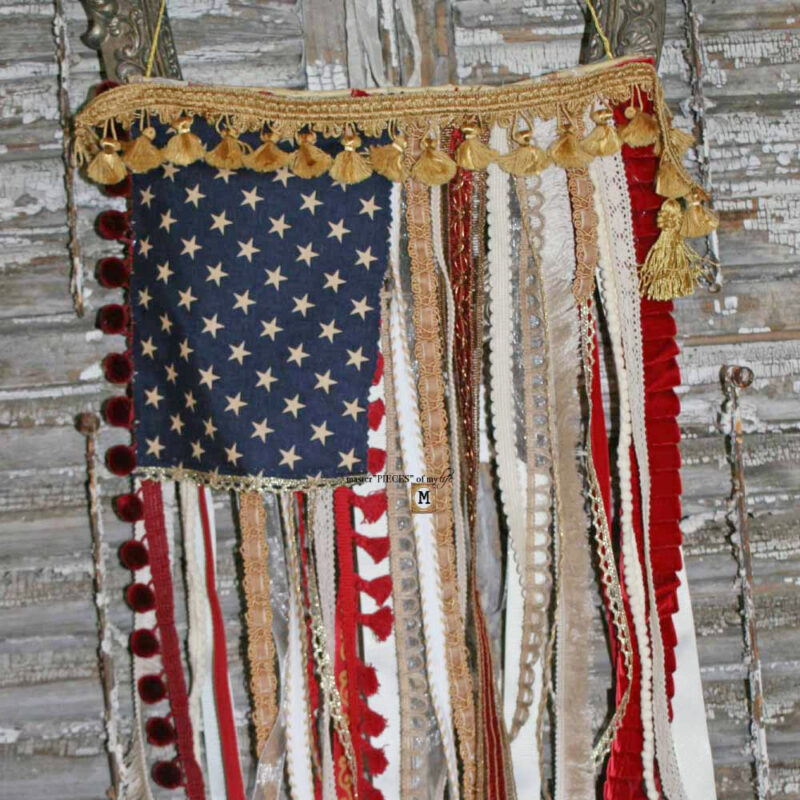
Masterpieces of My Life – DIY American Ribbon Flag
Sonata Home Design – Reversible No-Sew Placemat
More Tabletop Fun
The Best Table Runner Ideas for a Round Table

50 Simple and Easy Tabletop Centerpiece Ideas
What a fabulous idea, Missy, and your poppy bandanas are just gorgeous! This is the perfect addition to your patriotic table! Thanks so much for sharing!!
Thank you, Kim! I had no idea that bandanas came in other patterns so I was so excited when I found the poppy print. Thanks so much for reading and commenting!
Missy, I love the versatility of your placemats. I’ve made placemats before but always using a sewing machine. Thanks for the Heat and Bond idea. What a time saver. Than you for sharing at Celebrate the Holiday.
Thank you, Carol! As someone who does not care for sewing, I love Heat n Bond. Thank you so much for hosting the day!
I think Heat n Bond is going to be my new best friend! Love your pretty placemats Missy. Both styles bring lively color to your pretty table settings. The little jean pocket is brilliant!
Thanks, Michelle! I think it will be fun to come up with different ideas for filling the pocket! Thanks for stopping by!
Oh, my goodness! I am in love with your poppy bandanas! Who knew? I was just getting ready to take some fall ones to goodwill…not now! I’ll have to give these a try. Now to find poppy ones!
Hi Leslie! I’m so glad you like the idea! I found my bandanas at Hobby Lobby…including the poppies! So fun for summer!
What a great idea Missy & they look fabulous. I think I need some heat & bond in my life. The denim pocket is a great touch and I love the contrast of styles between both sides. Thanks for the inspiration! XO- MaryJo
I am not good at sewing so Heat & Bond saves me all the time! Thanks so much for “hopping” over! ~Missy
I love a pretty table and this is such a creative idea!
Thank you, Kim! I appreciate that! Thank you for taking a look!
Hi Missy,
This is my first time to visit you. Loved your placemats, so darling and love the denim pocket on them as well. The reverse side made for a beautiful table as well. Thanks for sharing this with us.
Blessings,
Nellie
Hi Nellie! It is so nice to meet you! The placemats were so easy to make and we are using them just about every day. Wishing you an amazing week!
Those jeans pockets on the placemats are so fun and cute! I’d definitely squee over these if I saw them at a dinner party.
I love it! Thank you, Kerri! Have an awesome week!
Missy these are so adorable. I love the bandana idea and that pocket just put this over the top. I always enjoy seeing your creative ideas come to life.
Thank you, Susan! We’ve used them quite a bit already this summer!
Adorable, Missy!! SO CUTE!! What an amazing idea to use bandanas for placemats. The color scheme, with all the coordinating elements and accessories, are all just lovely for the season!! Pinned!
Hi Rachel! Thank you so much for the sweet compliment! They are getting lots of use this summer!
Your placemats turned out so cute Missy! And I love that they are no-sew….that is one thing I never did pick up on in all my years of 4-H despite my mom being an FCS teacher and expert sewer herself.
I need to make some for our dining room table. Thanks for the inspiration!
What a perfect project, especially for Summer entertaining. Featuring when my link party opens.
I appreciate this so much! Thank you!
You are so crafty and clever! I love this. Thank you for sharing it with us on Farmhouse Friday. I’ll be featuring it tomorrow. Hope you have a great summer. pinned
Thank you so much, Cindy! Have a great week!
Love your placemats, Missy!! I’ve made some blue jean placemats using my sparkly pockets for silverware. (I hated that those pants bit the dust!) Fun idea to use no-sew with the bandanas!! Happy to feature your post at Share Your Style #432. <3
Big summer hugs,
Barb 🙂
Your project sounds so fun! I love a little sparkle! Thank you so much for the feature!
ADORE your bandana and denim placemats! They just scream celebration and all things summer and the fact that they are no-sew is pure gold!
Thank you, Donna! I always love your link party!
Can you wash these? Does the heat and bond stand up to machine washing.
thanks,
Joan
Mine have held up really well after 2 washings!