

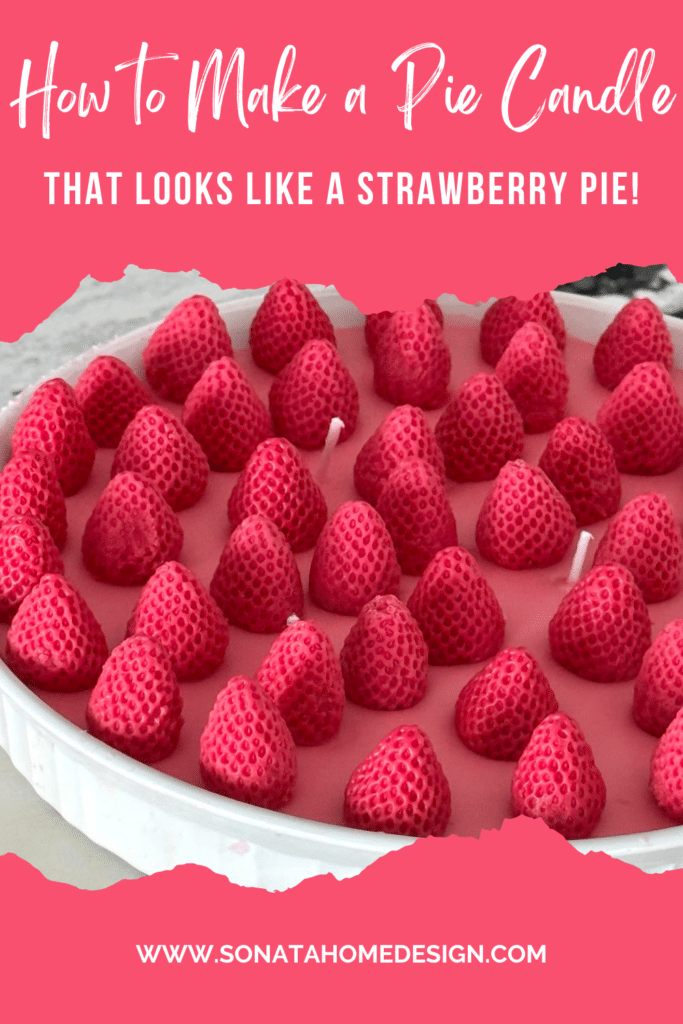
How to Make A Pie Candle That Looks Like A Strawberry Pie
If you love sweet home décor with a dash of whimsy, you’re going to fall head over heels for this charming DIY project. In this tutorial, I’ll show you exactly how to make a pie candle that looks just like strawberry pie—complete with juicy wax berries!
Whether you’re gifting it, displaying it, or just want your home to smell and look delicious, this strawberry pie candle is as fun to make as it is adorable!

This blog contains affiliate links. This means a small commission is earned if you make a purchase by using this link. The price you pay will be the same whether you use the affiliate link or go directly to the vendor’s website using a non-affiliate link. As an Amazon Influencer, I earn from qualifying purchases.
The other day, my daughter stopped by, walked into the kitchen, and stopped in her tracks.
Her eyes lit up as she exclaimed, “Ooooh! Did you make a strawberry pie?”
Now, I’ll admit—my creation did look dangerously delicious, complete with glossy strawberries in a pristine white tart pan.
But what she didn’t know (until she nearly grabbed one of the berries) was this: it wasn’t dessert… it was a candle! Good thing she didn’t try to sneak a bite… a wax strawberry is not a part of any balanced diet!
If you’re a fan of sweet-smelling DIYs and charming home décor, you’re going to love this fun project. Today, I’m sharing exactly how to make a pie candle that not only smells amazing but looks like it belongs in a bakery window. And yes, it’s easier than you think!
Supplies You’ll Need
- Red wax bricks from the dollar store (your choice of scent—we’ll chat about that in a sec!)
- Several glass jar pink candles from the dollar store (in comparable fragrances or colors)
- A heat-safe pan
- Plastic syringe
- Silicone berry molds
- A pie plate or tart pan
- Candle wicks with sticker pads
- Bamboo skewers or sticks
- Scissors
- Pot holder or oven mitts
- Optional: essential oils to boost scent

How to Make a Pie Candle
Let’s get cookin’—well, sort of…
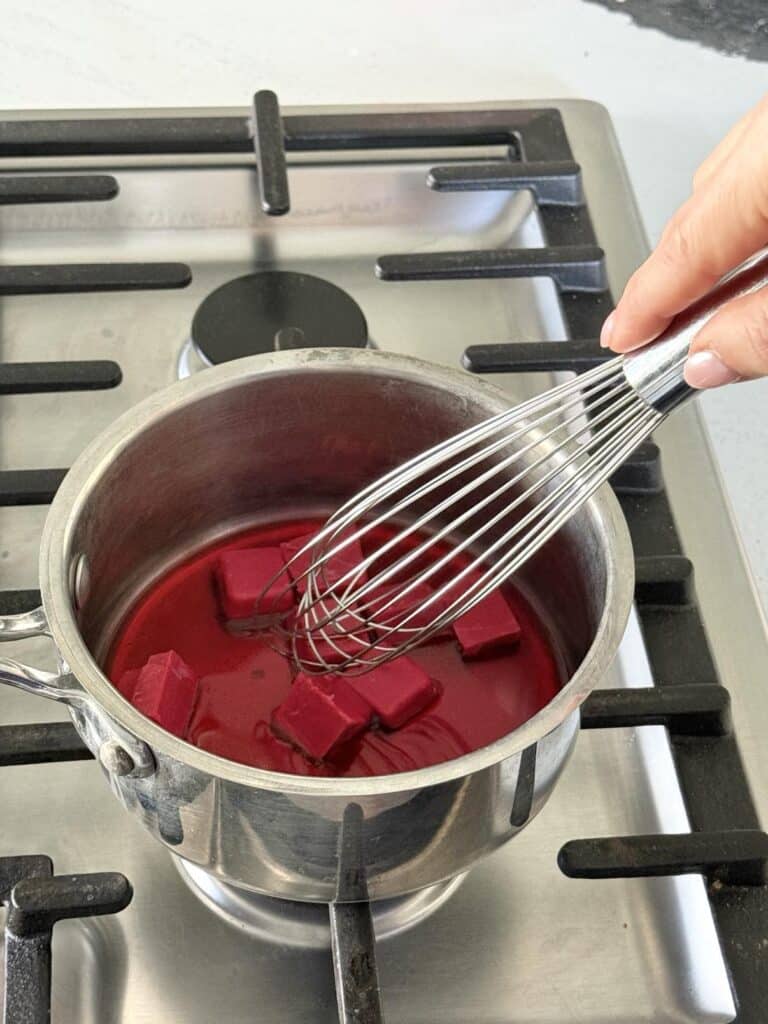
Step 1: Melt the Wax
Start by breaking up your wax bricks into smaller pieces.
Then toss them into a pan on the stove and melt them over medium heat, stirring occasionally for a nice even consistency.
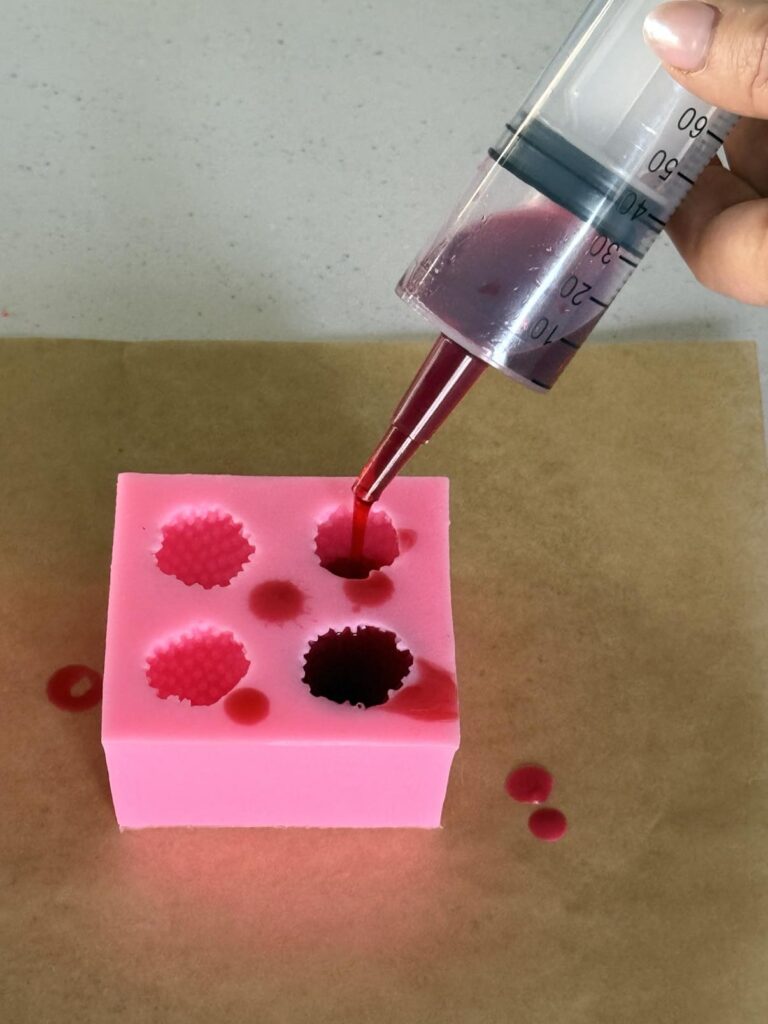
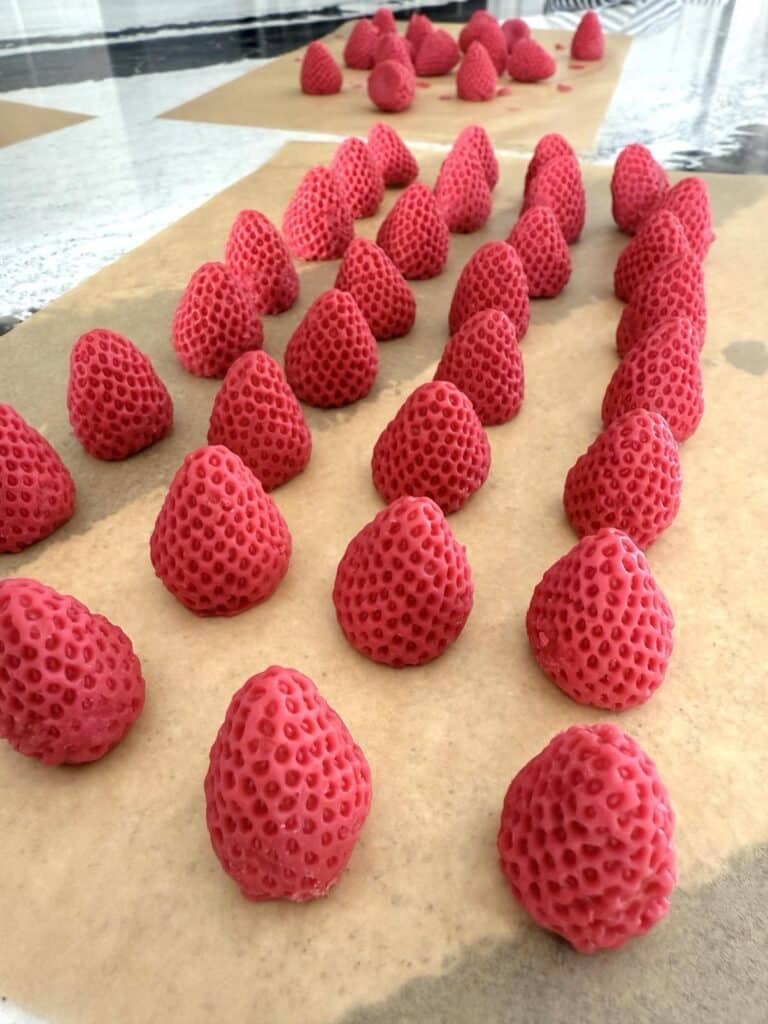
Step 2: Make the Wax Strawberries
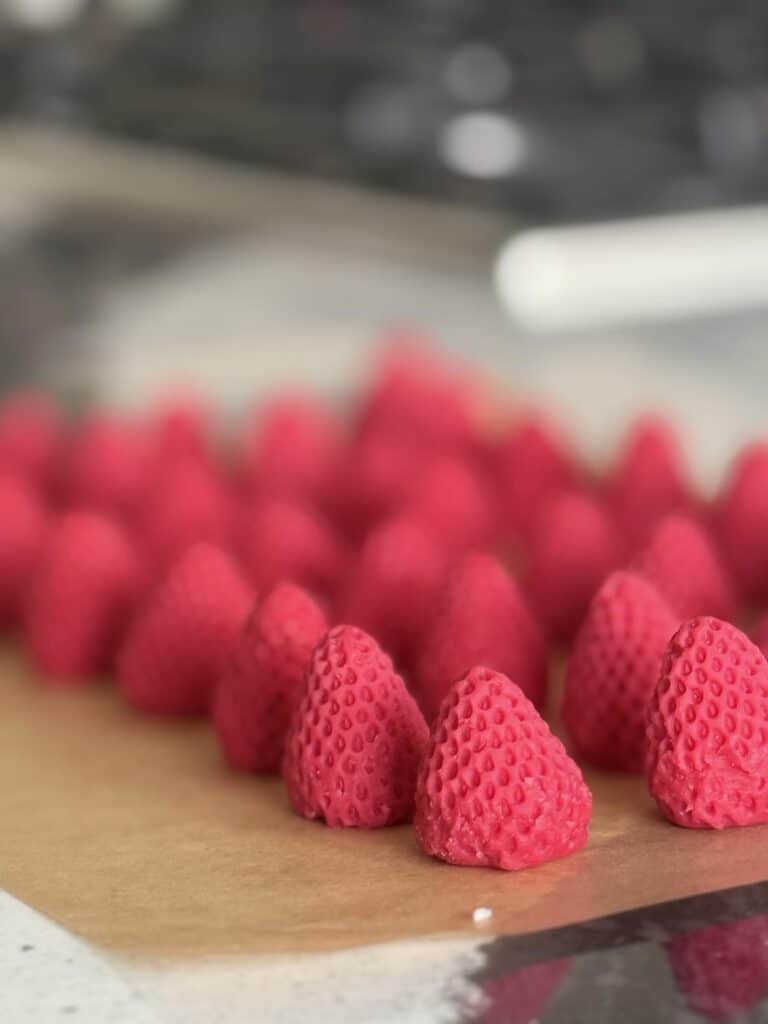
Once your wax has melted, take your plastic syringe and draw up the melted wax. Then, inject the wax into your silicone berry molds until each strawberry shape is filled to the top. Let them sit for about 15 minutes.
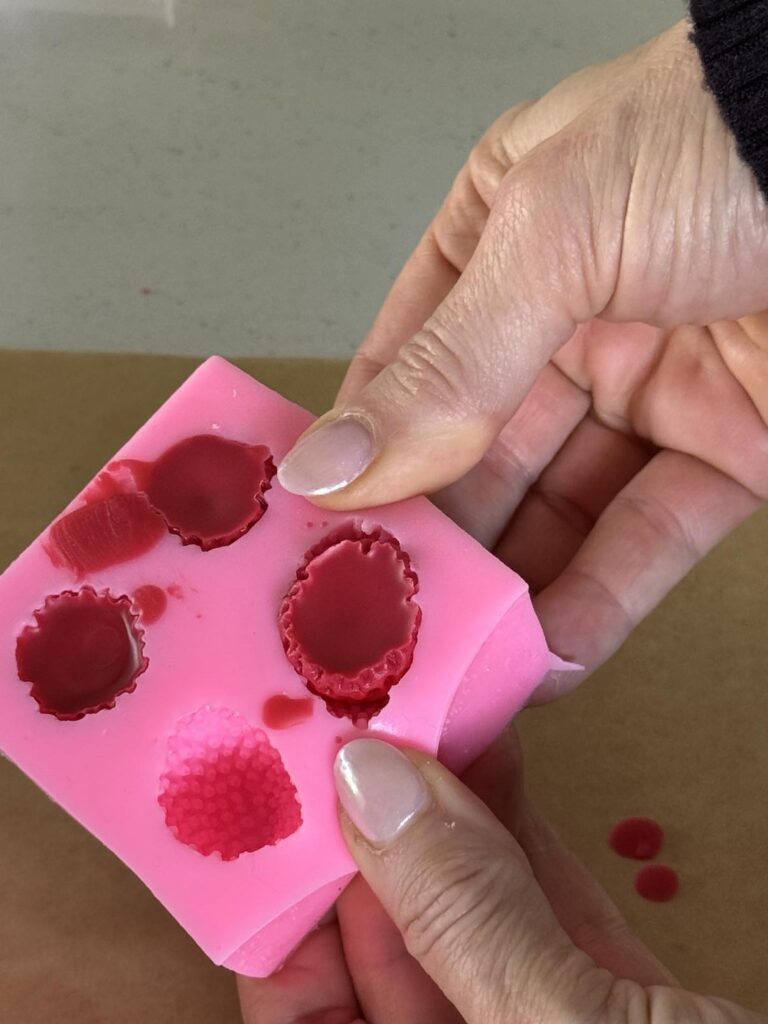

Once the wax cools, pop out the strawberries. You’ll be amazed at how real they look—like they were plucked straight from the produce aisle!
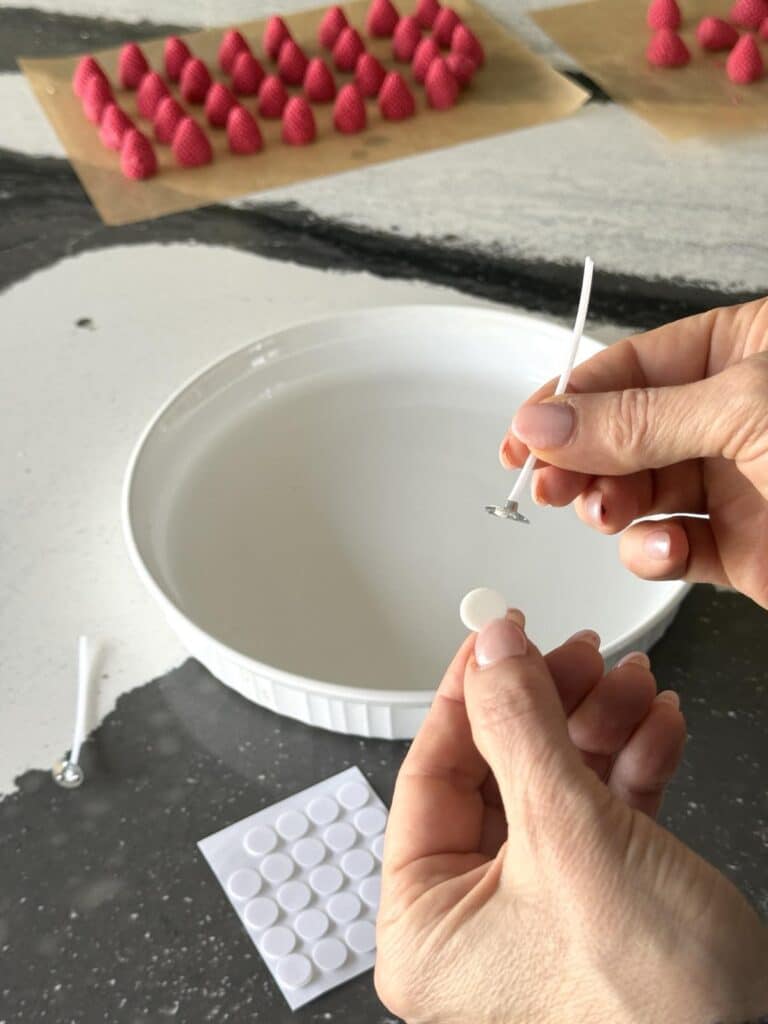
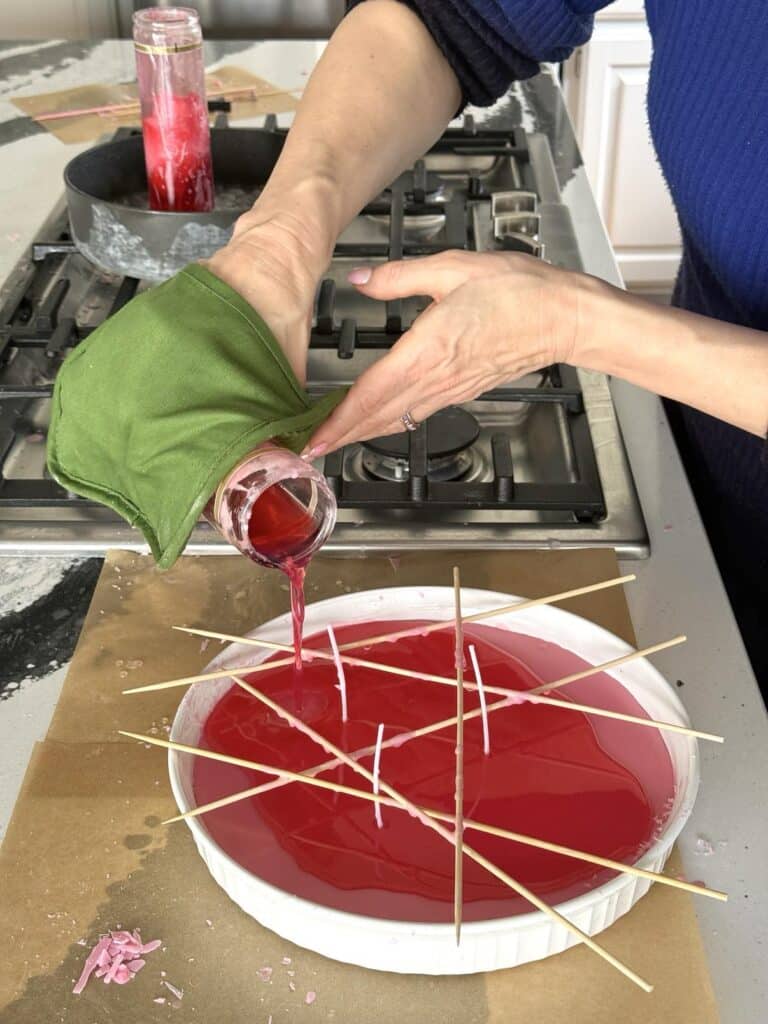
Step 3: Prep the Pie Plate
Attach a sticker pad to each cotton wick and place them inside your pie plate. You can add as many as you like, depending on the size of your pie plate.
I started with four and then later switched to 3. (story on this later…)
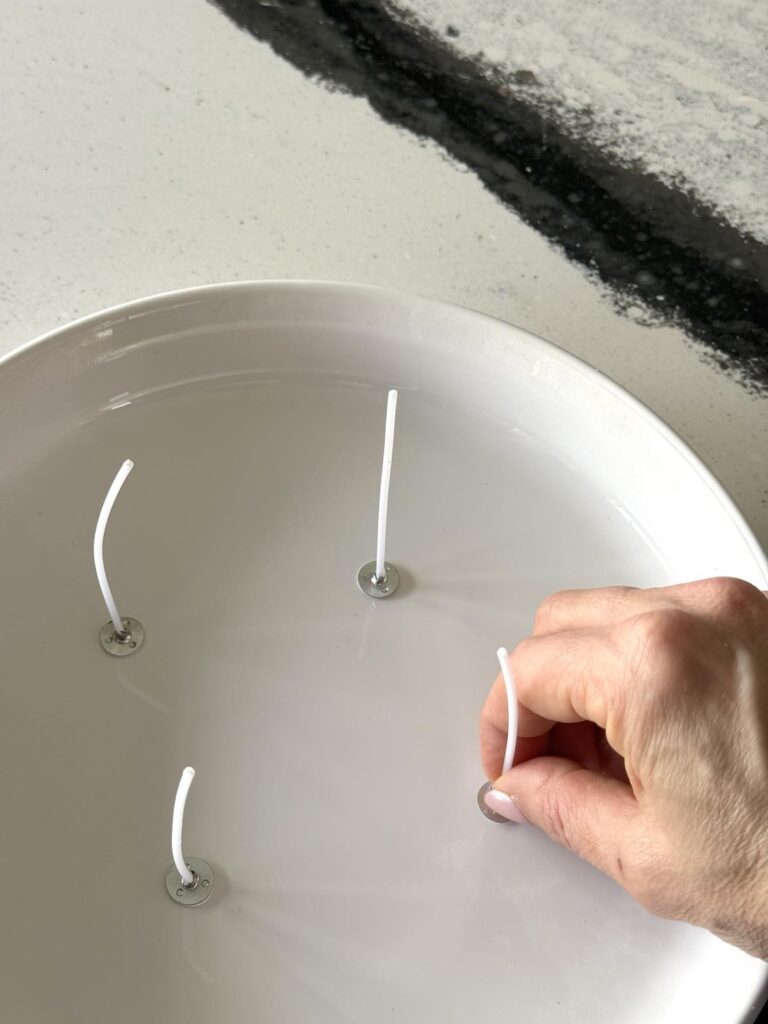
Lay some bamboo sticks across the pie plate and near the wicks to keep them upright. I initially forgot this step and, well….story to follow!
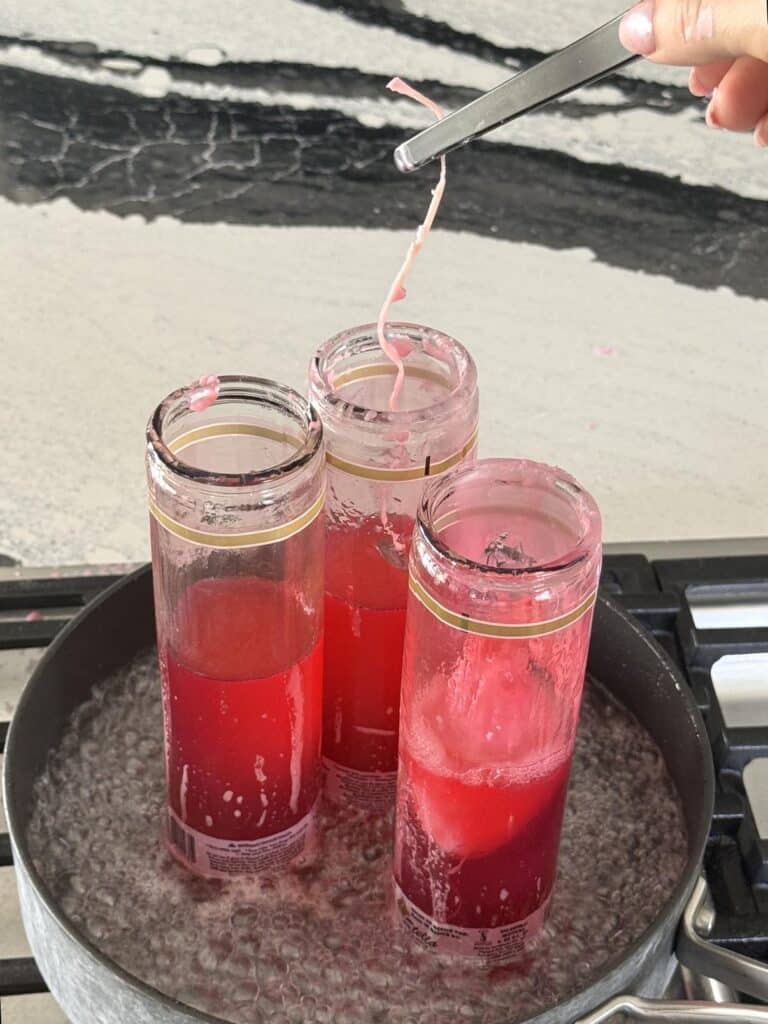
Step 4: Melt the Wax from the Jar Candles
Fill a high-sided pan with water and bring it to a gentle boil. Place your glass jar candles in the pan (make sure they’re standing upright) and let them sit for 20–30 minutes until the wax melts.
I was very cautious with this at first and worried about the jar breaking. Eventually, I became courageous and turned up the heat to a full boil. The wax melted quickly, and the glass held up just fine.
Remove the original candle wick once the wax is fully liquid.
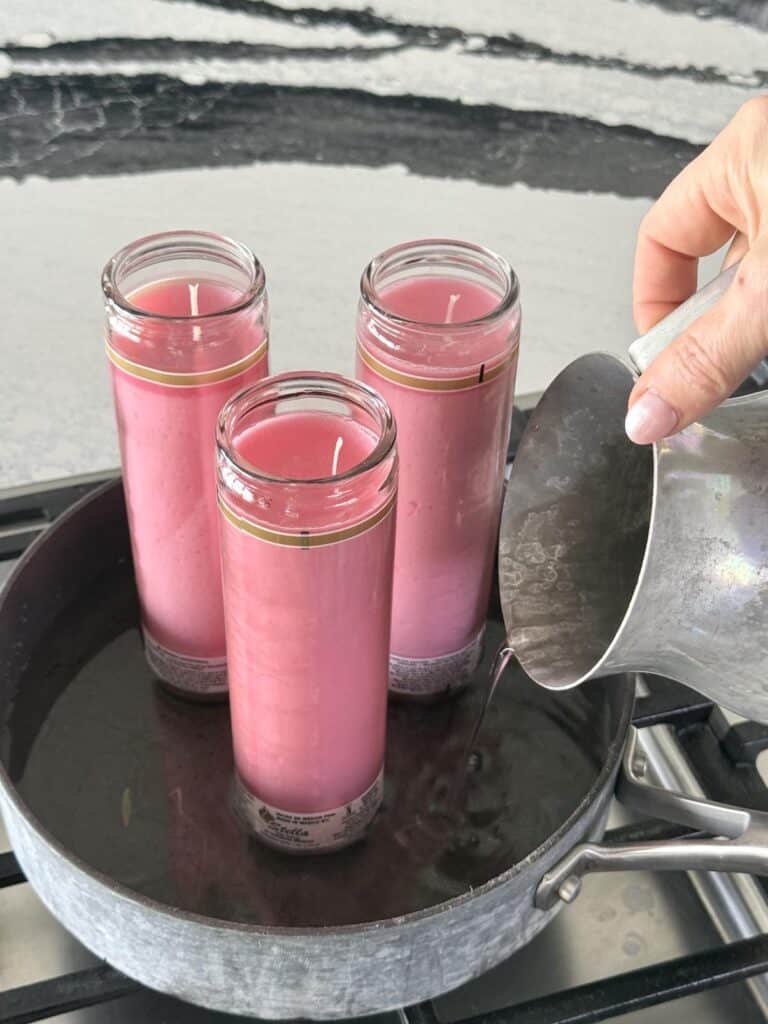
Carefully hold the jar with a hot pad and pour the melted wax into your pie plate over the wicks.
Continue to pour the jars of melted wax into the pie plate. I started with three jars and ended up getting three more to fill my tart pan.
Don’t be afraid to let the wax cool with each layer you add. It forms a very smooth top as the wax layers cool.
Pro Tip: Use a bamboo stick grid to help the wicks stand upright as you pour.
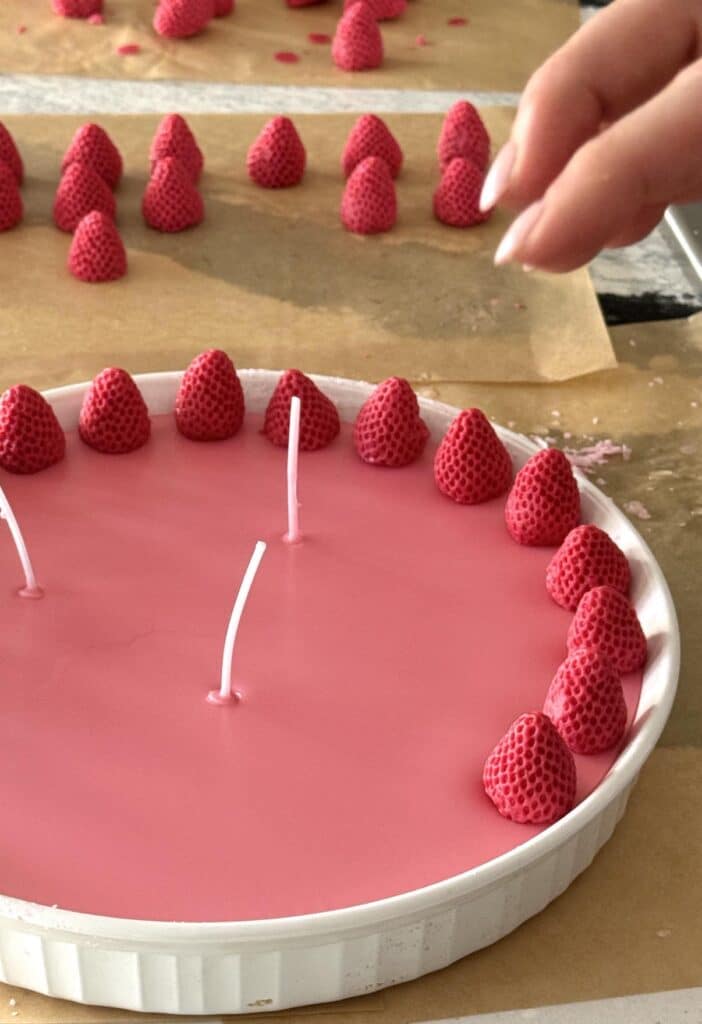
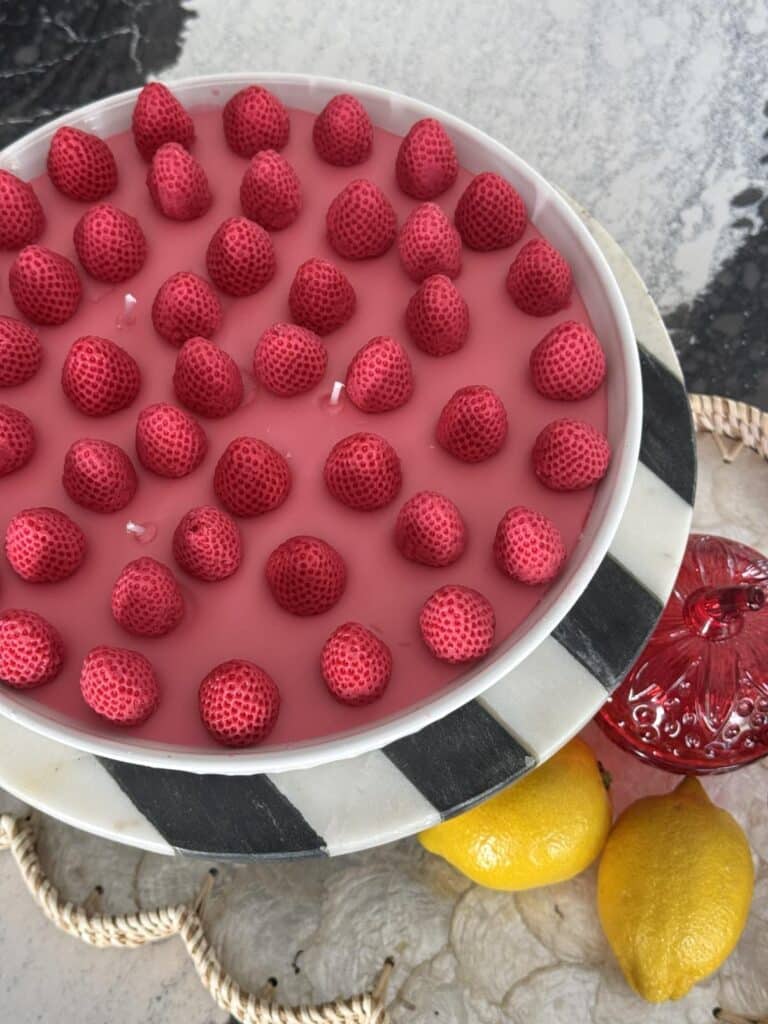
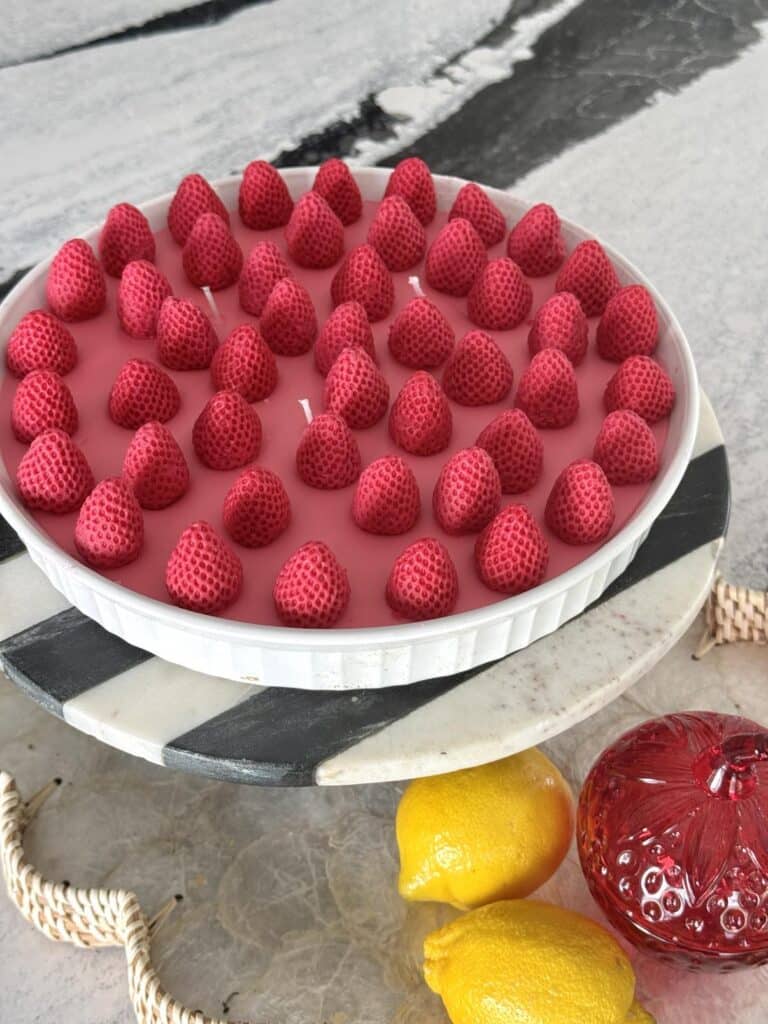
Step 5: Add the Strawberries
Once the last layer of wax has cooled for a few minutes, but is still soft, start pressing your wax strawberries into the top.
Go for an “all-over berry blast” or place them with artful precision. You do you!
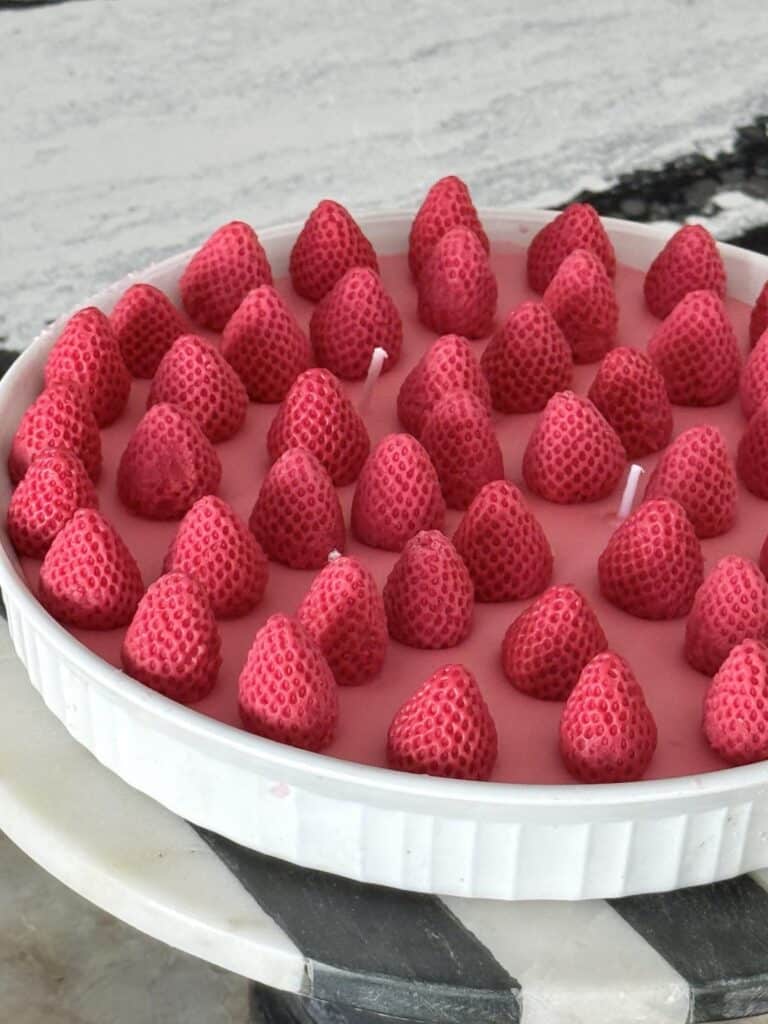
Step 6: Trim the Wicks
Give those wicks a quick haircut and voilà! You’ve got yourself a pie candle that could fool anyone into thinking it’s the real deal.
My Candle Crisis: A Real “Wick-ed” Meltdown
After hours of standing, filming, and photographing every single step of this project, I was finally ready to pour the first layer of melted wax. That’s when it happened…
In my excitement (on tired feet!), I completely forgot to set up the bamboo stick grid to hold the wicks upright. As the wax hit the pie plate, all four wicks did a dramatic swan dive—straight into the melted wax!
To add insult to injury, my hot pad slipped, the jar wobbled, and wax spilled all over the kitchen island like a lava flow of DIY disappointment. No burns, thank goodness—unless you count the ones to my ego.
I am not usually a swearing kind of gal, but let’s just say the language was… expressive.

My husband and daughter came running in, ready to help, only to find me pacing, head shaking, muttering a stream of words that would’ve made a sailor blush.
Fortunately, the fix was simple: I fished the wicks out, propped them up with the bamboo grid (like I should’ve done in the first place), and the spilled wax cooled quickly…so I re-melted it and carried on.
Crisis averted.
Candle saved.
Pride? Slightly bruised.
And my family? Oh, they’ll never let me forget my little “meltdown!”
Styling Your Strawberry Pie Candle
So, what do you do with your adorable strawberry creation?
- Kitchen Décor: Place it on a cake stand for a bakery display moment.
- Dining Table Centerpiece: Pop it into the middle of your brunch spread—it’s a guaranteed conversation starter.
- Gift It: Who wouldn’t love receiving a pie candle? Wrap it in cellophane with a ribbon and you’re good to go.
Just remember: keep it out of reach of children and pets who may also be tempted to take a bite!
Play with Scents and Styles
While I went with strawberry (because… adorable), there are so many ways to personalize this project. Try:
- Apple pie candles for that classic apple pie scent. (You can find adorable apple silicone molds HERE!)
- Fun new fragrances like peach, cherry, or even spiced vanilla
- Mixing in essential oils to customize your candle’s aroma. There are so many popular candle scents possible!
- Creating seasonal versions—think pumpkin pie in the fall or lemon tart in spring
The world of candle making is surprisingly creative and relaxing, especially when your results look good enough to eat.
Sweet Endings (No Fork Required!)
Whether you’re a candle connoisseur or a DIY newbie, learning how to make a pie candle is a joyful little adventure. You get to melt things, make fake fruit, and end up with a home accessory that smells divine and looks straight out of a Pinterest dream.
And remember, if someone wanders into your kitchen and asks for a slice… just smile and hand them a spoon. They’ll figure it out eventually.
Cheers!

A Little About Me
Hi! I’m missy. So happy to meet you!
“Decorate with Joy! Live with Happiness”
I truly believe that your home should be a reflection of your personality, a space where you feel free to express yourself and create a sanctuary that feels uniquely yours.
I love creating mood boards, hunting down unique home décor treasures, tackling easy DIY projects, and gathering with family and friends. Homes are meant to be enjoyed, filled with laughter, and shared with the people you love!
– cheers –

Don’t Forget to Pin It!
Pin the image below to your boards on Pinterest (just click the Pin button in the top left corner). You can also follow along with me on Pinterest!


Whimsical DIY Projects You Might Love
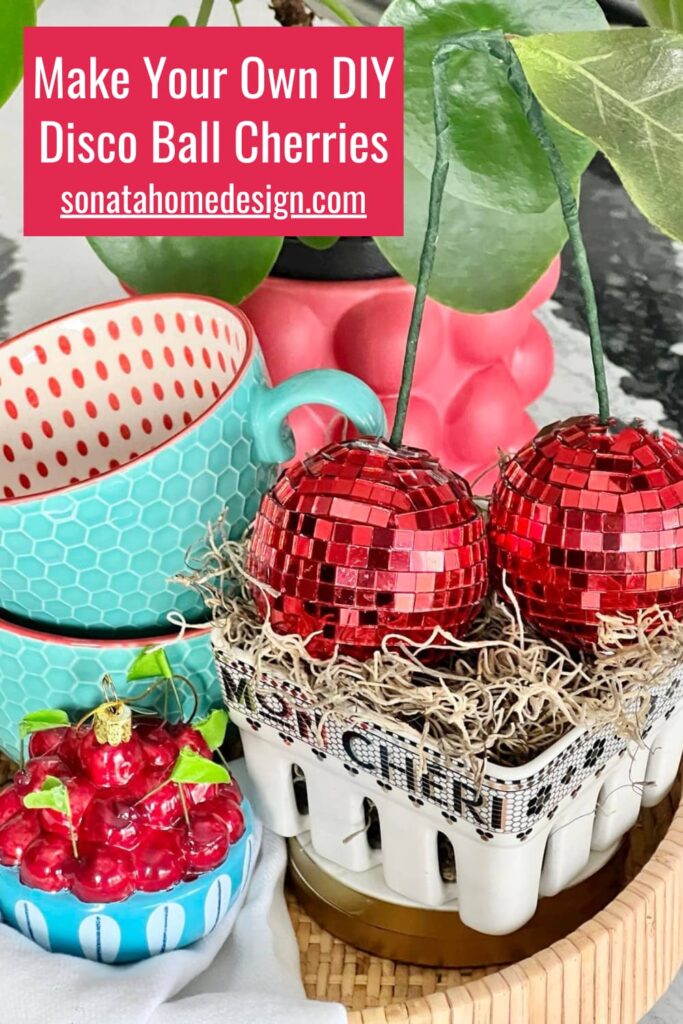
Get Your Groove on with DIY Disco Ball Cherries
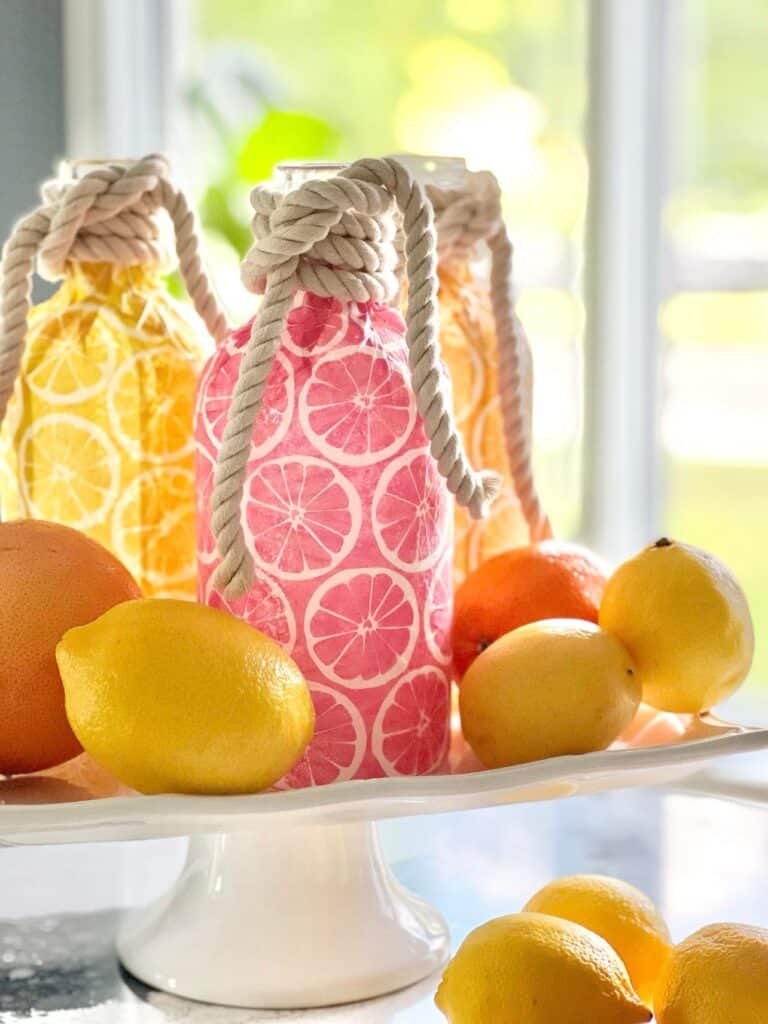
A Simple Decoupage Bottle Project

Shop Till You Drop

Absolutely the best Missy! Thanks for sharing the ups and downs of creativity ❤️
LOL! You know the whole story!
Missy
This is such a creative idea.
Thank you so much, Rachel! Happy Spring!