

How to Make an Easy DIY Concrete Cement Bowl Planter
Spice up your home decor with a DIY concrete bowl! This project is easier than you think, and the results are gorgeous! This modern planter is perfect for any space, and you can customize it to fit your unique style.

This blog contains affiliate links. This means a small commission is earned if you make a purchase by using this link. The price you pay will be the same whether you use the affiliate link or go directly to the vendor’s website using a non-affiliate link. As an Amazon Influencer, I earn from qualifying purchases.
Handcrafted Society Made Me Do It!
Each month, the Handcrafted Society gives me and some of my blogger friends a DIY challenge. We are given a theme or material to work with and then left to our own creative devices.
One of the great things about the Handcrafted Society is that it pushes me to try materials that are new to me.
So this month…Hello, CONCRETE! Be sure to check out all of the concrete projects at the bottom of this post!

I’ve never worked with concrete and I have to admit to a certain level of uncertainty.
But I do love a challenge so I started to brainstorm my concrete project.
With no real idea in mind, I knew that I needed some sort of form for whatever I came up with. So I headed to the Habitat for Humanity ReStore.
After wandering around for a bit, I came across these two glass light fixture covers…and a plate.
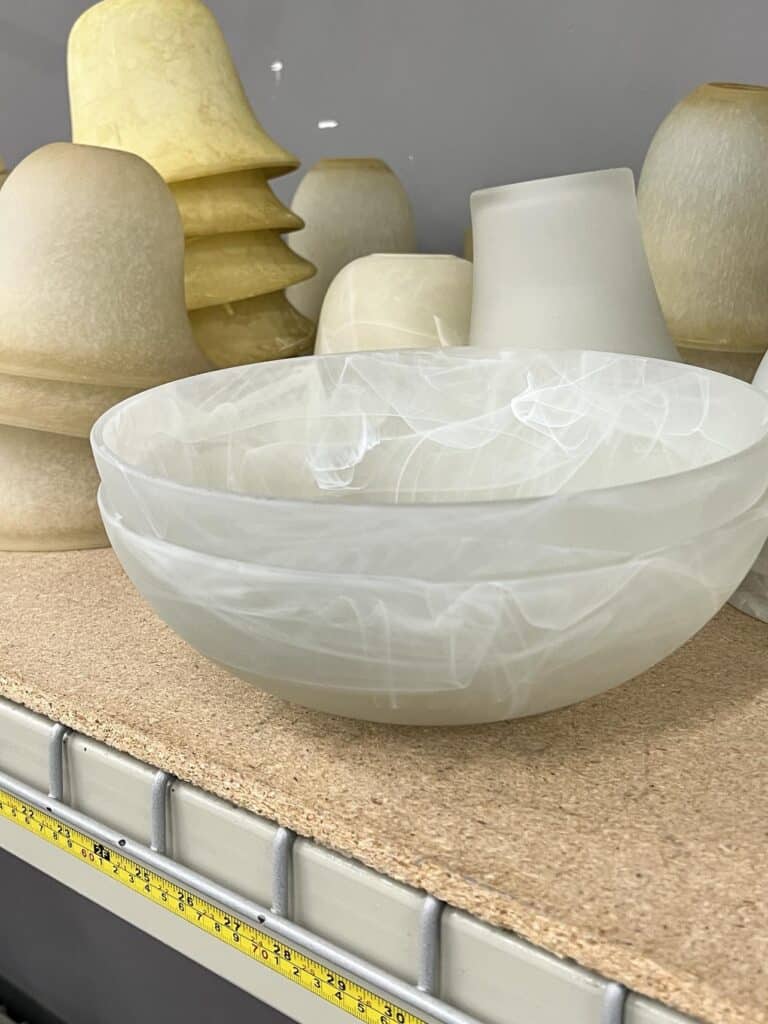
An idea started to form.
Before I knew it, I had created my own concrete bowl and it could not be easier!
Let’s get started so you can make your concrete bowls!
I have found amazing pieces at the Habitat for Humanity ReStore. Not only do I find unusual resources for project, but I feel great contributing to this amazing cause. Some of my projects include…
- Creating a side table from two ReStore lampshades
- Chair seat upholstery
- Tissue Paper Decoupage Glass Plates
- DIY Faux Snowballs
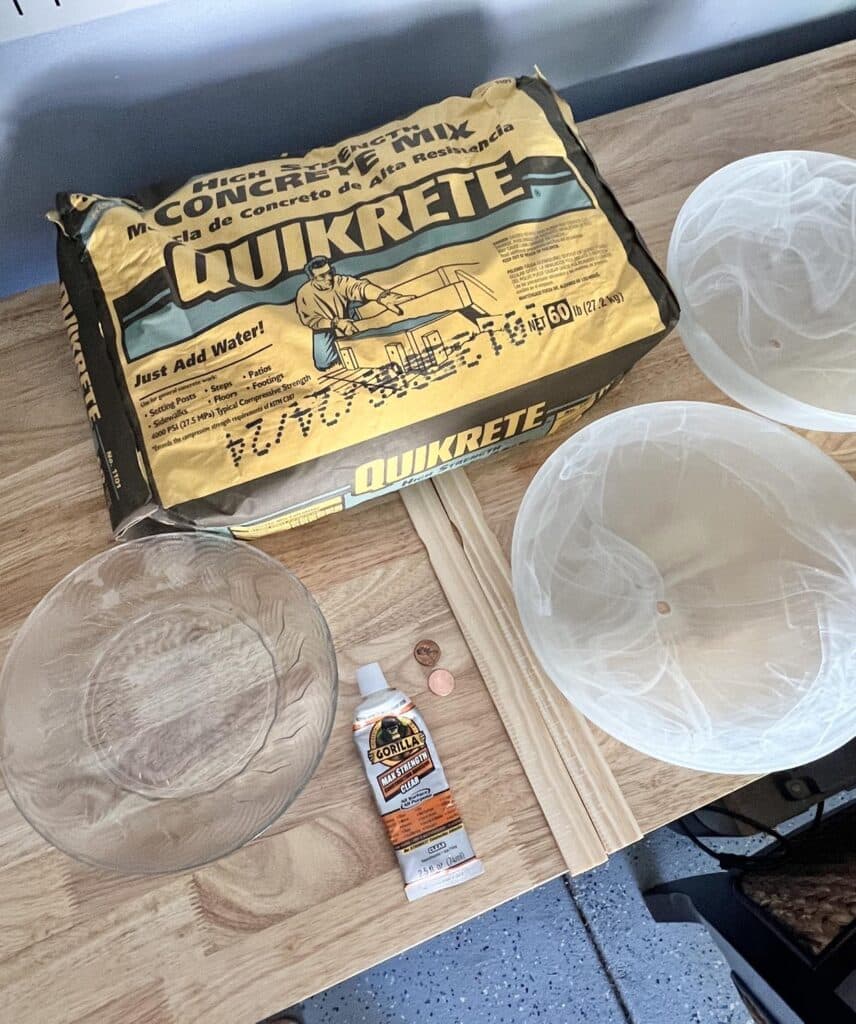
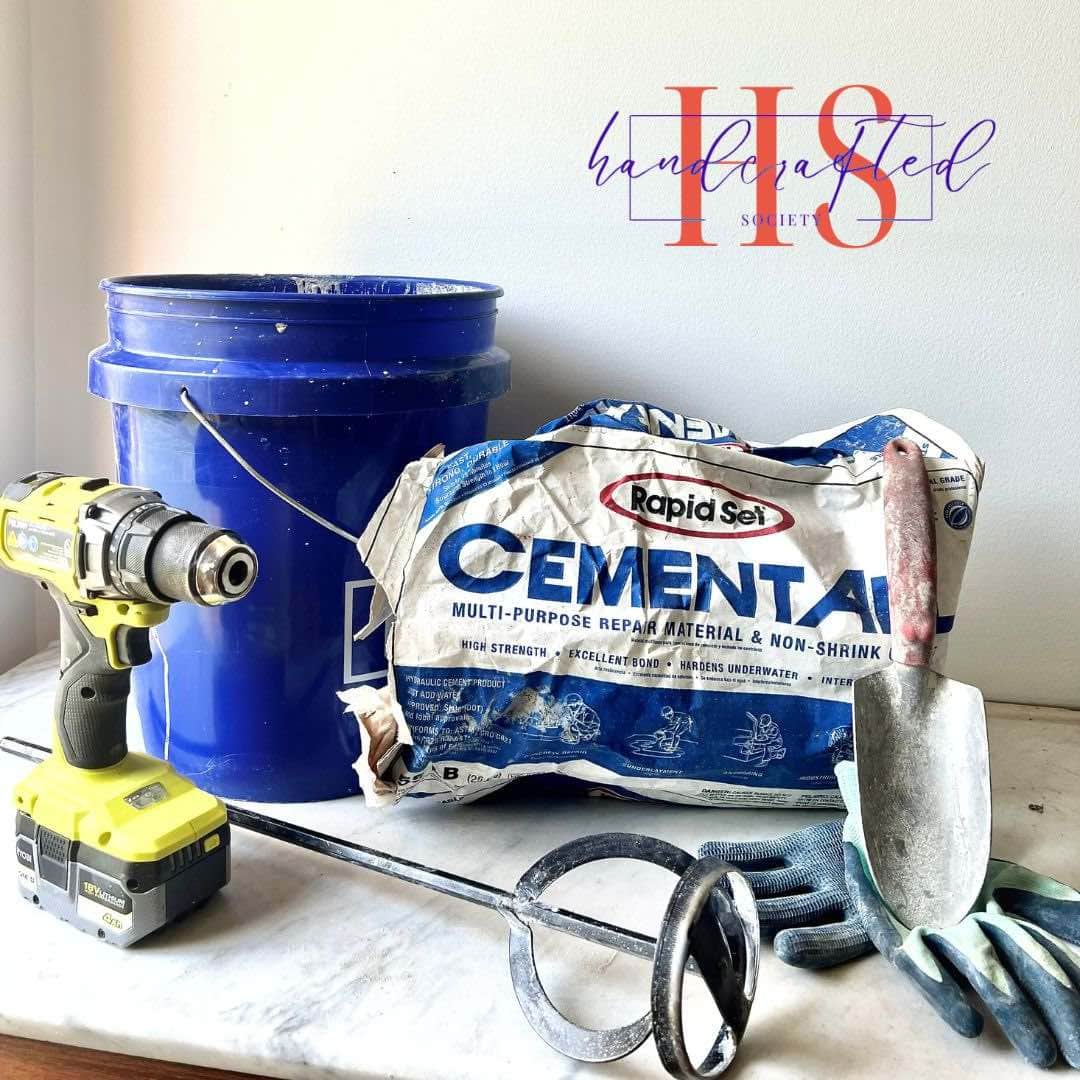
DIY Concrete Bowl Supply List
Chances are, you might not run across the same type of glass light covers that I discovered. No worries! You can use two small bowls and either a plate or a smaller bowl that will fit within one of the bowls.
And they can be made of glass or plastic because of a secret supply item. Can you guess what that item will be from this supply list?
All of these items can be found at home improvement stores or even the dollar store.
- Bag of concrete
- Two glass light fixture covers or plastic bowls (light fixture covers or other unique glass containers)
- One small bowl or deep plate that will fit inside the other bowls
- Bucket
- Water
- Paint stir sick
- Non-stick spray
- Two pennies (optional)
- Fabric dye (optional)
- Strong construction adhesive glue.
- Rubber gloves (optional)
How to Make DIY Concrete Planters
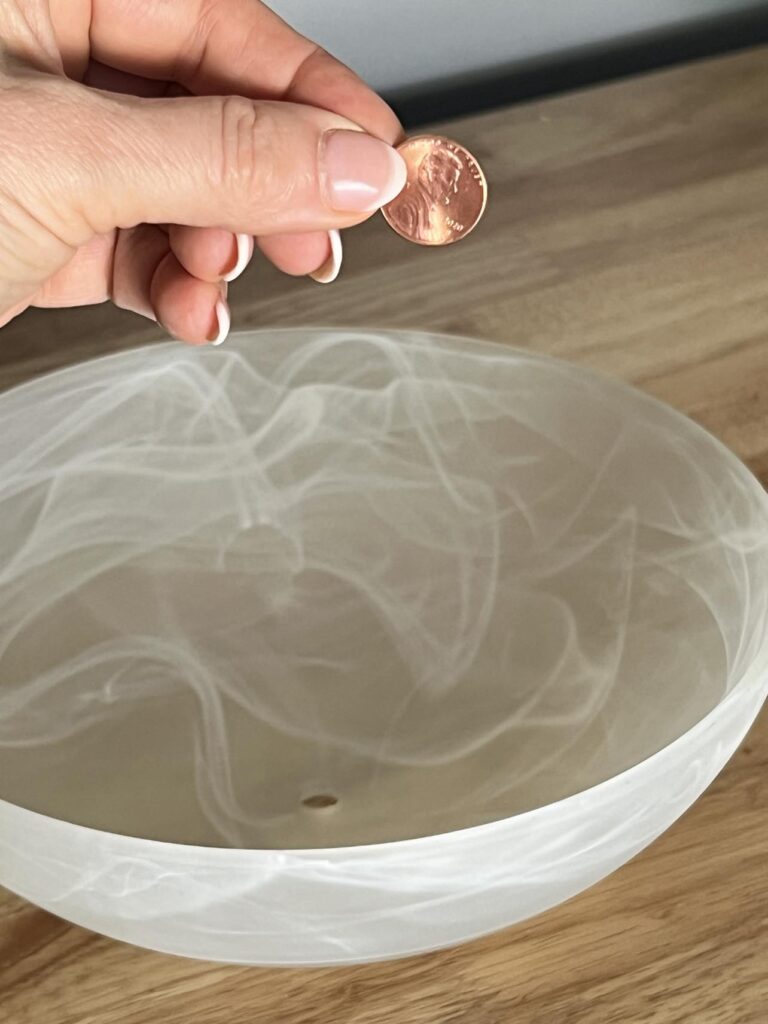
The first step is to prep each planter bowl.
If you are using a glass fixture cover, you will need to cover the center hole so the concrete mix doesn’t seep through.
Here is a great solution: Pennies!
Simply glue a penny over each hole and none of your concrete will escape.
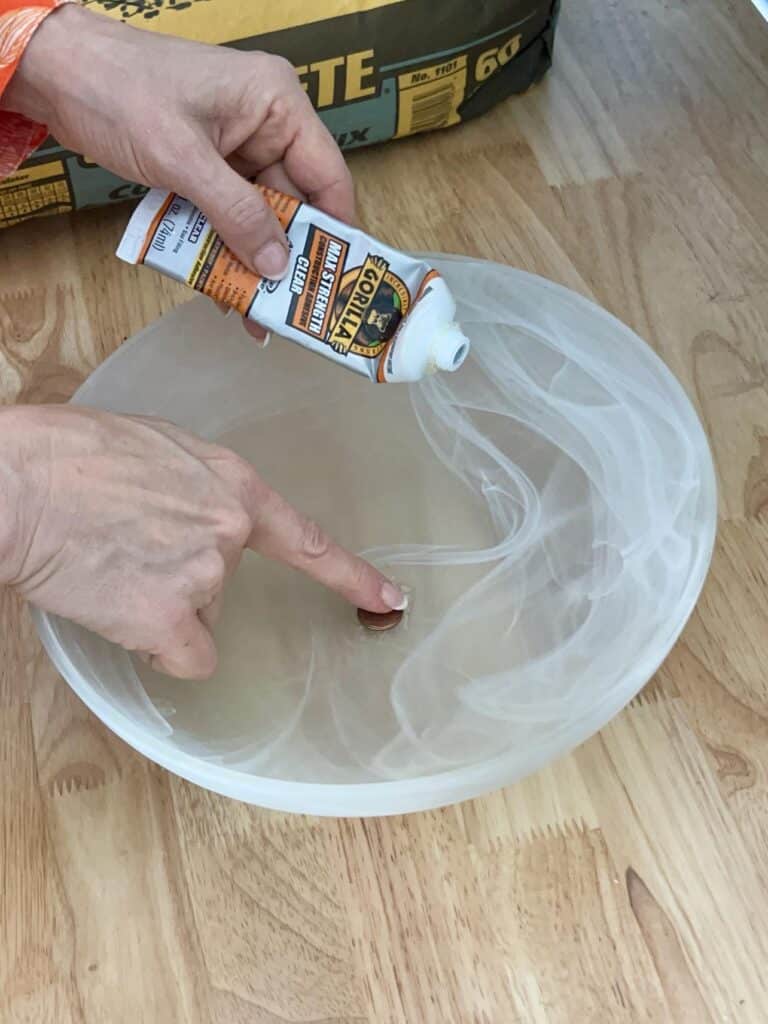
Now for that secret supply that works magic…cooking spray!
Yes! Once the glue has dried, spray the inside of the bowls with a cheap can of non-stick cooking spray!
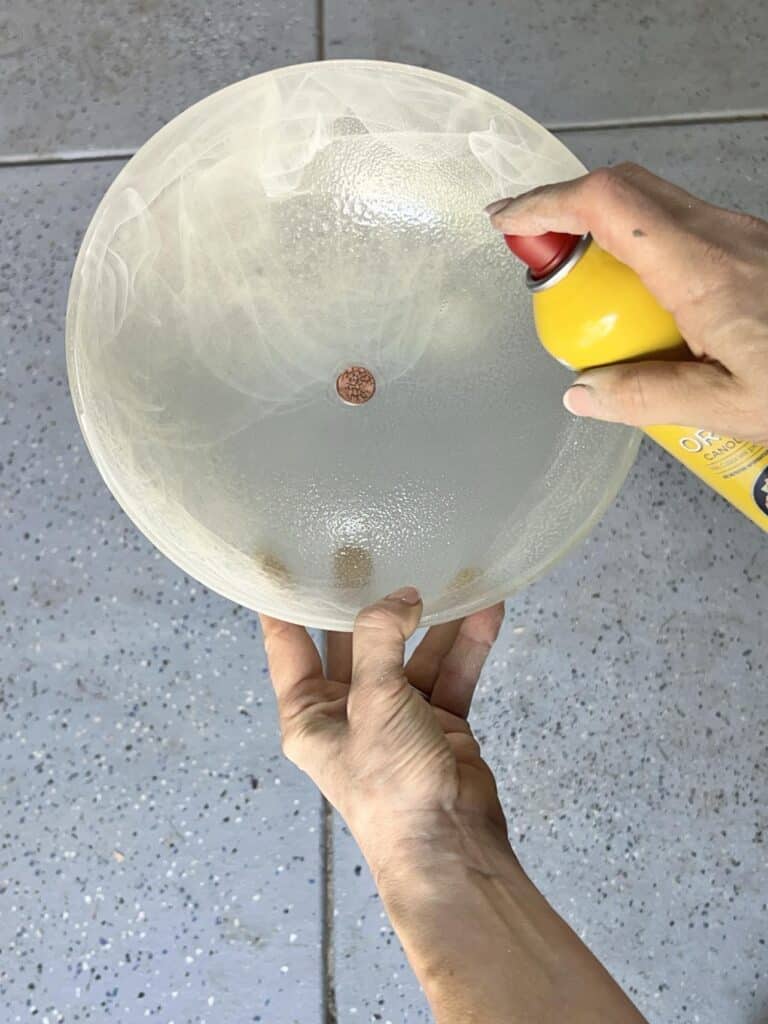
You can also use petroleum jelly or vegetable oil to create a slippery barrier between the bowls and the concrete.
Now for the fun part…it’s time to mix the concrete!
I chose a basic dry concrete mix by Quikrete. There are concrete varieties available: quick drying concrete, heavy duty concrete, or finely powdered concrete mixes.
For my project, I wanted a little of the “chunky” look rather than finely ground. So I went with the most basic (and cheapest!) concrete that is used for general concrete work.
Measure your concrete mix into a bucket, add water, and stir with a paint stir stick.
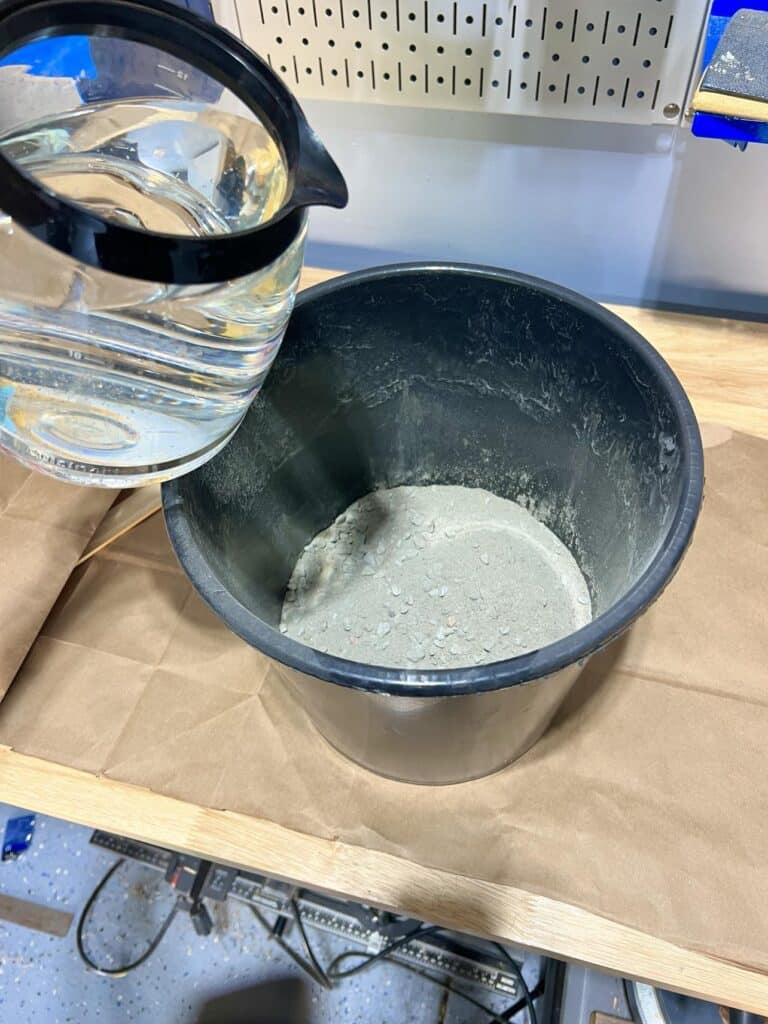
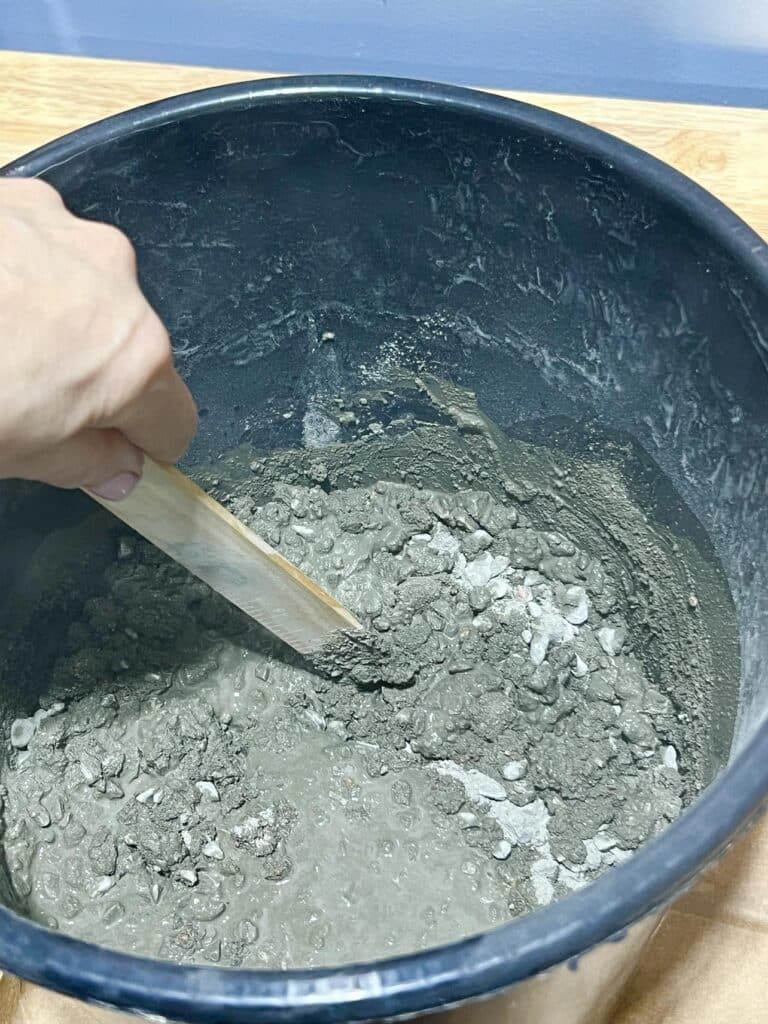
Follow the general instructions on the concrete bag for the concrete/water ratio. However, I found that I pretty much ignored the recommended ratio and just added concrete and water until it was the consistency of peanut butter.
Pro Tip: Concrete mix and be very dusty and you don’t want to inhale this dust. Be sure to mix your concrete in a well-ventilated area and wear a mask.
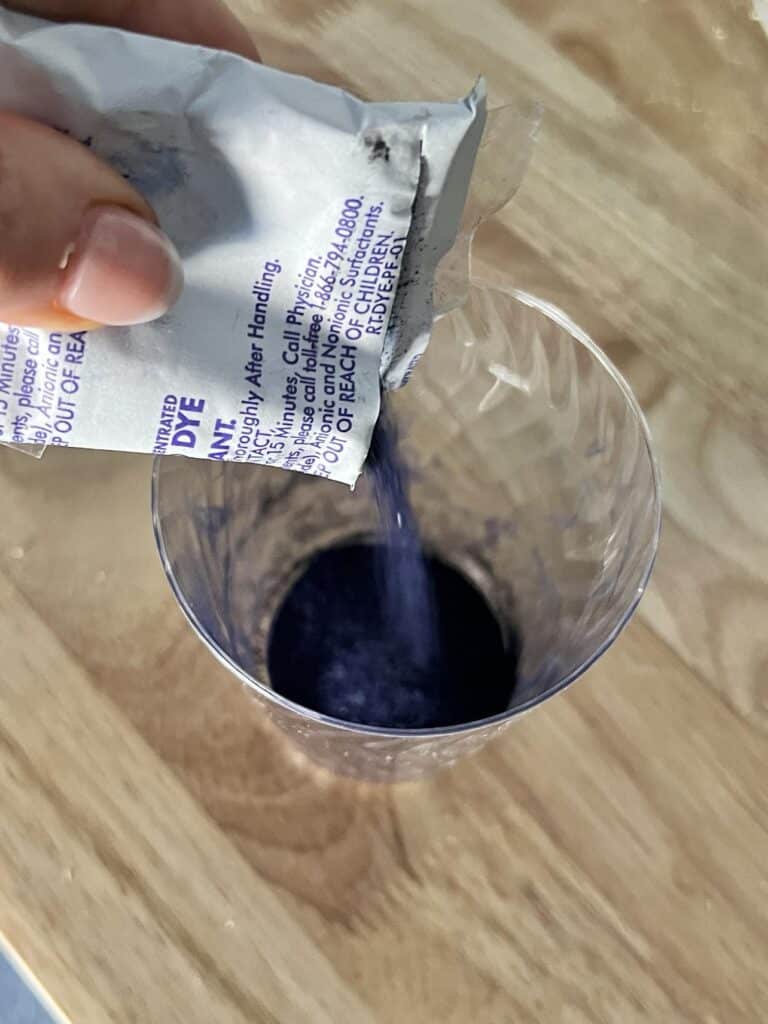
Concrete Color
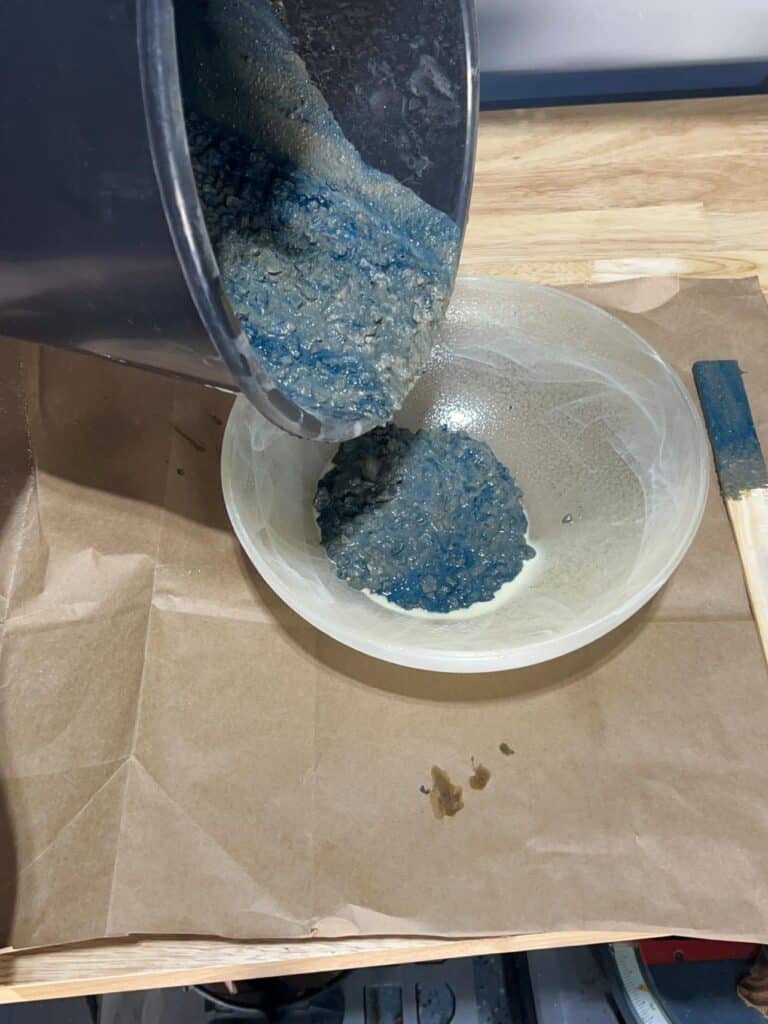
You can pour the concrete into one of the bowls at this point, but I always like to add a little color.
For coloring concrete, you can use liquid cement colors. However, again I like to keep it simple and less “consistent” and so I added powdered fabric dye.
Sprinkle it here. Sprinkle it there.
Stir a little…sprinkle a little…stir some more.
If you want color consistency, stir until the powder is fully incorporated into the concrete. Or, leave it in color-concentrated puddles, like me!
Pouring the Concrete
Once your concrete is ready, pour it directly into one of your bowls.
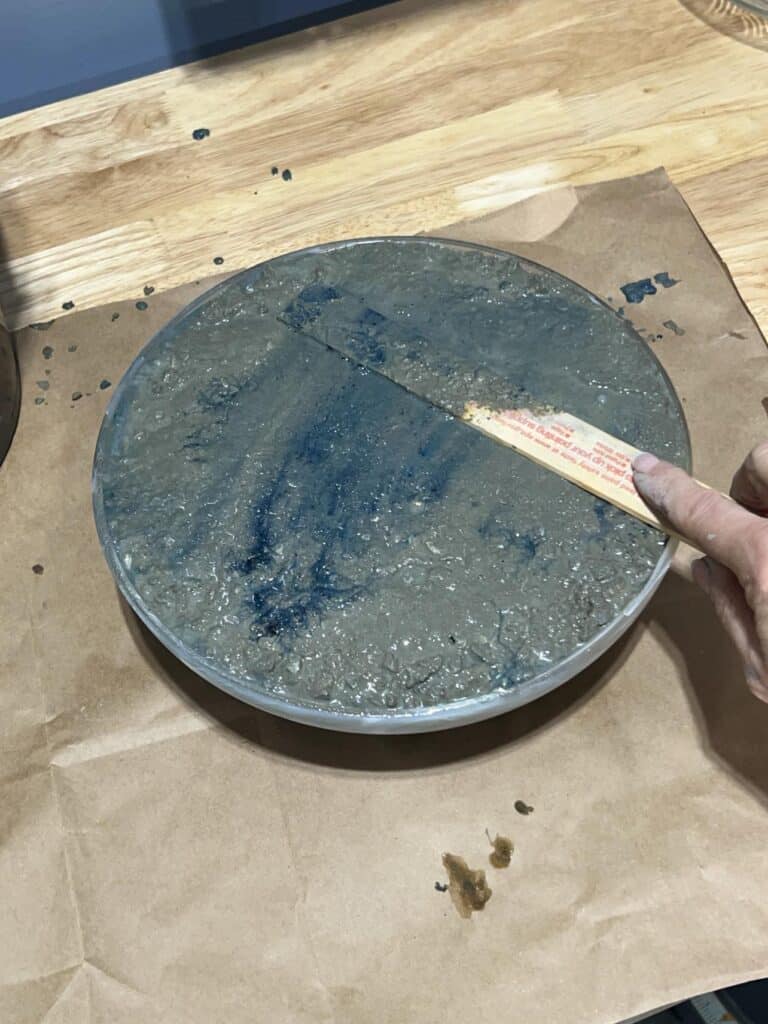
Fill the inside of the bowl to the top and level off any excess with your stir stick. You can also randomly stick the stir stick into the concrete to get rid of any air bubbles.
Then turn your attention to the other bowl. Fill this with enough concrete so it levels about an inch from the top.
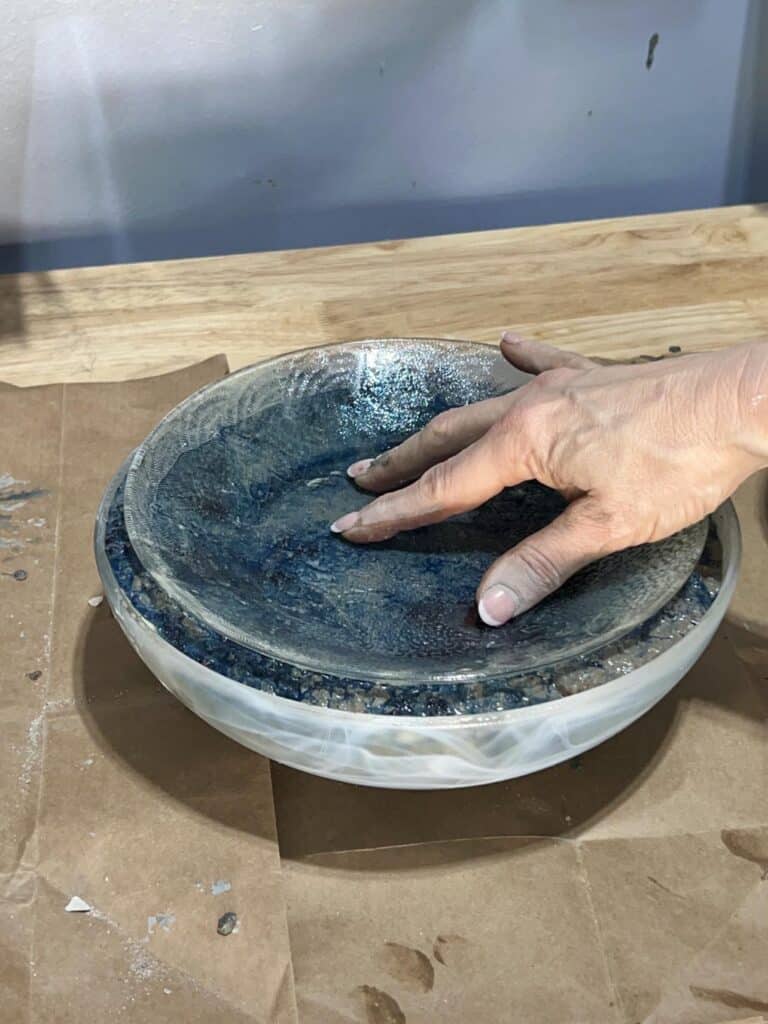
Grab your magic cooking spray and coat the underside of your plate or inner bowl. Center it on top of the partially filled bowl and press down with your fingers until the level of the wet concrete reaches the lip of the outside of the bowl.
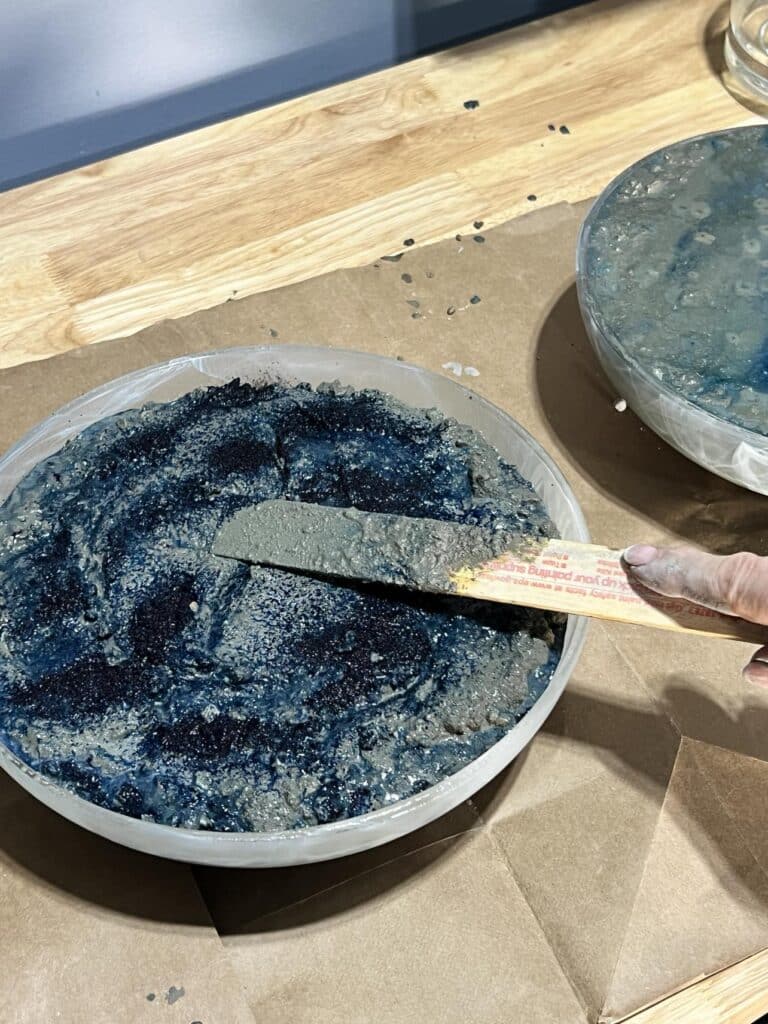
You can use your stir stick and a paper towel to level the concrete and tidy up any rough edges.
As the concrete dries, the plate or bowl may have a tendency to float upwards. So I anchored mine with a couple of vertical bricks.
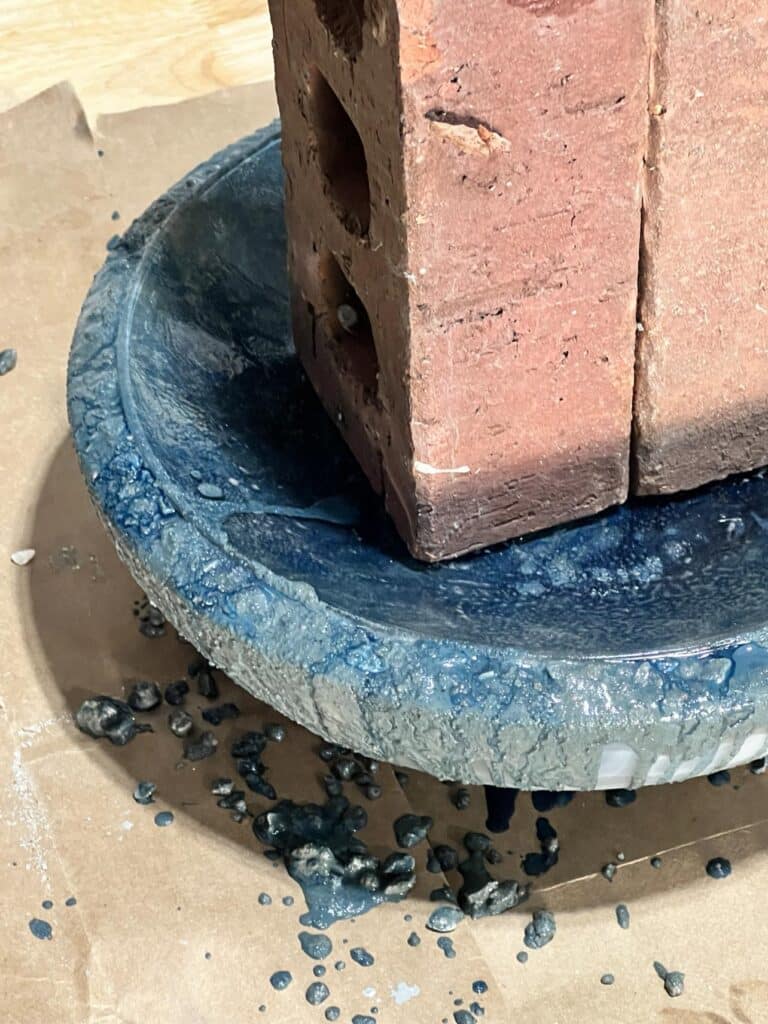
And then I went to bed! Let the concrete dry while you snooze!
Dry times will depend on the type of concrete that you use. Additionally, the concrete will continue to cure over time. Cured concrete is extremely strong so your project will last a long time!
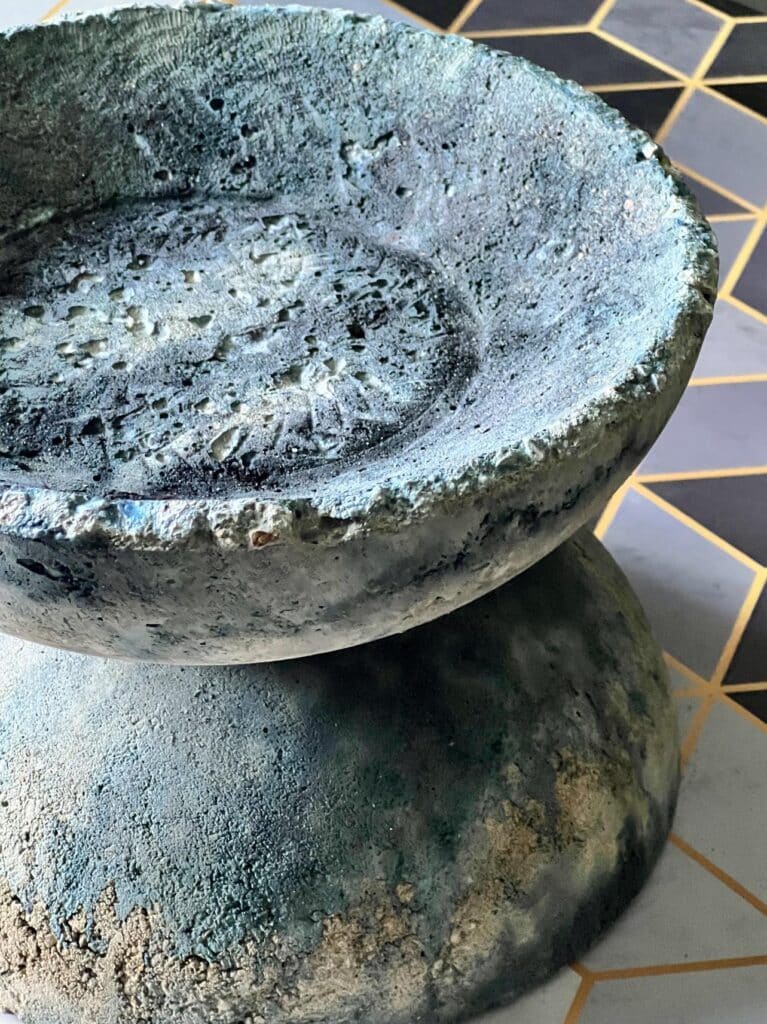
Assembling Your Concrete Bowl Planter
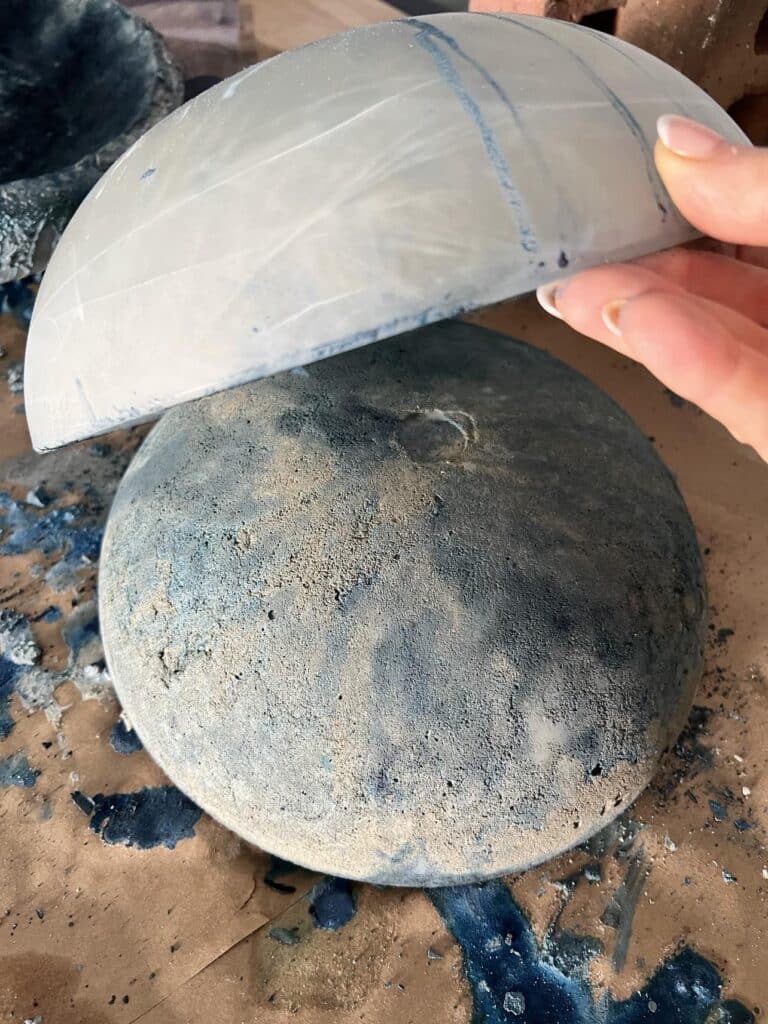
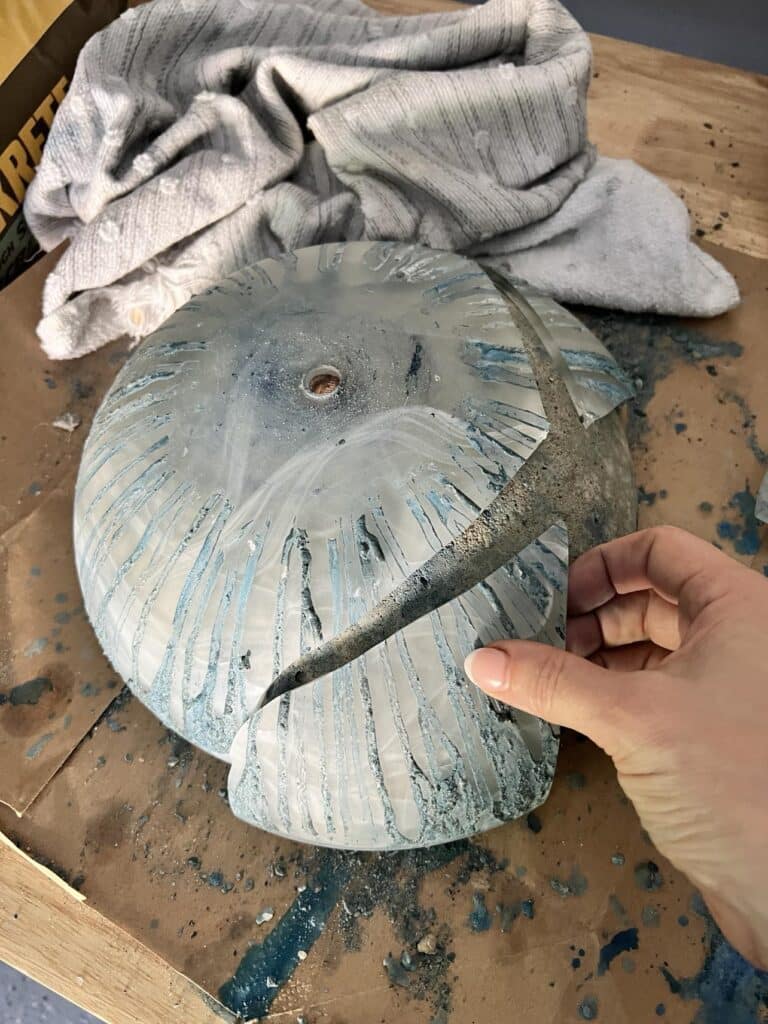
Truth be told, I was a little nervous to see how I would get the cement bowls out of the glass fixture covers.
The concrete base was the easiest. I flipped it over and the glass dome lifted right off!
So satisfying!
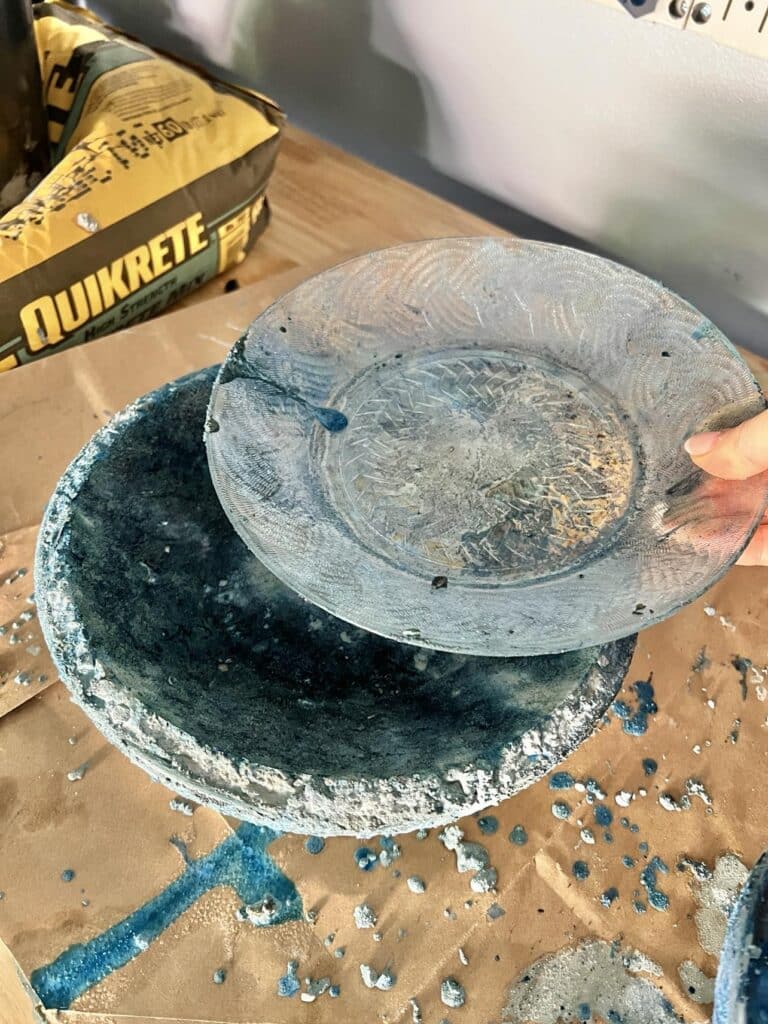
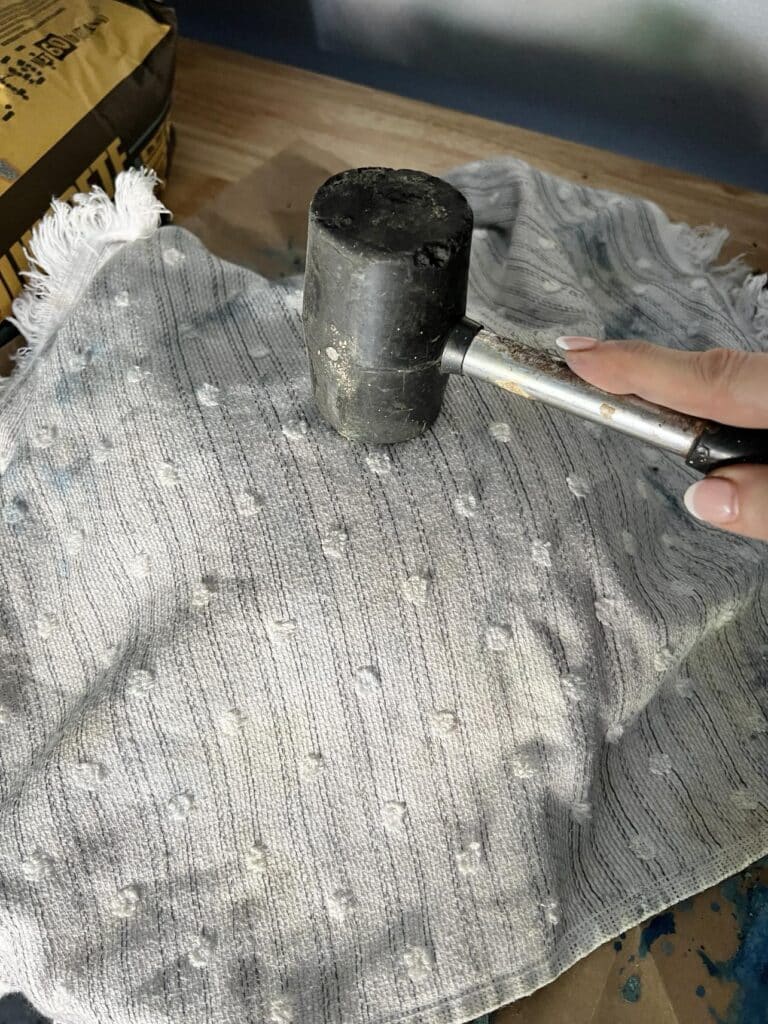
The cement bowl was a tad trickier but still easy. The plate slipped right out. (Gotta love that cooking spray!) But the glass dome wouldn’t slip off easily like the base.
So I covered it with a tea towel and gave it two gentle “whacks” with a rubber mallet. The glass cracked open into three clean pieces.
Again, so satisfying!
With the base sitting dome side up, squeeze a dollop of Gorilla glue onto the top of the dome. Center the other cement bowl and place it on top of the base.
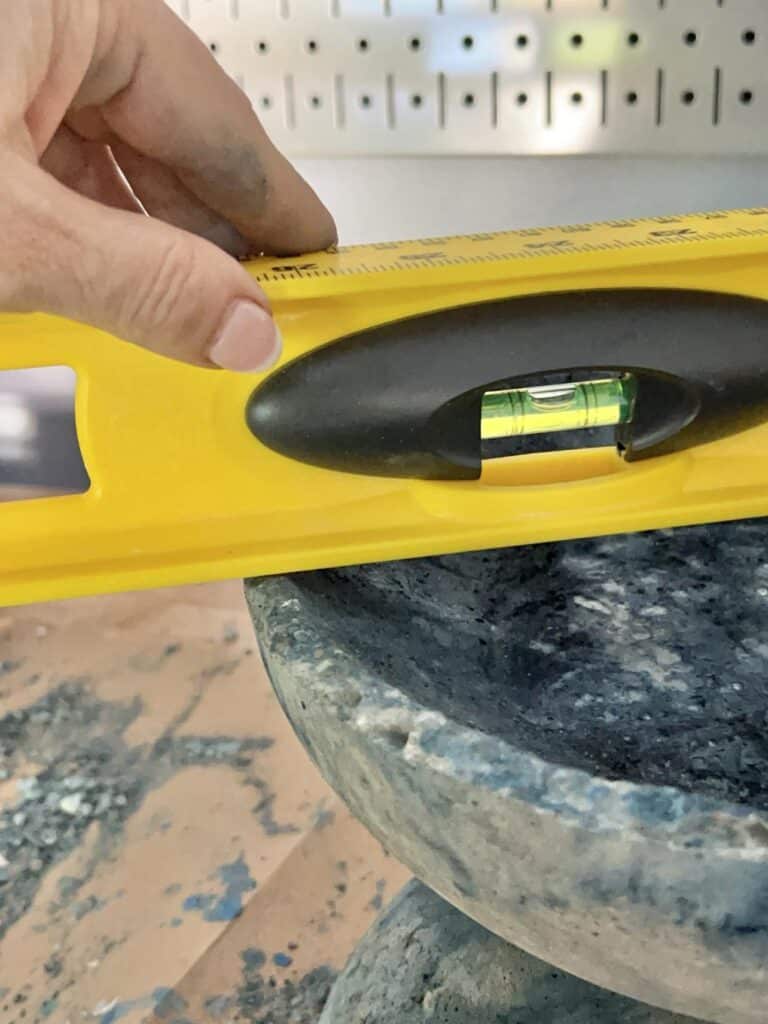
If you want, place a level on top to make sure you have it placed correctly.
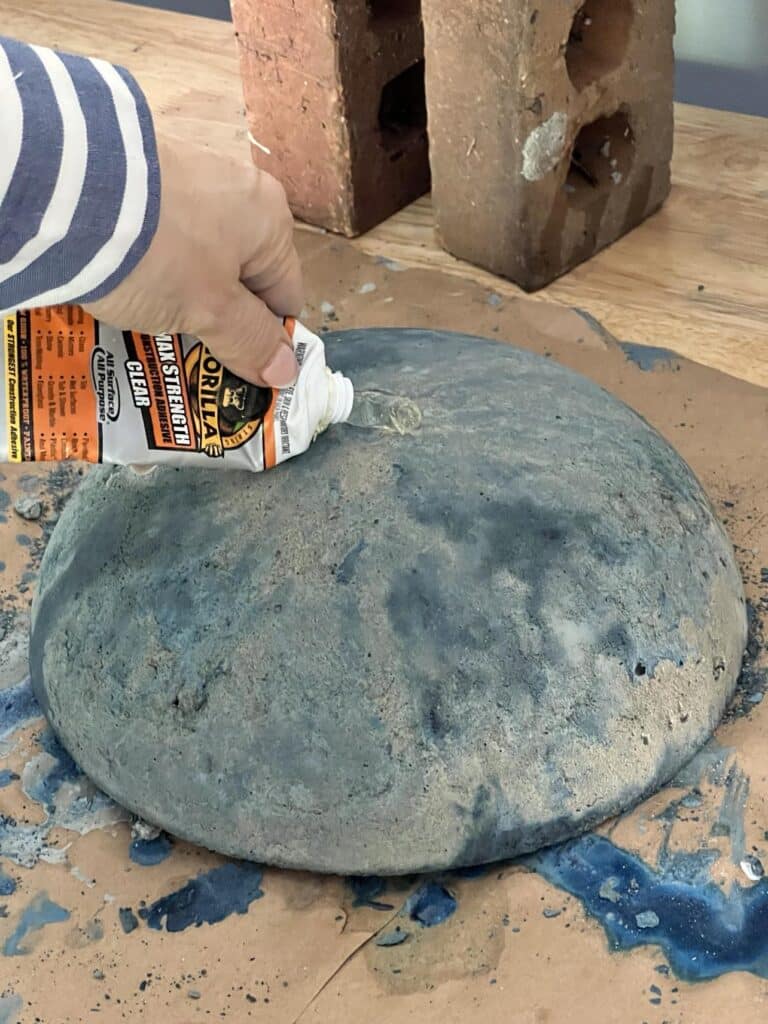
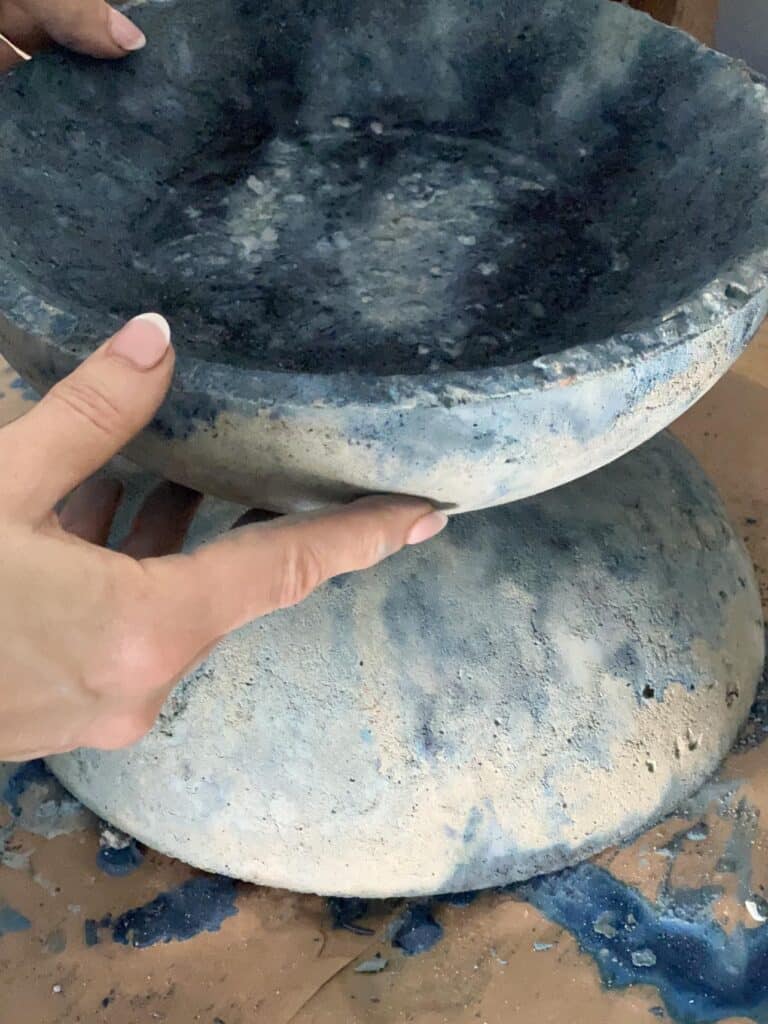
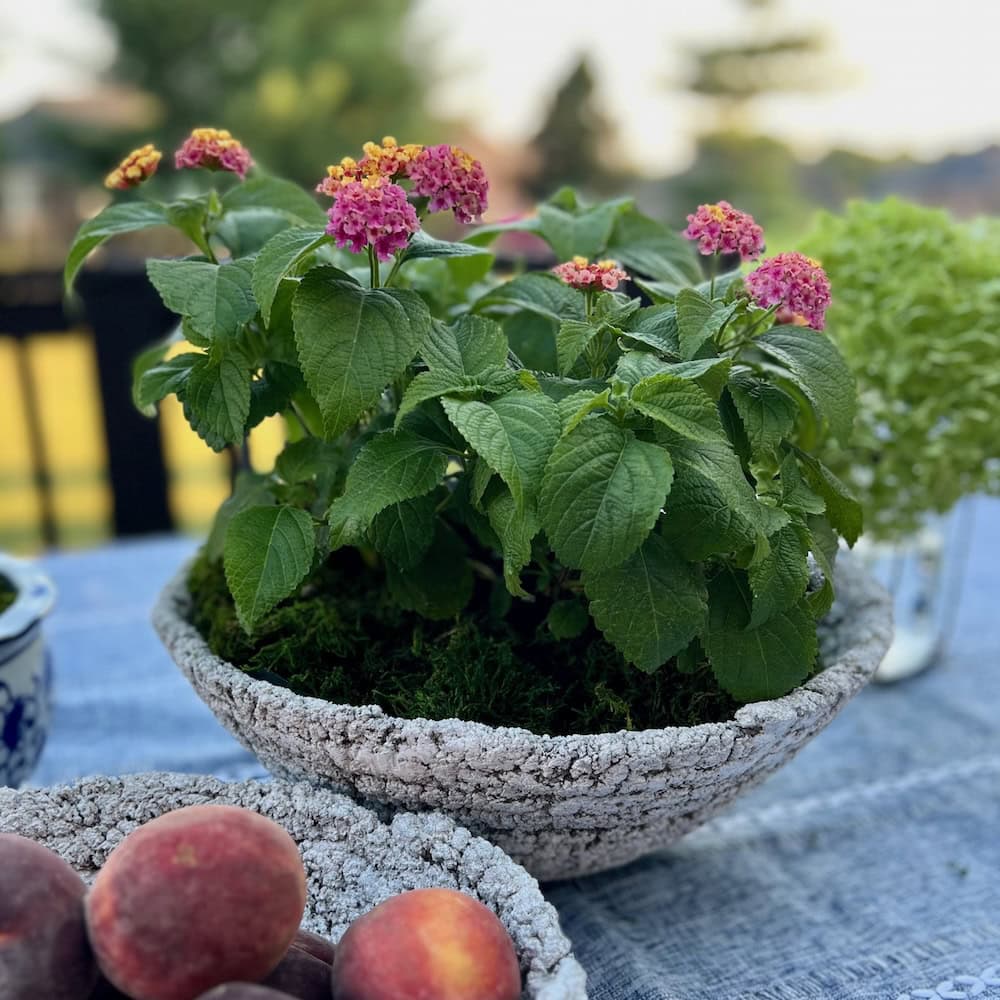
Once the glue dries, you are ready to style your new DIY concrete bowl!
DIY Concrete Bowl Decorating Inspiration
Your finished product is a really versatile home decor piece that can be styled in so many ways! Here are some ideas!
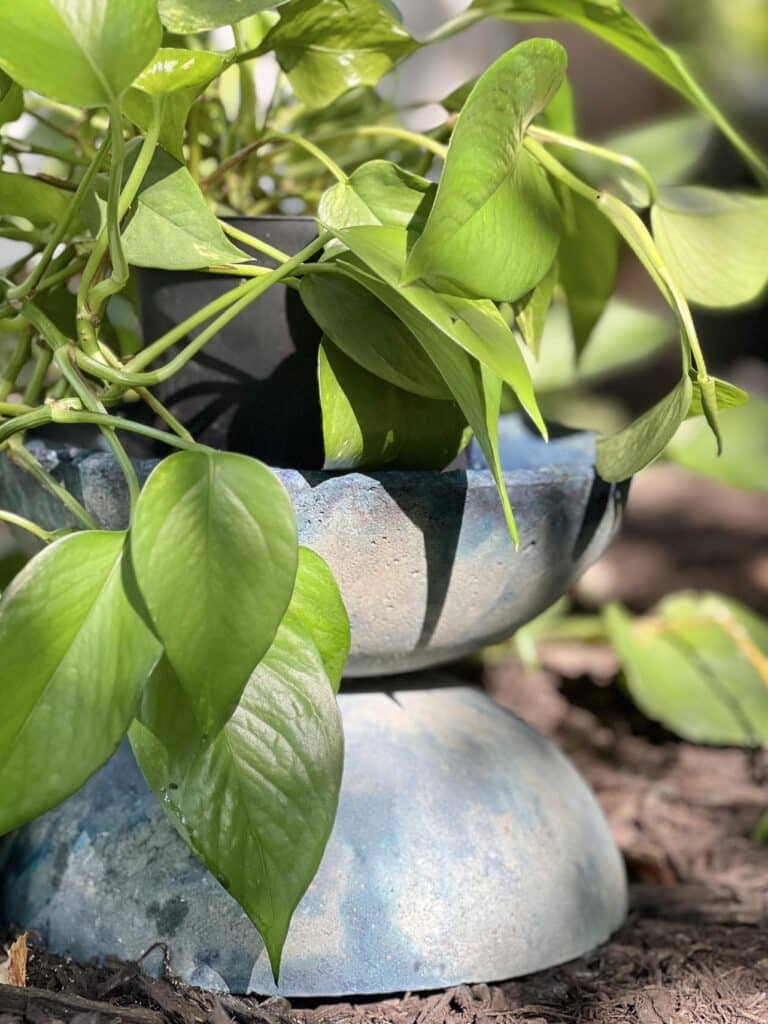
- Classic Planter: Fill your bowl with a vibrant succulent or trailing vine for a touch of life.
- Catch-All King: Keep keys, trinkets, or jewelry organized in a stylish concrete bowl by the door or on your dresser.
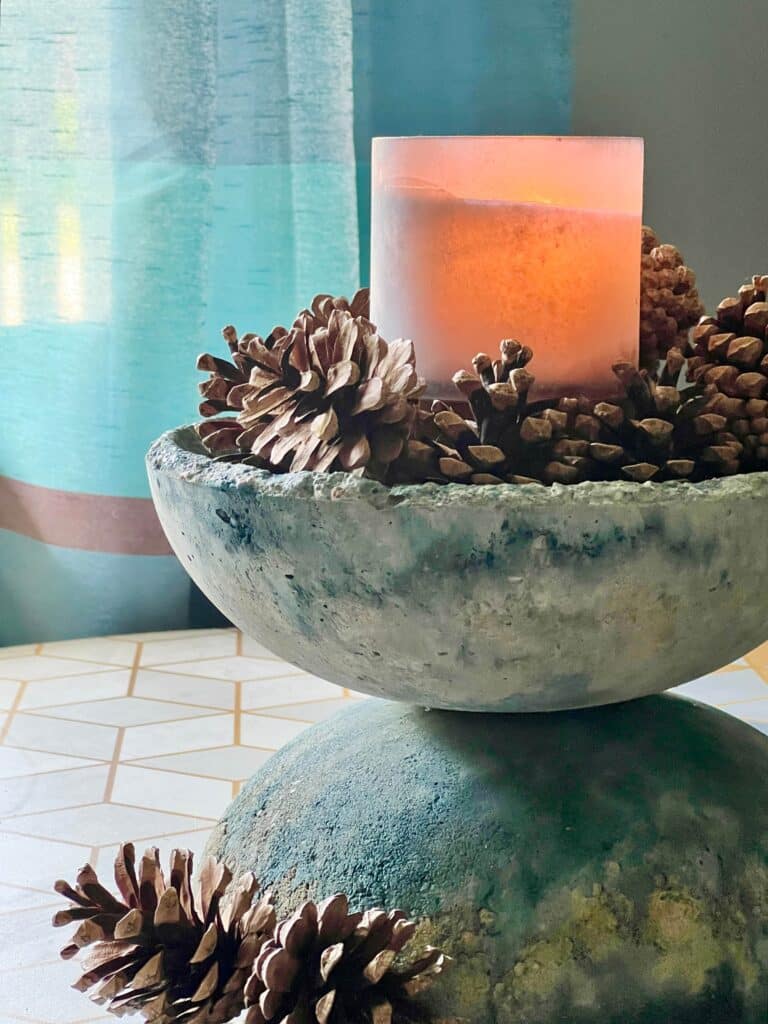
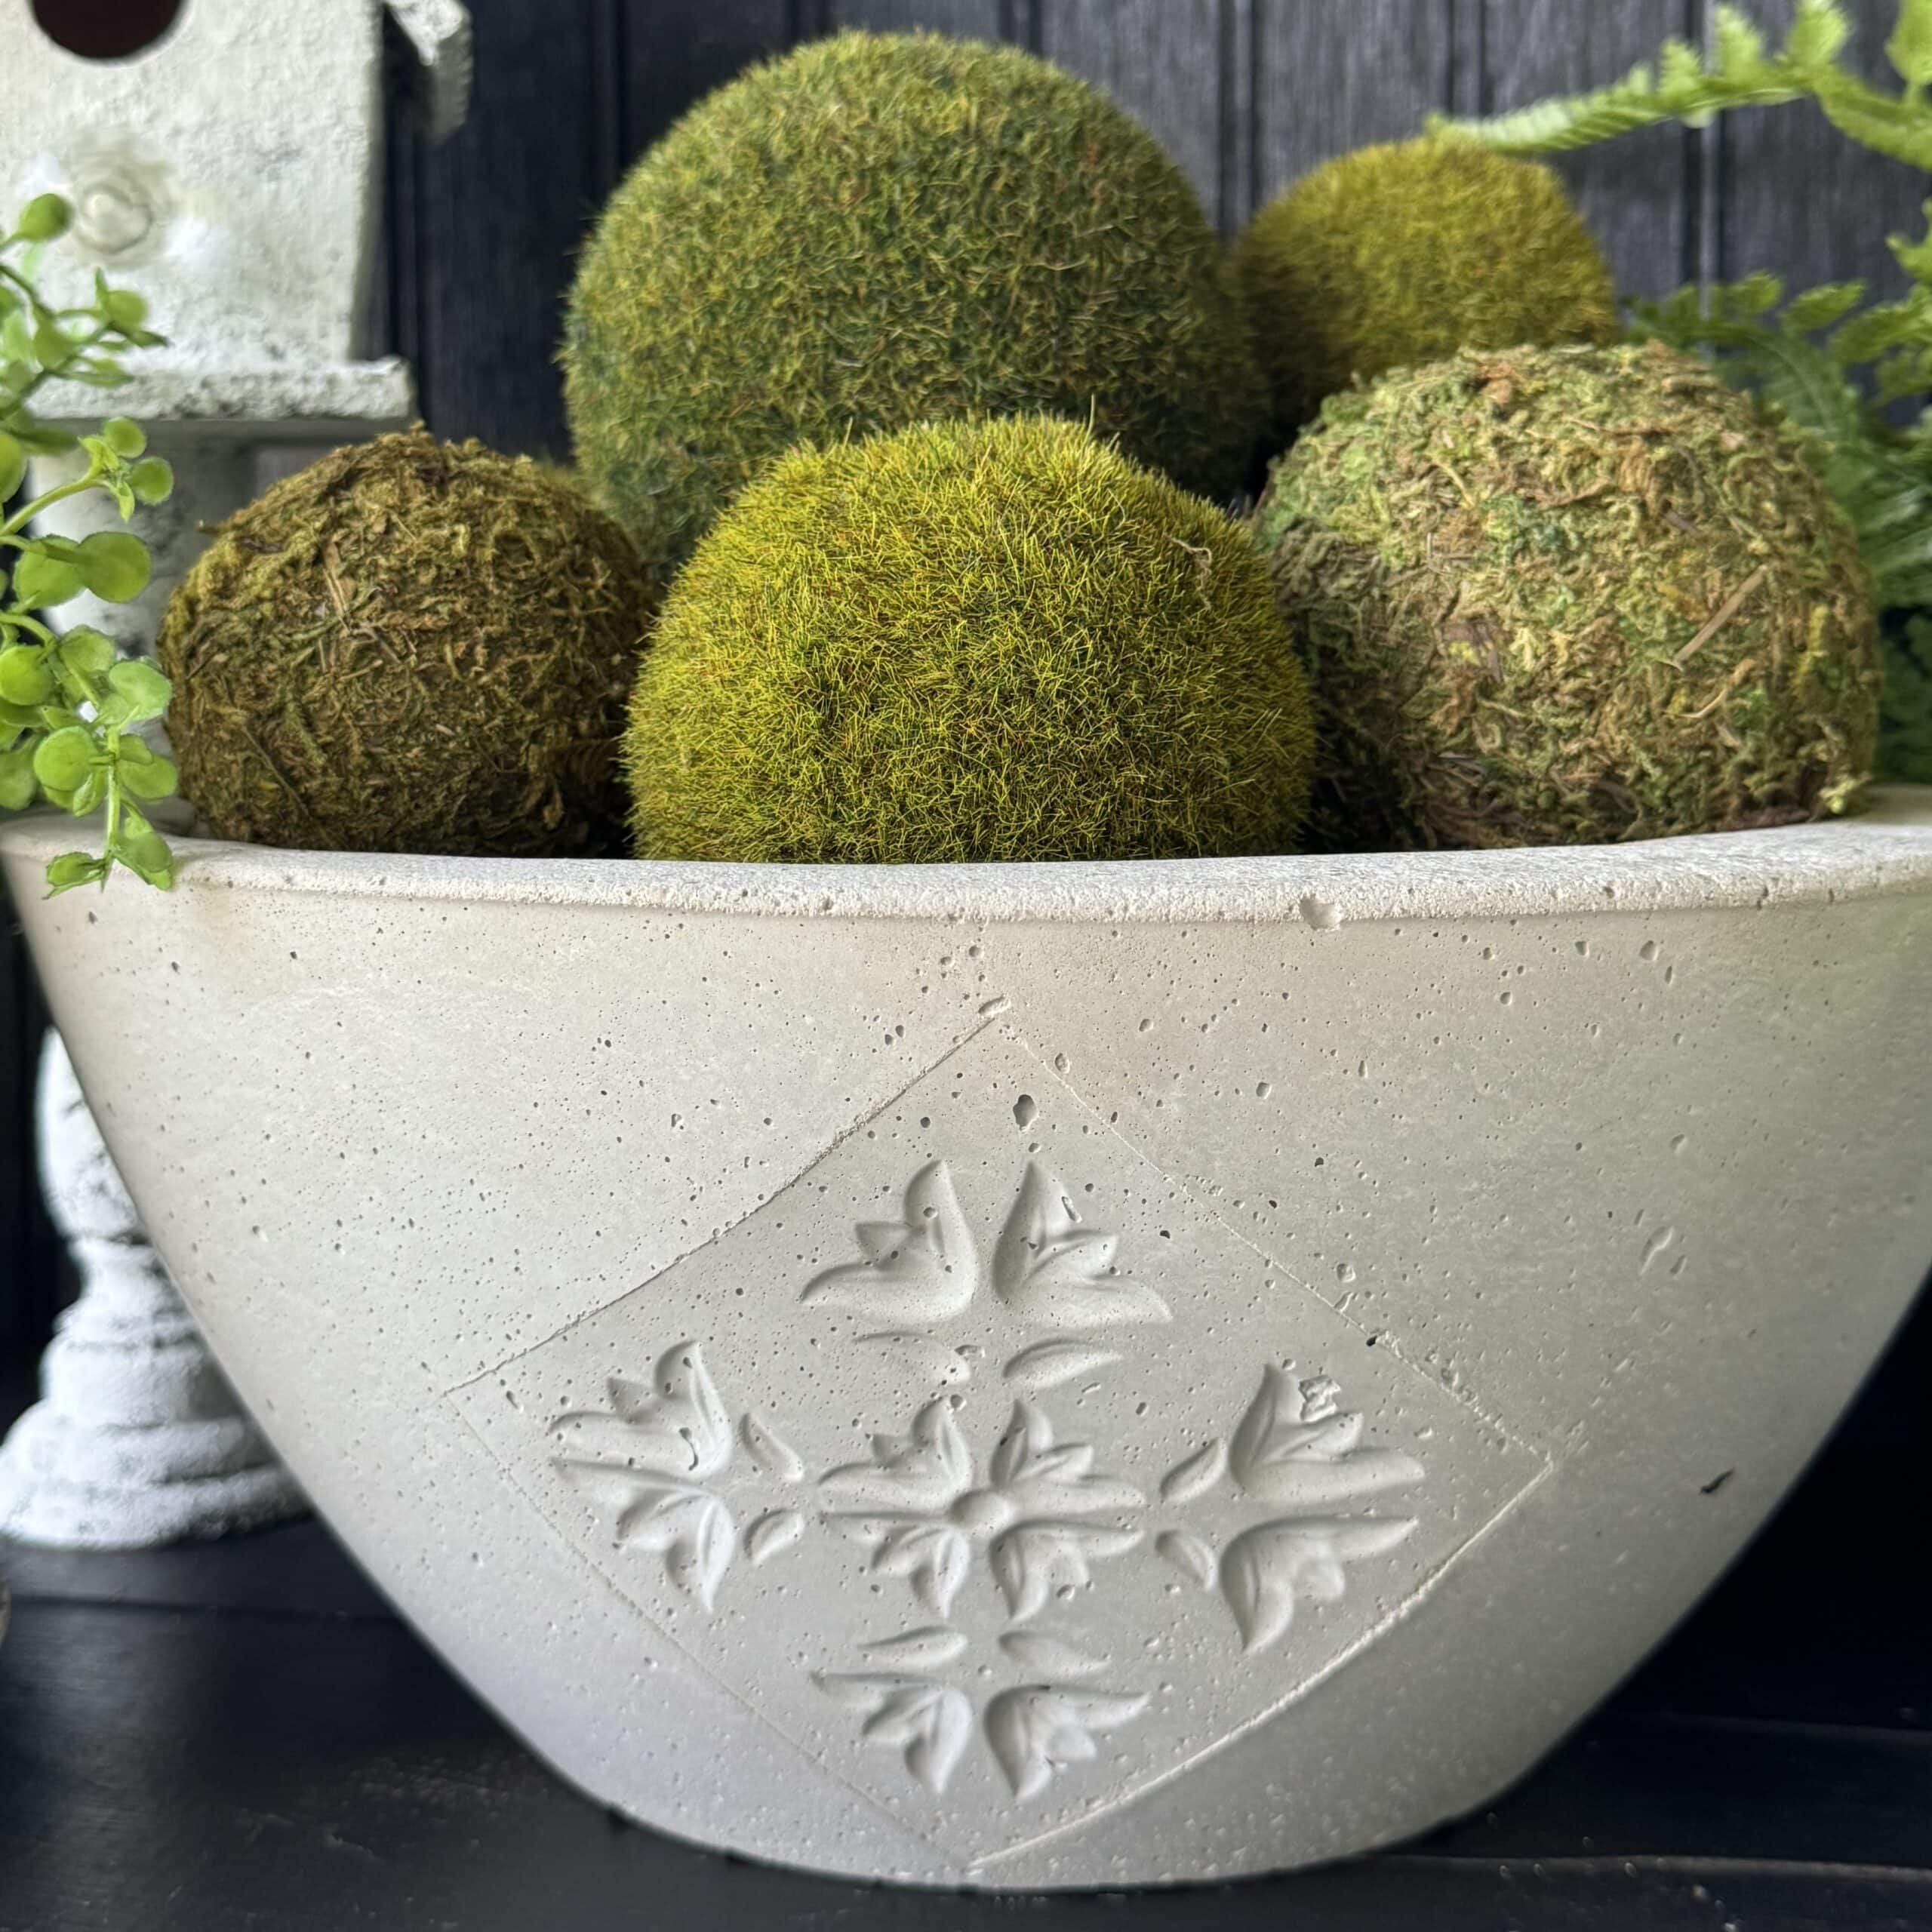
- Candlelit Ambiance: Add a touch of warmth with a pillar candle nestled in your bowl. Surround it with pine cones, pebbles, or moss for a natural look.
- Modern Sphere: Fill a clear glass ornament with air plants and place it inside your concrete bowl for a unique terrarium effect.
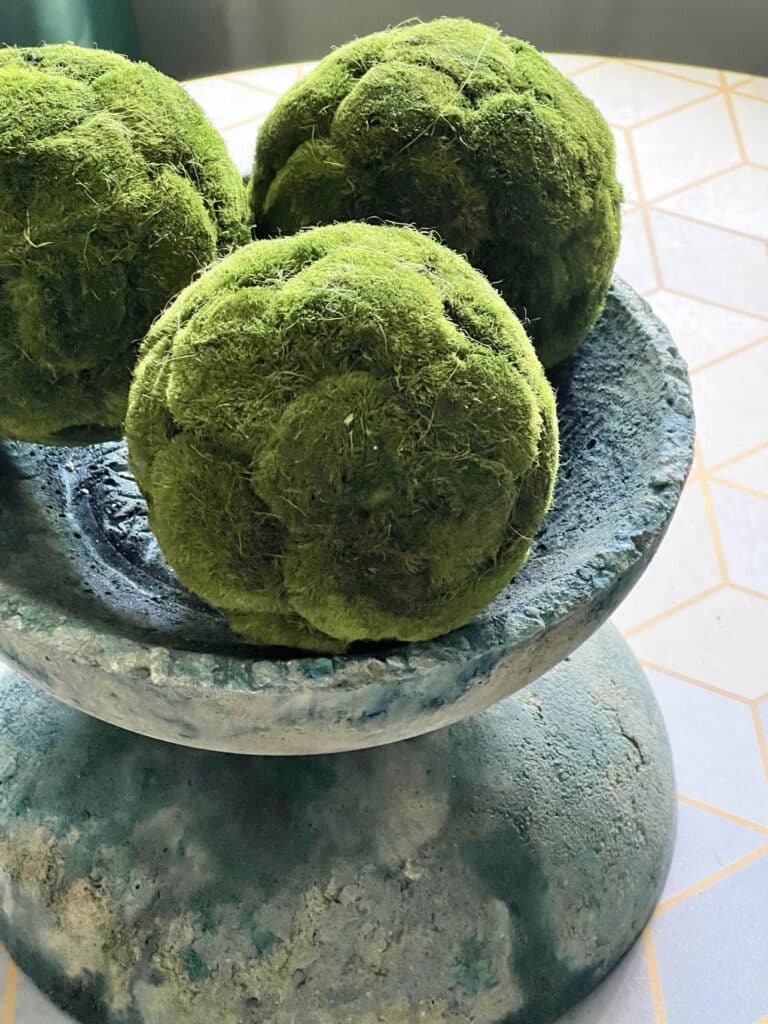
- Moss Orbs: Group a few green faux moss orbs together to create a sculptural centerpiece on your coffee table or bookshelf.
- Holiday Cheer: Fill your bowl with colorful ornaments during the holidays for a festive display.
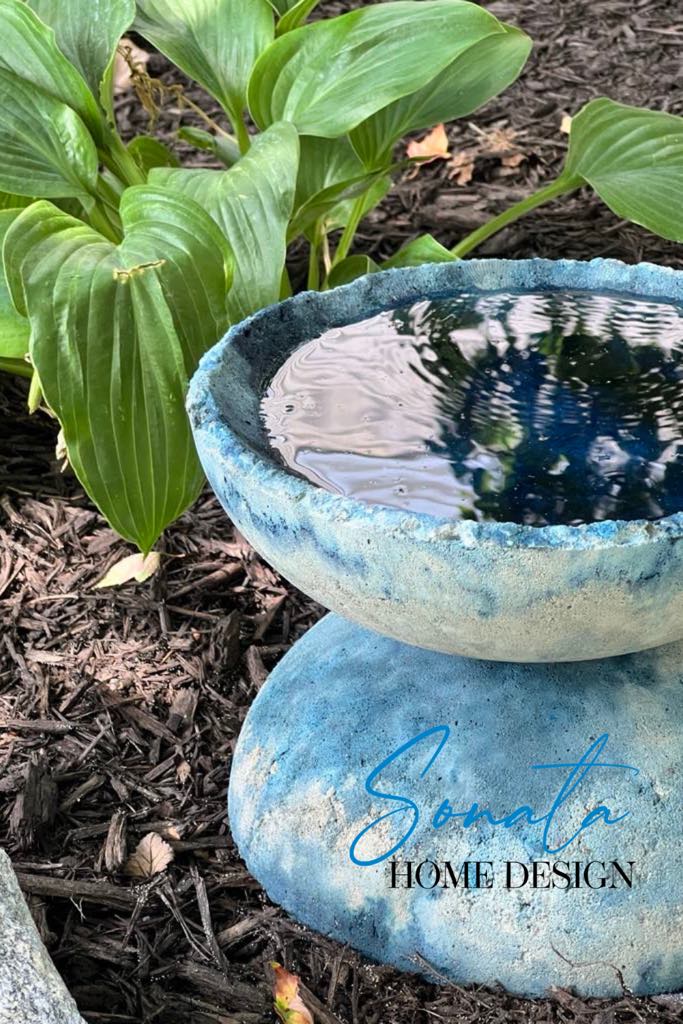
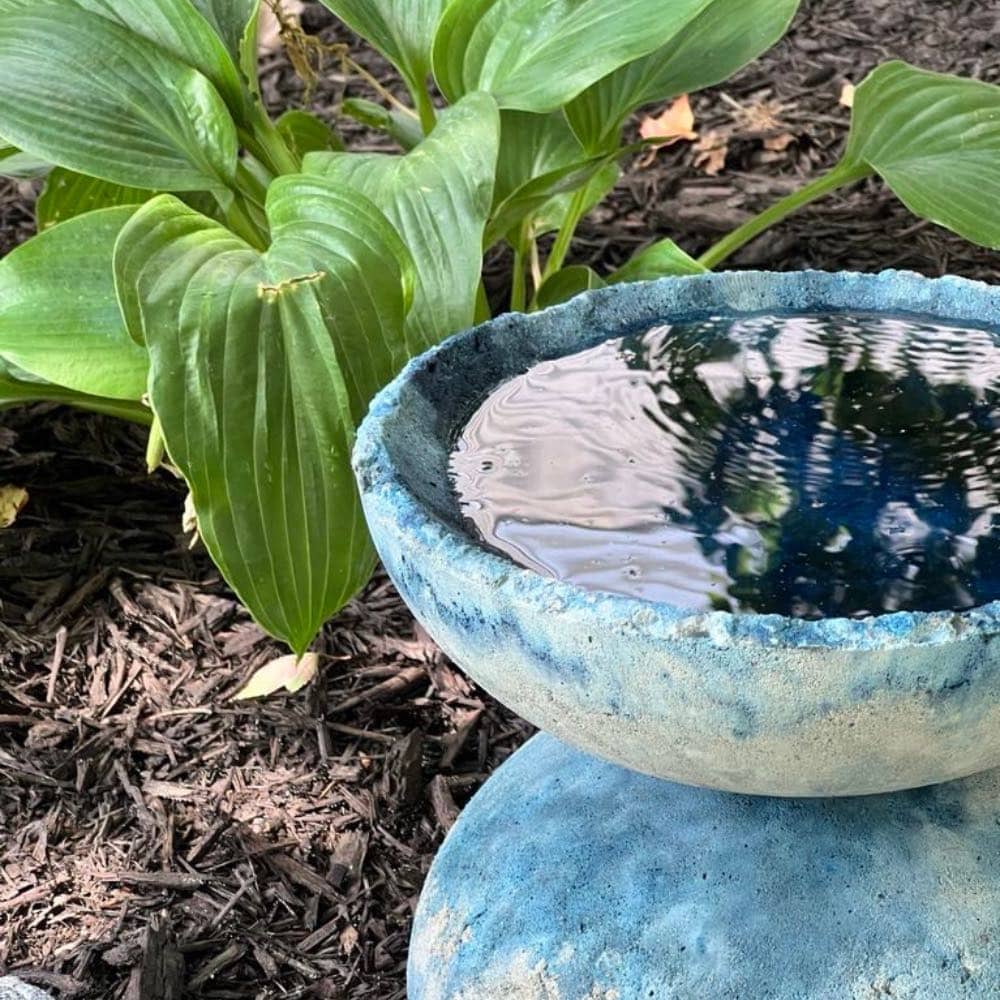
- Easy Garden Project: Tuck your bowl amidst garden greenery and fill it with water. Watch the neighborhood birds flock to your new birdbath!
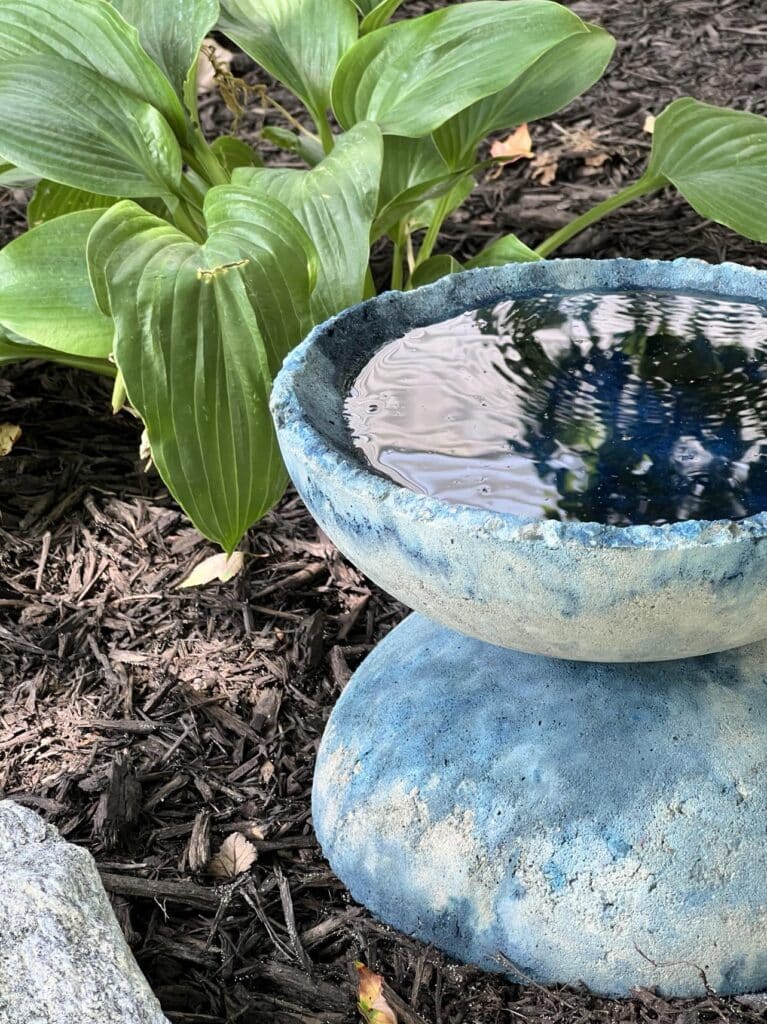
There you have it! With a little creativity, your DIY concrete bowl can transform into anything you imagine.
It’s a perfect smaller project for anyone who wants to add a modern look to their home, especially in small areas.
So have fun experimenting and don’t be afraid to get a little messy! The best part is seeing your unique concrete creation come to life, ready to add a touch of modern flair wherever you display your finished bowl!
Don’t forget to check out all of the Handcrafted Society concrete projects below! You’ll be stirring up concrete in no time!
Cheers!

Don’t forget to pin this for later!
Pin the image below to your boards on Pinterest (just click the Pin button in the top left corner). You can also follow along with me on Pinterest!
Check Out This Month’s HS Projects!
More recent posts
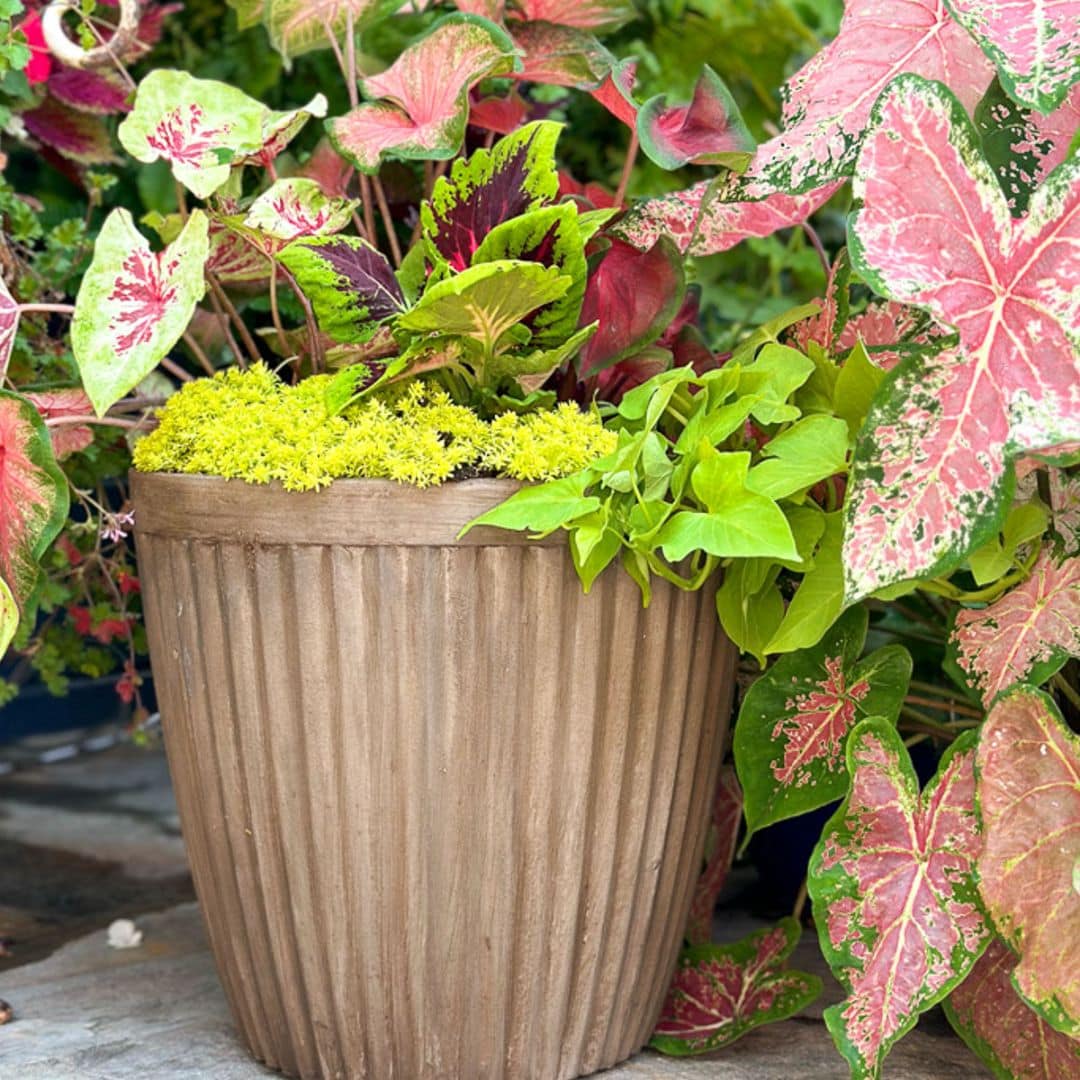
Shop Planters, Pots, and Plates

Hi Missy! I absolutely love the look of your concrete bowl! Your creativity never ceases to amaze me! I had no idea you could add color to a cement mixture and I love how you made a base for it! It looks great indoors and out! Pinning now!
OMG Missy..I LOVE this!! How you thought to add blue color to the mixture is just amazing…I love the marbled look of it! What a lovely garden or decor accent..so many uses and will never fall apart. Brilliant!
I love how your brain thinks!!!
I knew when we had concrete coming up, you’d find some way to add color, regardless of what you were going to make. I just didn’t know how!
I love your inventiveness – you are one creative lady!!!
And your new pot is so charming!
What a fantastic project! I love the blue color, and how you can use the planter bowl as a water feature. You are amazing Missy!
Missy – I had NO IDEA you could buy liquid cement colors! Your project looks amazing! Your projects are always great because you incorporate such happy colors. You have a signature style!
Fabulous project, Missy! I love the addition of the color and the pattern created by your “color puddles”. Such a beautiful project!
Miss, this is genius! From the powered fabric dye to placing one on top of another. I love the birdbath idea, too. LOVE IT! Pinning.
This looks so fun Missy. I agree w/ everyone, the addition of the blue color makes it extra special. Thanks for the inspiration. XO- MaryJo
This turned out great! Featuring when my link party opens!
Love this project Missy!!
Thank you for sharing your easy concrete bowl plater tutorial at Create, Bake, Grow and Gather this week. I’m delighted to be featuring it at tonight’s party and pinning too.
Hugs ~ Kerryanne
This DIY concrete bowl planter is a fantastic project for adding a modern touch to any space! The step-by-step instructions make it approachable, even for beginners.
I’m so glad you liked the project. This was special one for me as I had never worked with concrete before. Now I can’t wait for my next project using concrete!