Easy Party Pinecones: A Holiday Cheese Ball Recipe
Get ready to spread the joy this holiday season with this irresistible holiday cheese ball recipe. The holidays are all about creating delightful moments, and what better way to do that than by crafting a stunning and scrumptious cheesy centerpiece for your festive gatherings?
I’ll show you how to create a show-stopping pinecone-shaped cheese ball that’s as delicious as it is decorative. Whether you’re hosting a party or looking for a unique contribution to a potluck, this holiday cheese ball recipe is sure to be a crowd pleaser. Thanksgiving, Christmas, or any time of year…dive into the magic of the season and elevate your celebrations with this perfect appetizer!
This blog contains affiliate links. This means a small commission is earned if you make a purchase by using this link. The price you pay will be the same whether you use the affiliate link or go directly to the vendor’s website using a non-affiliate link. As an Amazon Influencer, I earn from qualifying purchases.
Welcome to this month’s Handcrafted Society! This month the theme is pinecones!
If you are visiting from Amy at Chateau Chic, welcome! Don’t you just love her adorable pinecones elves? Just the right touch of whimsy for the holidays!
Holiday Season Party Pinecones
Cream cheese, bacon, and almonds…have I caught your attention?
One of the joys of decorating your home for the holidays is creating fun ways to entertain and present all of the yummy food that you make!
My family loves a delicious appetizer but especially during the holidays. There are some pretty amazing cooks in my family so there is always a fabulous array of food when we are together.
This Christmas cheese ball recipe is a family favorite and is perfect for entertaining and holiday parties.
I love this Christmas photo of my daughters, nieces, and sister!

Our traditional Christmas Eve menu usually consists of a couple of soups paired with lots of dips, sweets, and appetizers. There is a little bit of everything for everyone!
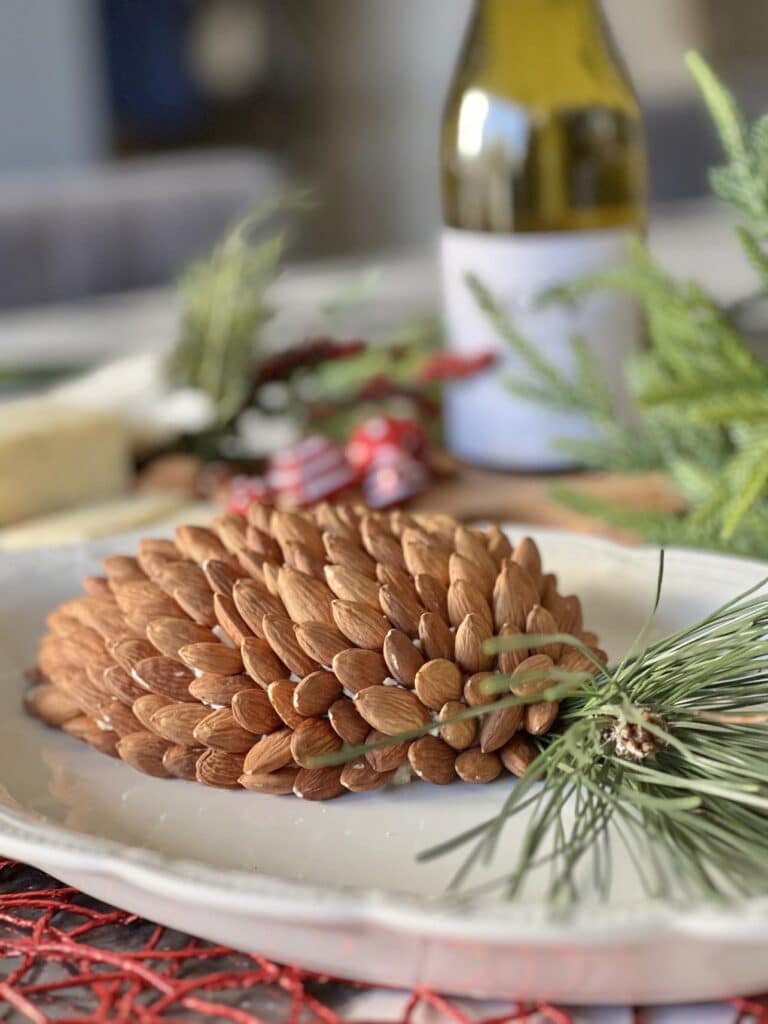
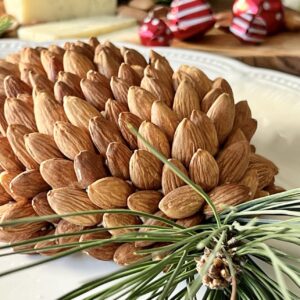
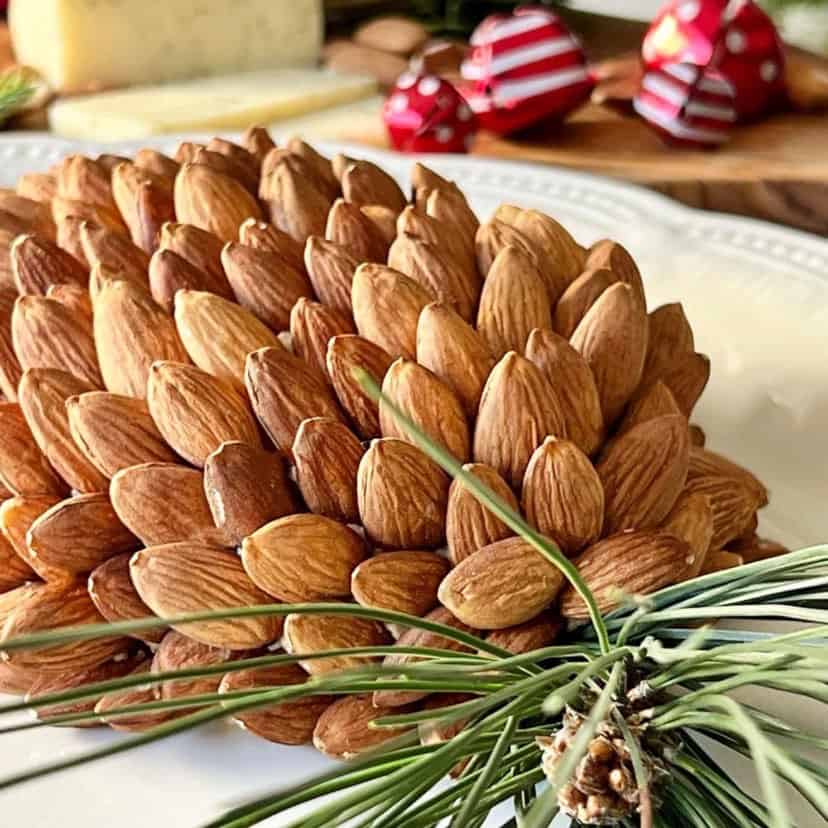
We love this classic cheese ball recipe with a little nutty twist…shaped and decorated as a holiday pine cone!
You are going to love serving this at your next holiday party!
Why You’ll Love This
I have made a lot of cheese balls over the years and I consider this recipe to be one of the best. Here’s why!
Simple ingredients – no last-minute run to the grocery store!
Quick to make – Got 15 minutes? You can make this easy cheese ball recipe in a jiffy!
Classic appetizer flavors – nothing beats cream cheese and bacon!
Edible centerpiece – By adding some pine cone “flair”, this is not your typical boring cheeseball. It is a beautiful Christmas party centerpiece!
Tastes SO good! – The best part!
Cheese Ball Ingredients
Here is what you need:
- 1 1/4 cups whole almonds, toasted
- 1 8 oz. package of softened cream cheese (regular or light)
- 1/2 cup mayonnaise
- 5 bacon slices, cooked crispy and crumbled (Sometimes I add more!)
- 1/2 tsp. dill weed
- 1 Tbls. green onions, chopped
- 1/8 tsp. black pepper


How to Make This Holiday Cheese Ball Recipe
Let’s get started!
In a bowl, mix together the room temperature cream cheese and mayonnaise until they are blended well.
Next, add the mayonnaise, crumbled bacon, green onion, dill weed, and black pepper.
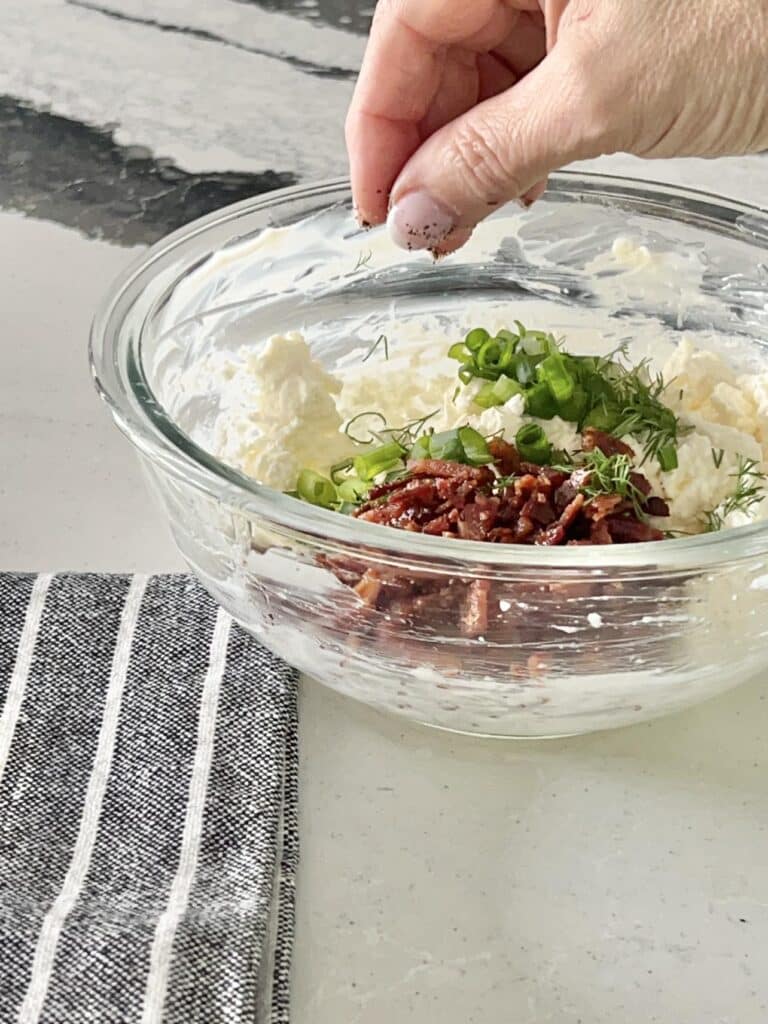
Mix the cream cheese mixture until everything is well combined. Cover the bowl with a large piece of plastic wrap and let it chill overnight in the refrigerator.
How easy is that?
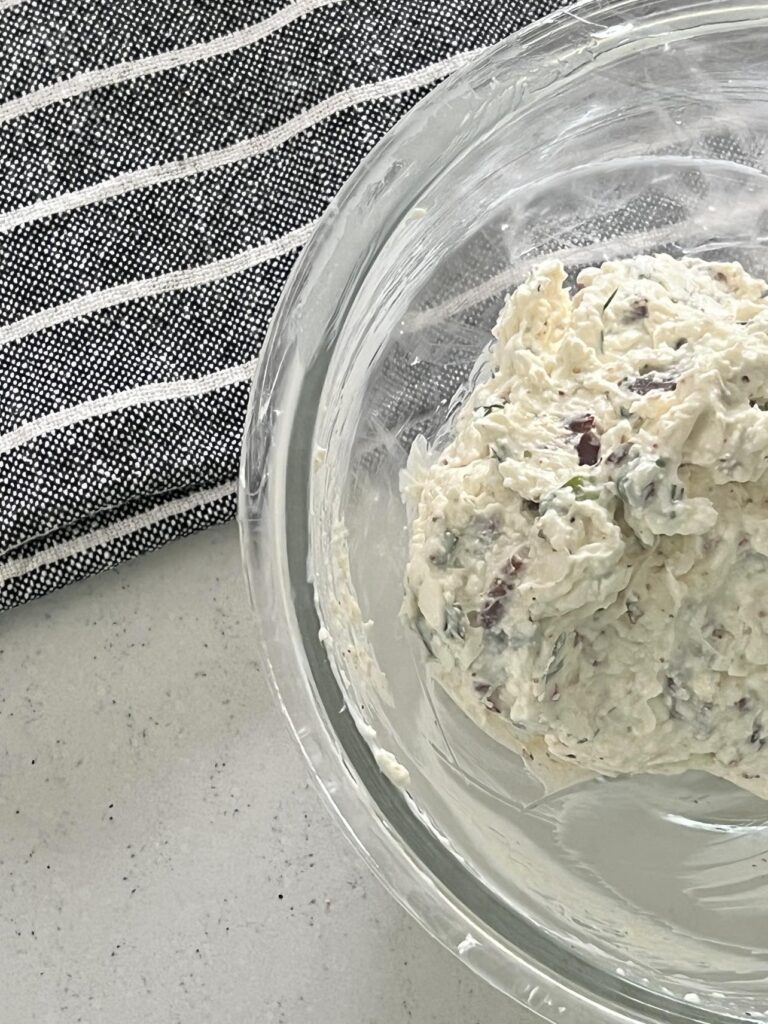
Creating a Pine Cone Cheese Ball
Time to have some fun!
Take the cold mixture from the fridge and shape your mixture into a single large cone shape on your serving platter. (You can also shape two smaller pinecones if you like.)
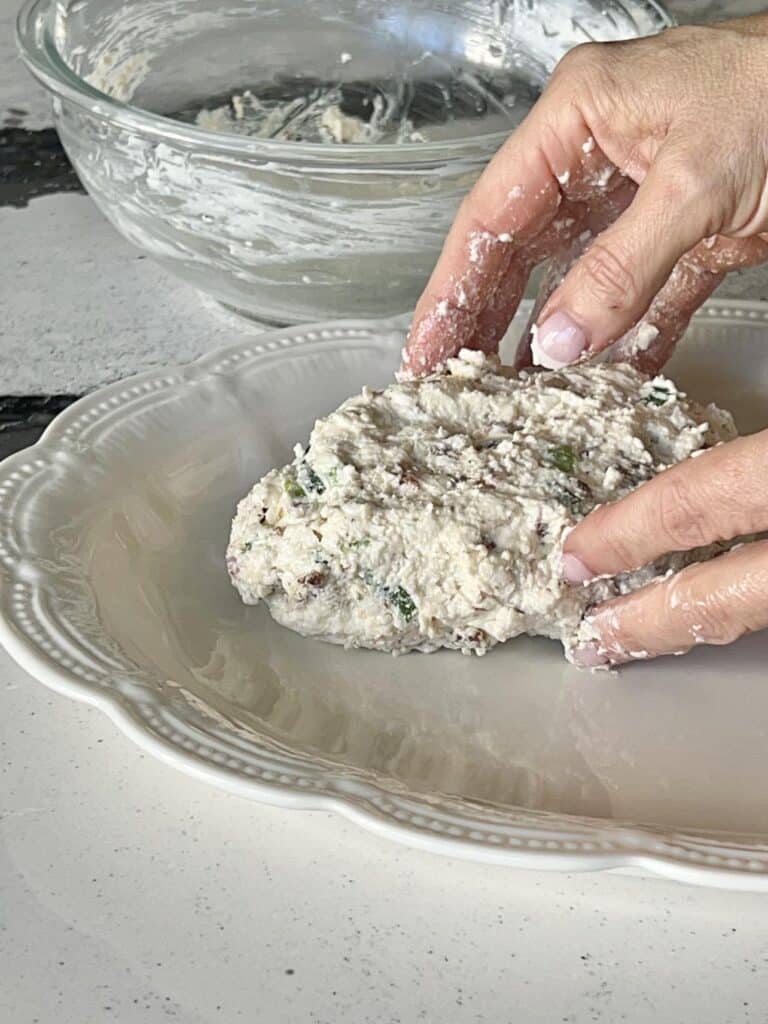
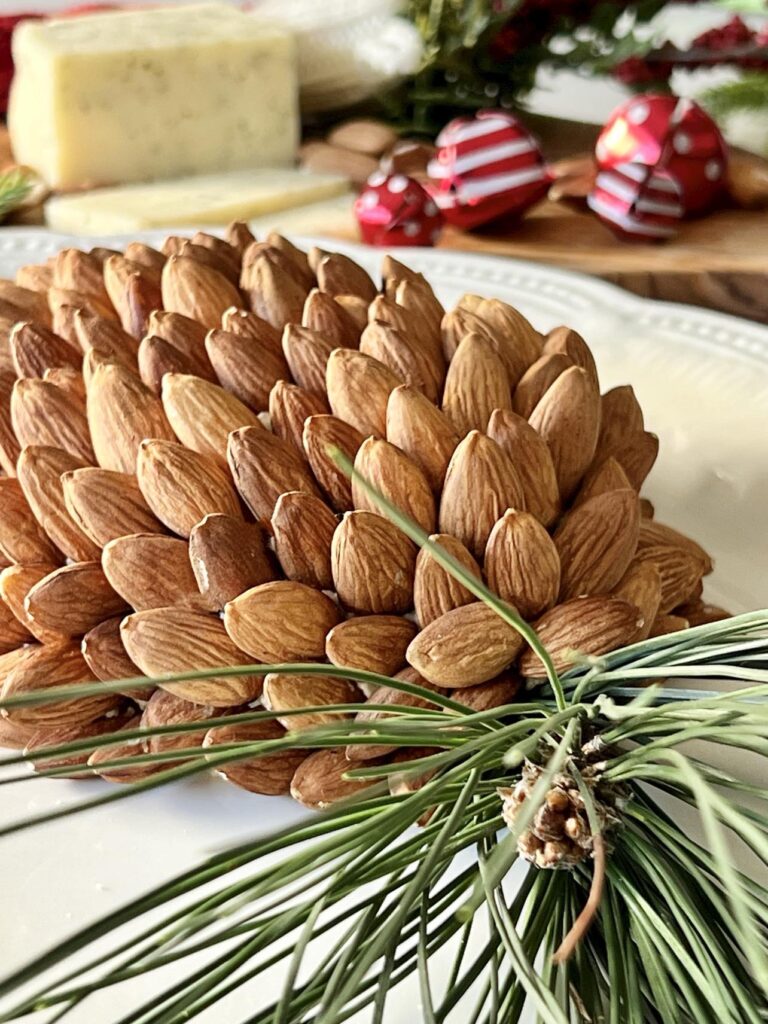
Starting at the pointy end of your shape, gently press those almonds into the cheese mixture, arranging them in neat rows
Continue to arrange the almonds in layers, covering the entire cheese ball.
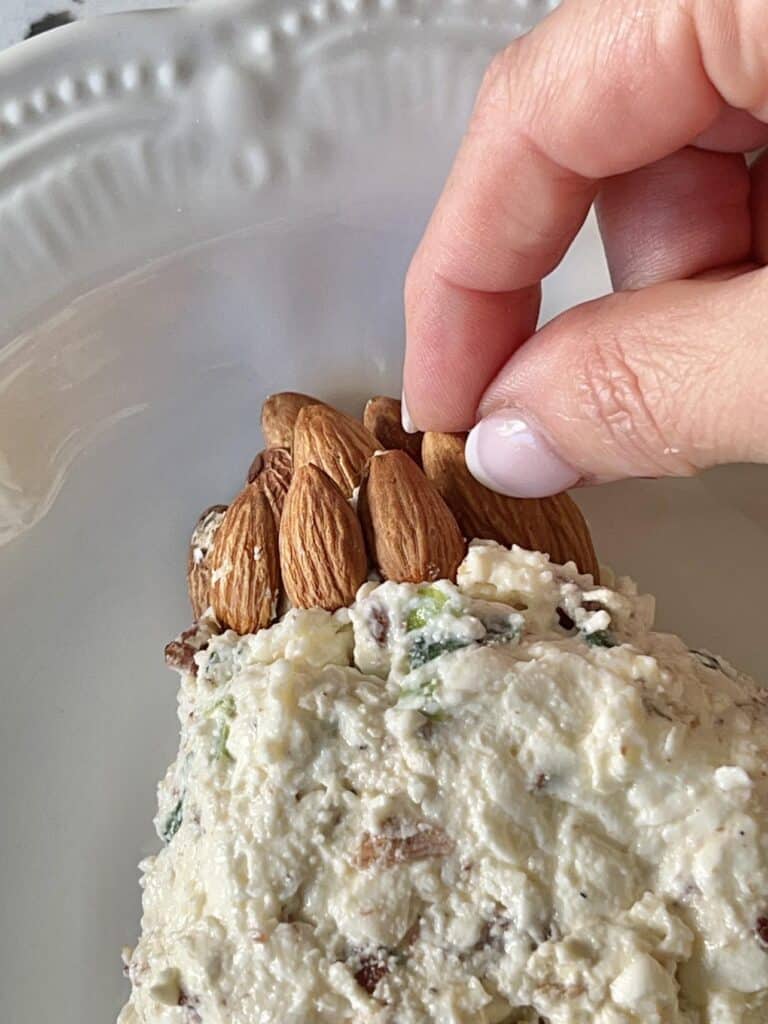
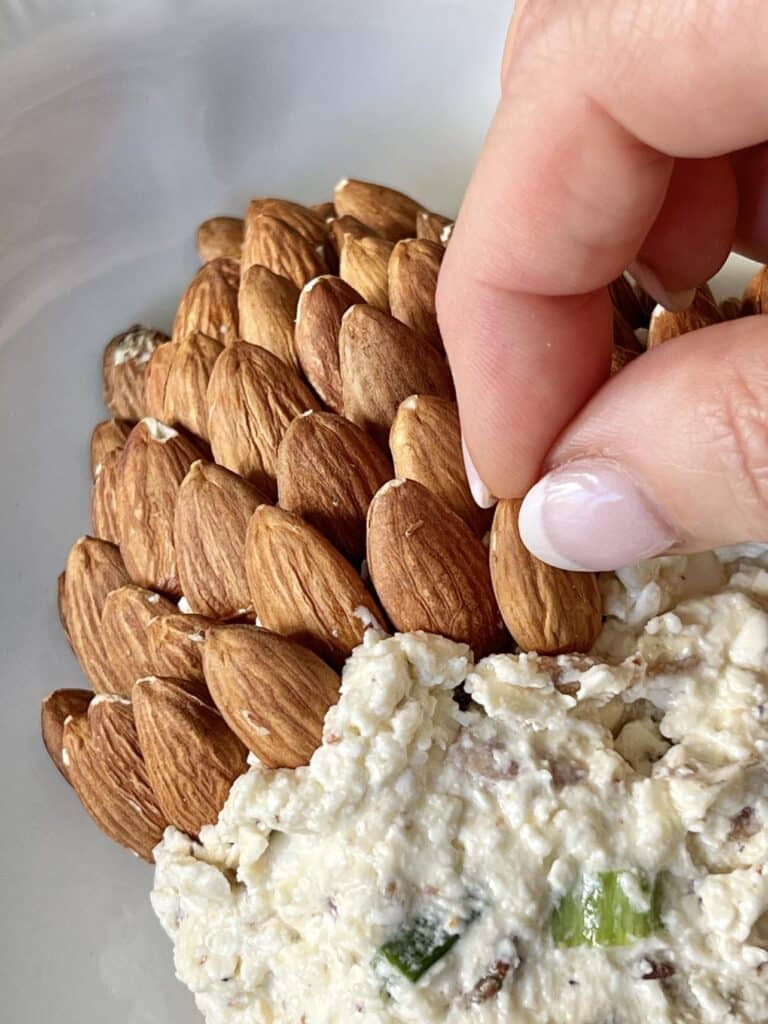
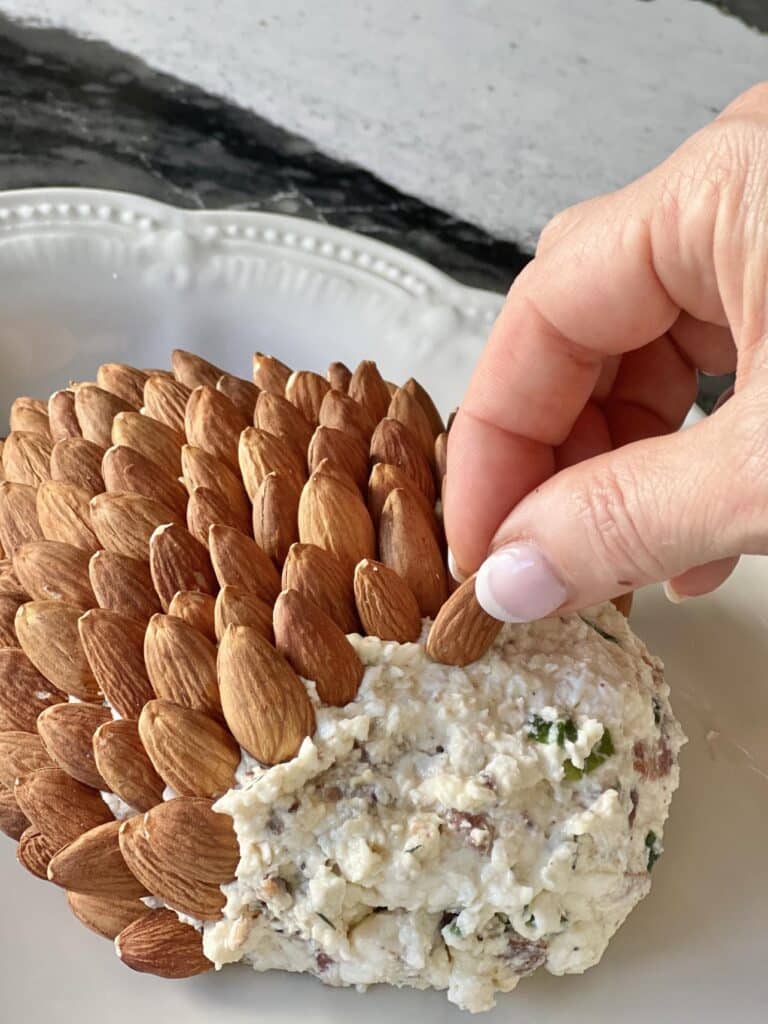
As you approach the broader part of the cream cheese shape, stop pressing almonds for a moment while you create some pine cone magic!
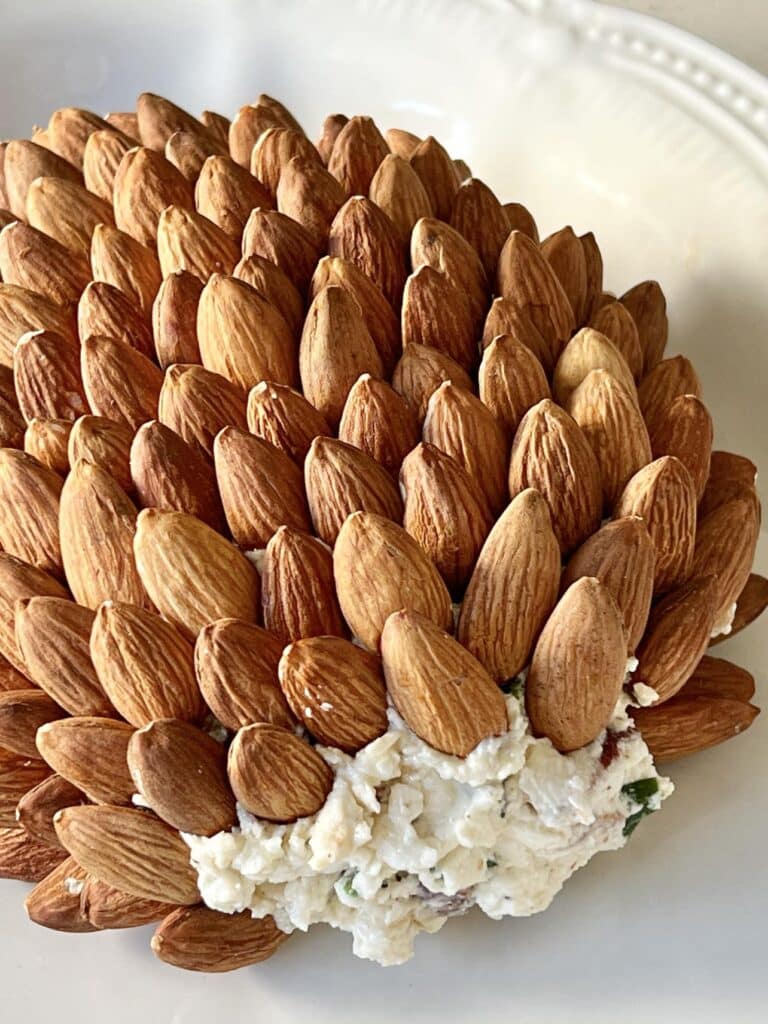
Turning Your Homemade Cheese Ball Into A Pinecone
Here’s a clever touch to add some pine cone flair to your Christmas appetizer:
Head into your backyard or nearest park and clip a small twig from a pine tree.
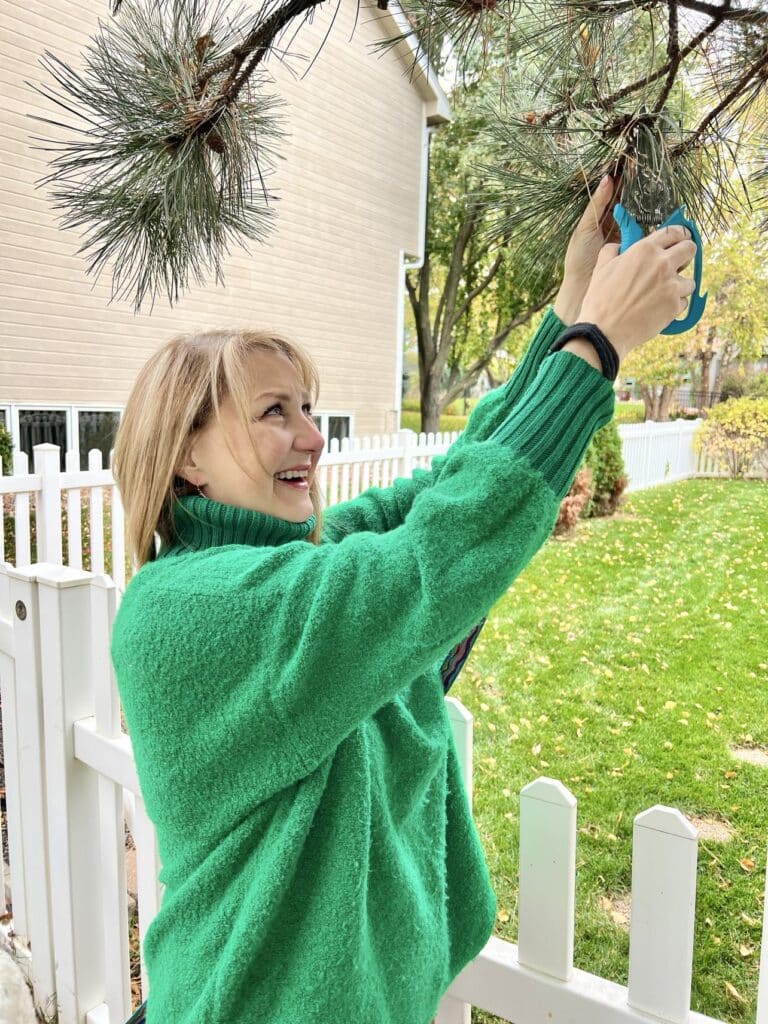
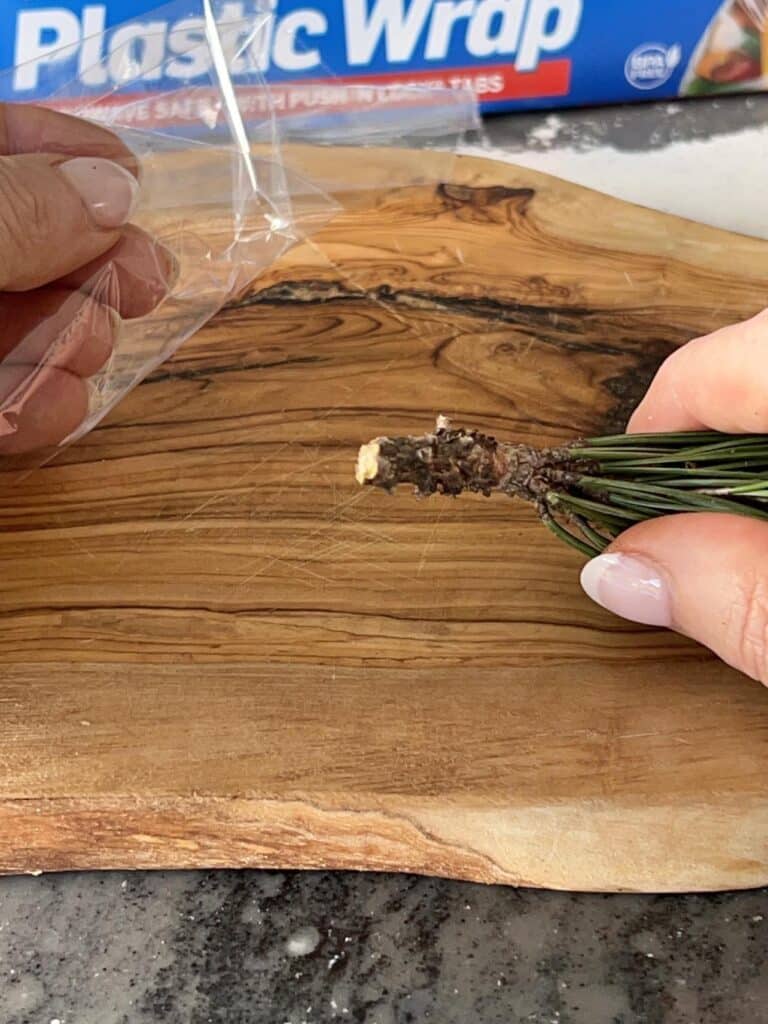
Remove the needles from the bottom so there is about an inch of bare twig.
Next, wrap a piece of plastic wrap tightly around the stem of your freshly cut pine bough and insert it into the underside your ‘pinecone’ cheeseball.
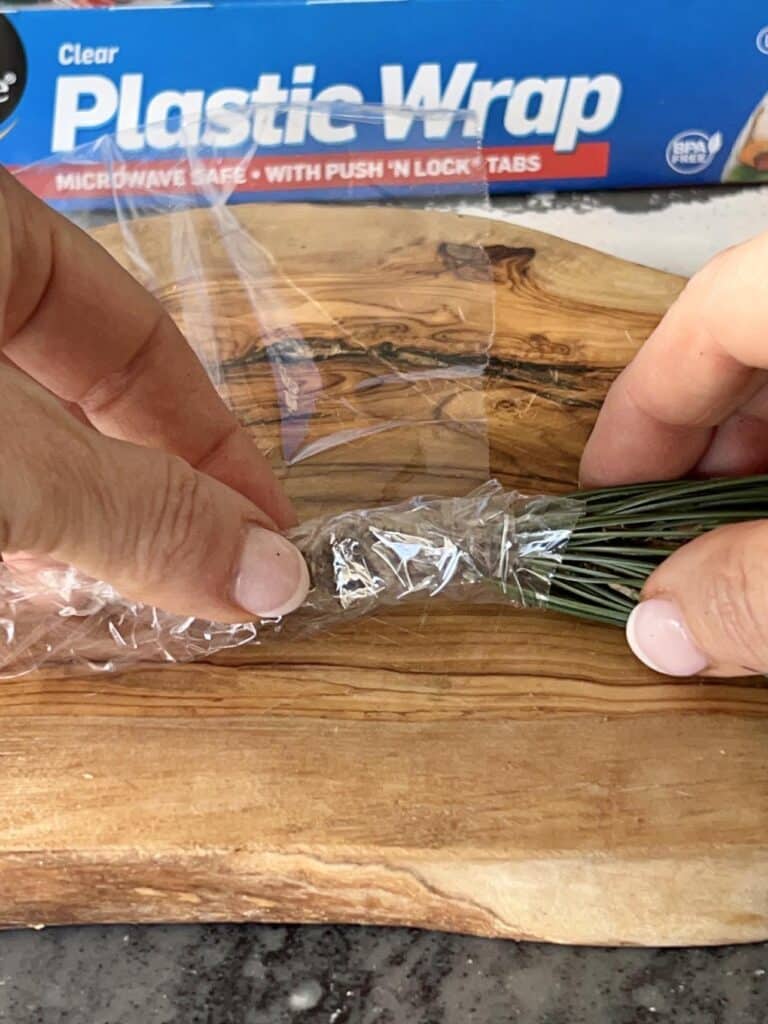
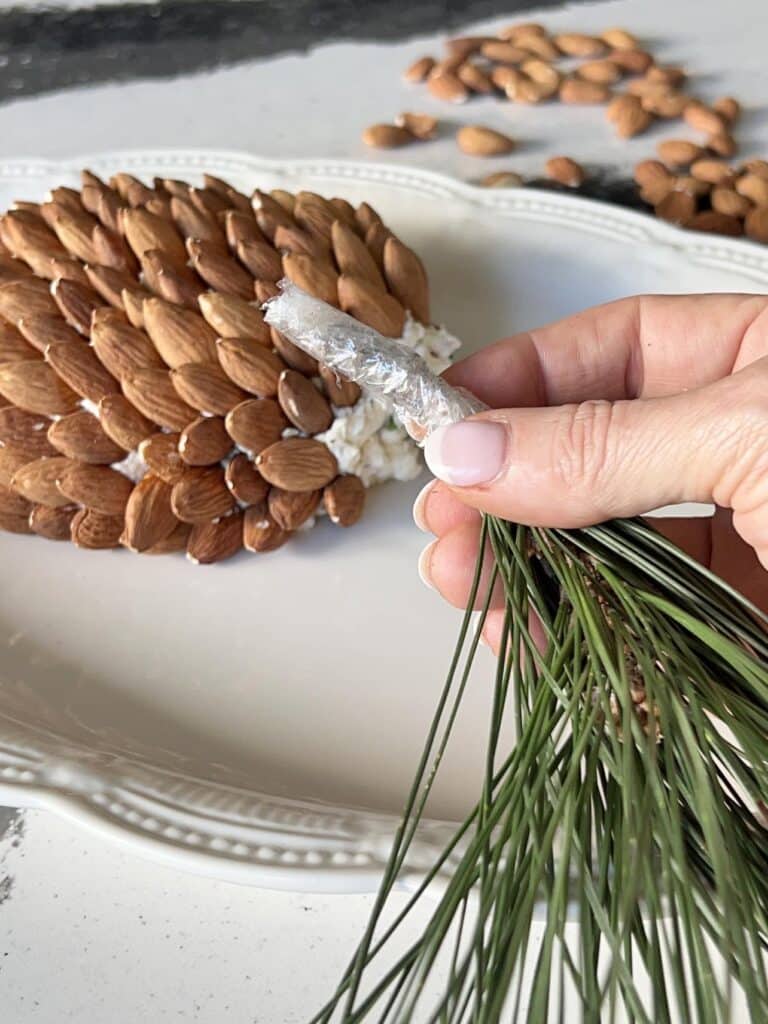
It’s a party pine cone cheese ball!

It’ll give your creation that perfect natural finishing touch!
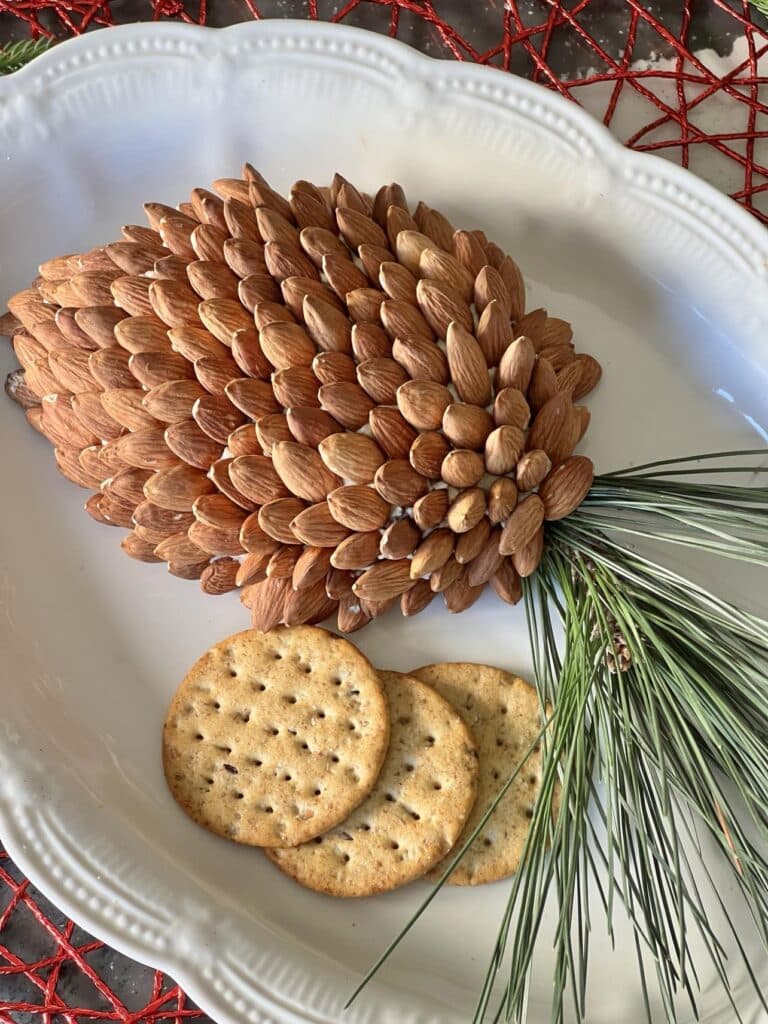
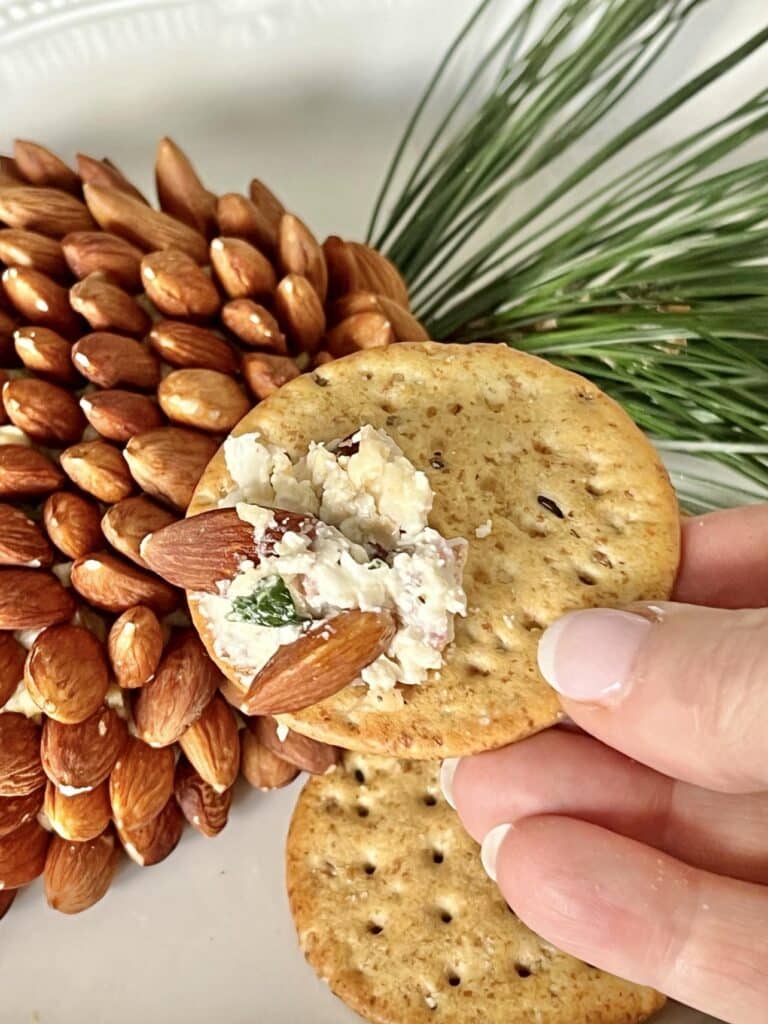
Now, you can scoop up this delightful spread with your favorite crackers, crudite, or rustic bread and enjoy. (My family loves good ‘ole Ritz crackers!)
Pinecone Holiday Cheese Ball Recipe
Equipment
- 1 Mixing bowl
- 1 knife
- 1 Large spoon
- 1 Sheet Plastic Wrap
- 1 Serving platter or tray
- 1 Scissors
Ingredients
- 1 1/4 cups whole almonds, toasted
- 8 ounces cream cheese (regular or light), softened
- 1/2 cup mayonnaise
- 5 slices bacon, cooked and crumbled
- 1 Tbsp. green onion, chopped
- 1/2 tsp. dill weed
- 1/8 tsp. black pepper
Instructions
- Combine the cream cheese and mayonnaise in a bowl and mix well.
- Add the bacon, green onion, dill weed, and black pepper. Combine well, cover with plastic wrap, and chill in the refrigerator overnight.
- Form the mixture into the shape of a large pine cone.
- Starting at the narrow end of the shape, press almonds into the cheese mixture, creating rows at a slight angle upward. Continue until all of the cheese is covered.
- Wrap the end of a fresh pine bough with plastic wrap and place under the broad end of the cheese mixture shape.
- Serve with crackers, crudite, or rustic bread slices.
How to Toast Almonds
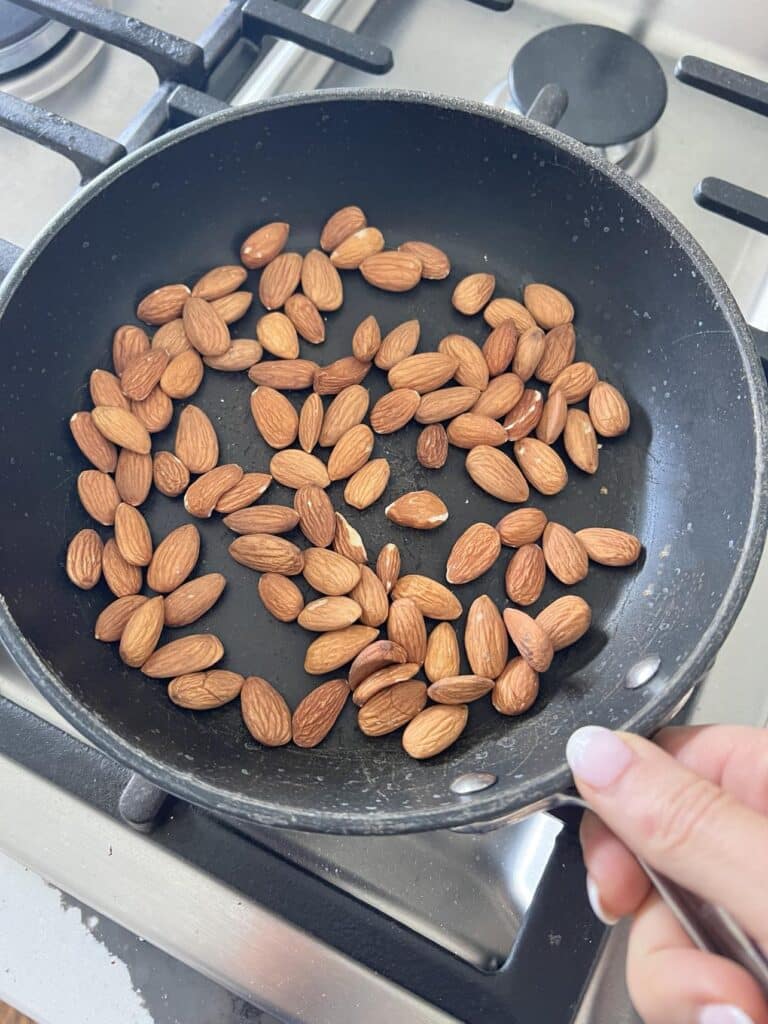
Toasting almonds is super easy, and it’s a game-changer for adding extra flavor and crunch to your dishes. Here’s how to do it:
- Get Your Almonds: First, grab a handful of raw almonds. You can use whole almonds, slivered almonds, or almond slices – your choice!
- Heat a Pan: Take a pan, any non-stick one will do. Put it on the stove over medium heat. No need to add any oil or butter, just a dry pan.
- Add the Almonds: Toss your almonds into the pan and stir them around occasionally with a spatula over medium-low heat. Keep an eye on them because they can go from toasty to burnt pretty quickly.
- The Aroma Test: You’ll know they’re ready when you start smelling that wonderful, nutty aroma. It usually takes about 5-7 minutes, but watch for that lovely scent.
- Golden Brown: Keep stirring until the almonds turn a beautiful golden brown. They’ll be slightly crispy, too.
- Cool Them Down: Once they’re toasted to perfection, remove them from the pan and transfer them to a plate. This is important because they can continue to cook in the hot pan even after you’ve turned off the heat.
Easy Flavor Additions
One of the great things about this cheese ball recipe is that you can customize the flavors! Here are a few ingredients you might consider adding to add your own personal touch. Just a little bit of any of these ingredients would be a tasty addition to your homemade cheese ball.
- Favorite fresh herbs
- Garlic powder
- Sesame seeds
- Parsley leaves
- Lemon juice
- Red Pepper flakes
- Hot sauce



Wishing You a Cheesy Holiday!
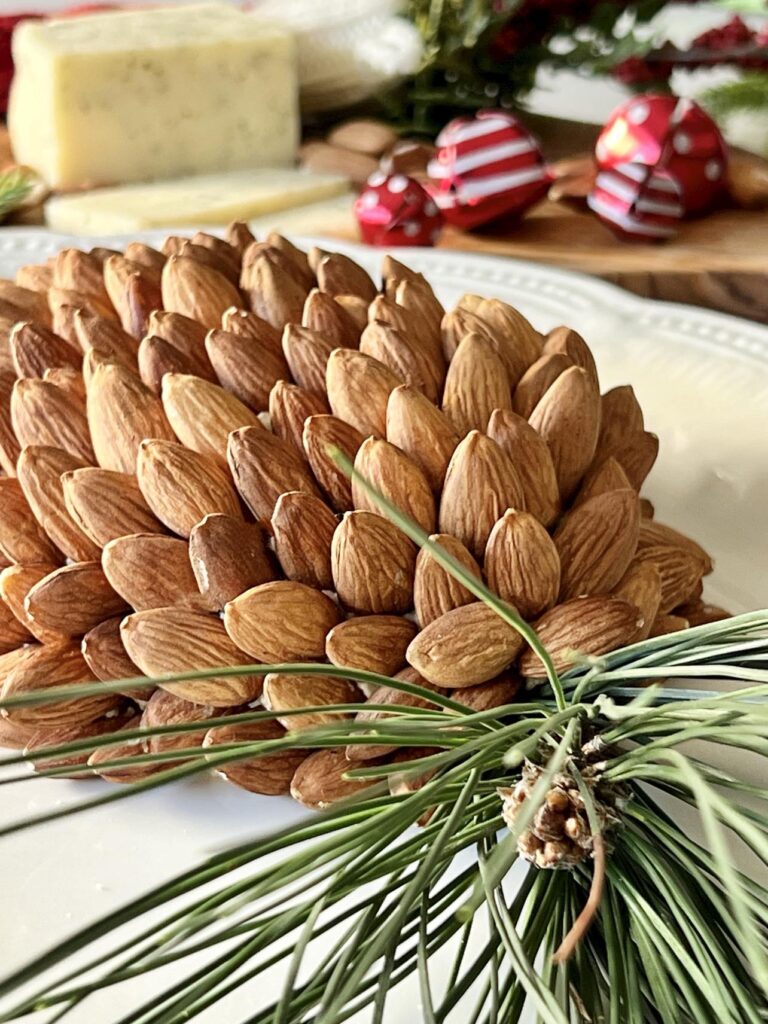
From my kitchen to yours, I hope this holiday cheese ball recipe adds a touch of magic to your celebrations.
Share it with loved ones, and watch their faces light up as they savor this delectable creation! Wishing you a joyous and cheese-filled holiday season, filled with laughter, love, and, of course, great food!
Don’t forget to check out the rest of the Handcrafted Society’s pine cone tour! Head over to Hen and Horse Design. Susan has designed gorgeous pine cone topiaries for your front porch that I can’t wait to try!
Happy Holidays!
Cheers!

Don’t Forget to Pin It!
Pin the image below to your boards on Pinterest (just click the Pin button in the top left corner). You can also follow along with me on Pinterest!
More Holiday Recipes
Chocolate Truffle Christmas Tree




Missy it’s always win win when you have a recipe that’s both delicious and eye pleasing! The pine branch makes such a pretty presentation! I’ll be making this cheese ball recipe during the holidays!
Thank you, Michelle! It is always a treat to share projects with you each month with the Handcrafted Society!
Yum! I’ll be right over with crackers!
Sounds good!
Yum Yum, this not only sounds delicious, but it looks so pretty! I love the fresh pine on the top. Such a great holiday appetizer. And yes, you had me at bacon and cheese :)))
You can never go wrong with bacon and cheese! LOL!
Anything with bacon, count me in! Looks delicious and pretty! Nice joining you ladies, this month. Happy holidays!
We loved having you join us, Kim!
Wow!! Quite impressive Missy!! This looks yumm-o!!
Thank you so much, Jennifer!
Missy I love this! It not only looks fantastic I’m guessing it’s delicious! Can’t wait to try it!
Thank you, Susan! High praise from my favorite master chef!
This looks SO good, Missy and look how cute it is!!! Such a creative treat for any holiday gathering. Thanks so much for sharing at Home Imagined this week!
Thank you, Rachel! I hope your holiday season is off to a great start!
This sounds delicious, and it’s such a beautiful display! I’d love to invite you to share on Tell It Me Tuesday, you can find this weeks here: https://perfectlyimperfect-lwl.com/tell-it-to-me-tuesday-24-11-28-23-link-party/
I am honored, Lyndsey! I’m so glad you like it! Thank you so much!
I love this and I’m so making this for my holiday party and also for my daughter’s woodland baby shower.
Ooh! I’m so glad you like it, Michele! I think your guests will love it! Thank you so much for giving it a try!
I saw this at another blog party – this is beautiful!! I’m thinking of making one for my Christmas appetizers. Thanks for sharing at the What’s for Dinner party.