

Transform Your Desk in a Day: An Easy DIY Desk Pad How-To
Is your desk in need of a little upgrade? A DIY desk pad might be just the thing to add some style and function to your workspace! You can craft a personalized desk pad that not only looks great but also makes your desk more comfortable and organized.
This easy project is perfect for anyone looking to refresh their space without spending a fortune. Let’s dive in and get your desktop looking brand new!

This blog contains affiliate links. This means a small commission is earned if you make a purchase by using this link. The price you pay will be the same whether you use the affiliate link or go directly to the vendor’s website using a non-affiliate link. As an Amazon Influencer, I earn from qualifying purchases.
Desk Chaos or Elegance?
I have two visions of a desktop in my head.
The first is of a desk with piles of papers, files, and sticky notes with a mish-mash of other “necessary” paraphernalia. It looks untidy and disorganized. (But I probably still know where everything is).
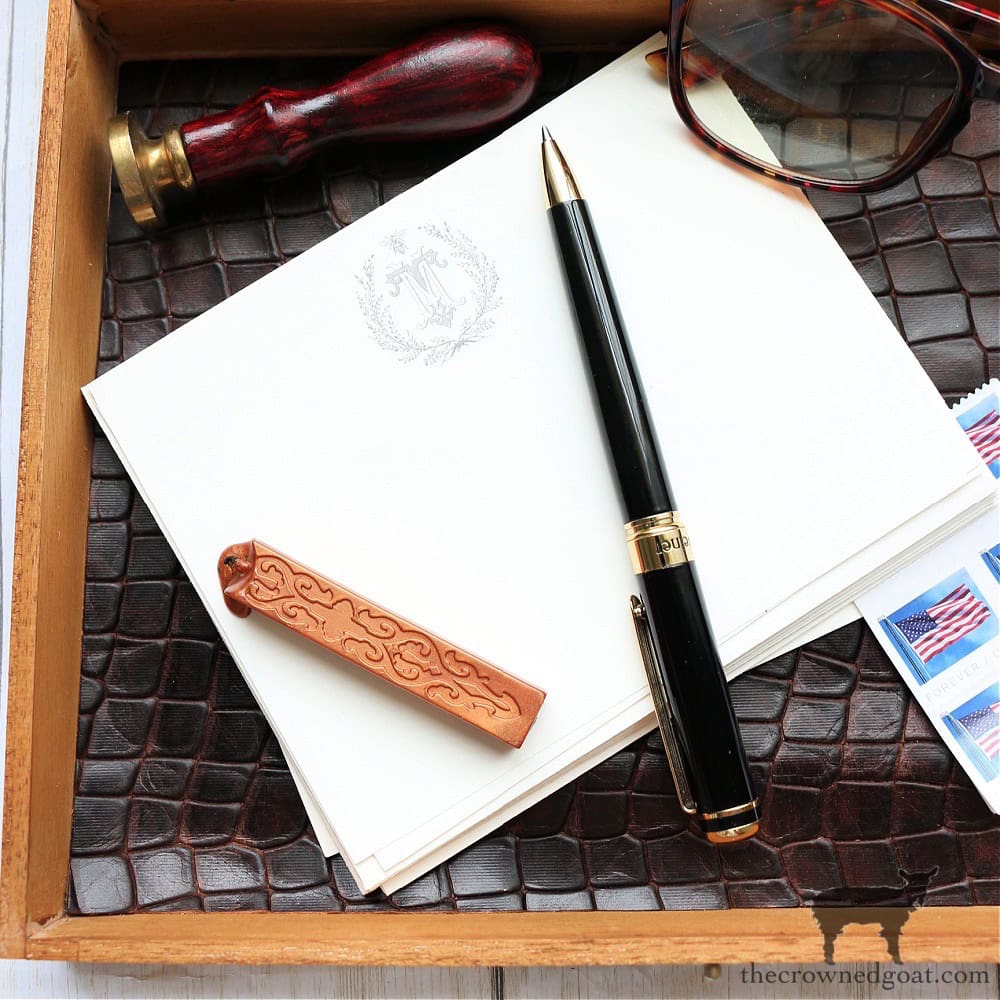
The other vision is of a lovely writing desk. But this desk holds a handwritten letter in beautiful script. The letter has just been opened with an elegant letter opener sitting on top of a beautiful leather desk blotter.
Just the kind of desk (or desktop) that Elizabeth Bennett would have used when writing and reading her letters in Jane Austin’s Pride and Prejudice!

Yes, I am prone to romanticizing…
I would love to bring this second vision to life on a writing table in an upstairs guest room.
But have you ever priced leather desk pads? Yikes! Expensive!
So this month’s Handcrafted Society’s challenge is timely! The challenge by this groups of creative bloggers is to use leather or lace in a project. I came across this beautiful blue faux leather and knew I had to use it!
Creating a DIY desk pad is an easy project. And it is perfect for anyone looking to refresh their desk without spending a fortune!
As always, be sure to read to the bottom of the post to check out all the other creative projects. I am always amazed at what everyone comes up with!
If you are new to Sonata Home Design, WELCOME! My name is Missy and I love anything to do with decorating, creating, and sharing all the joys of home!
DIY Desk Pad Supply List
Before we get to work, let’s gather all the supplies you’ll need for this DIY desk pad:
- Leather or faux leather fabric
- Woven fabric drapery trim tape
- Felt fabric
- 2 pieces of thin MDF board or high-density fiberboard (even a thick piece of cardboard will work)
- Measuring tape or yardstick
- Utility knife or box cutter
- E6000 glue
- Scissors
- Spray adhesive
- Hot glue gun and glue sticks
Got everything? Great! Let’s move on to the fun part.

Step-by-Step Instructions for Your DIY Desk Pad
Creating your own DIY desk pad is easier than you might think. Follow these steps, and you’ll have a custom piece that fits perfectly on your desktop, and adds a splash of color to your home office space.
Measuring and Creating the Desk Pad Base
The first step in any project like this is making sure you’ve got the right size pad for your desk. Whether you’re looking for a full desk mat or something smaller, the size is totally up to you. The standard size is usually around 18 x 24 inches, but feel free to customize!
- Measure your desk to decide on the right size for your pad. For my desk blotter, I went with a 26″ width as I wanted something a little wider to cover more tabletop space.
- Mark your MDF: Using a straight edge and measuring tape (or yardstick if that’s your style), mark the dimensions on one piece of MDF. Use a utility knife or box cutter to score along the marked lines and cut the MDF to the desired size. (if your MDF is thicker, you may need a circular saw.)


- Cut the second piece of MDF: This piece will be slightly smaller. Cut it about ½ inch to 1 inch smaller on all sides. This smaller piece will create a nice “lip” that helps the fabric wrap smoothly around the edges without adding bulk.
- Glue the MDF boards together: Using E6000 glue, center the smaller MDF piece on top of the larger one and glue them together. This will give your desk pad a sturdy base with a lip for attaching the leather.

Adding the Leather
Now it’s time to wrap this desk blotter in some chic leather (or faux leather like me)!
- Cut the leather: Lay your leather out flat and cut it about 1 inch larger than the large MDF board on all sides. This extra fabric will be wrapped around the edges of the board to give it a clean, finished look.

- Spray adhesive time: Take your connected MDF boards outside and apply spray adhesive to the back of the larger side (not the side with the smaller MDF board). I have learned from experience to always use spray adhesive outdoors. It can really make a sticky mess!
- Adhere the leather: After letting the adhesive sit for a minute or two, bring the boards back inside and center them—sticky side down—on the back of the leather piece. Press down firmly to ensure everything sticks together smoothly.


Taking Care of the Corners and Edges
Now for the part that makes it all come together—wrapping those long edges and corners
- Trim the corners: Using scissors, trim the corners of the leather at an angle. This reduces bulk and makes it easier to wrap around the MDF board.
- Glue the edges: With your trusty hot glue gun, glue each corner first, then wrap the leather around the long edges of the board. Work your way around the desk pad, pulling the leather taut as you glue it down. Be sure to press firmly so there are no air bubbles or gaps.


Adding Decorative Fabric Tape
You could stop here and admire your new deskpad, but why not add a little flair? Woven fabric trim tape is a great way to add some personality and function to your desk pad.
- Cut the fabric trim tape: Measure and cut two pieces of tape that are a couple of inches longer than the height of your desk pad.

- Wrap and glue: Wrap each piece around the height of the pad and hot glue the ends on the back side, securing them in place. Make sure to pull the fabric taut as you glue it so securely hugs the leather and the board.


The Finishing Felt Touch
No one will see the back of your desk pad, but it’s still nice to cover it for a polished finish. This will also protect your desktop and give the pad a sturdy base.
- Cut the felt: Measure and cut a piece of felt fabric that’s about ¼ inch smaller than your desk pad on all sides.
- Glue it down: Using your hot glue gun, glue the felt along the edges and corners of the back side of the MDF. This adds a nice finish to the back and makes sure everything looks neat—even on the bottom!


Bonus: Making a Custom Mouse Pad
Want to go the extra mile and make a custom mouse pad to match? The process is the same, just on a smaller scale!
- Cut a smaller piece of MDF: Decide on the size of your mouse pad (about 9 x 7 inches is standard mouse pad size). Follow the same process of cutting the MDF, wrapping it in leather, and finishing the edges.
- Finishing touches: Add felt to the bottom, just like with the desk pad, and you’ve got a chic, matching mouse pad!
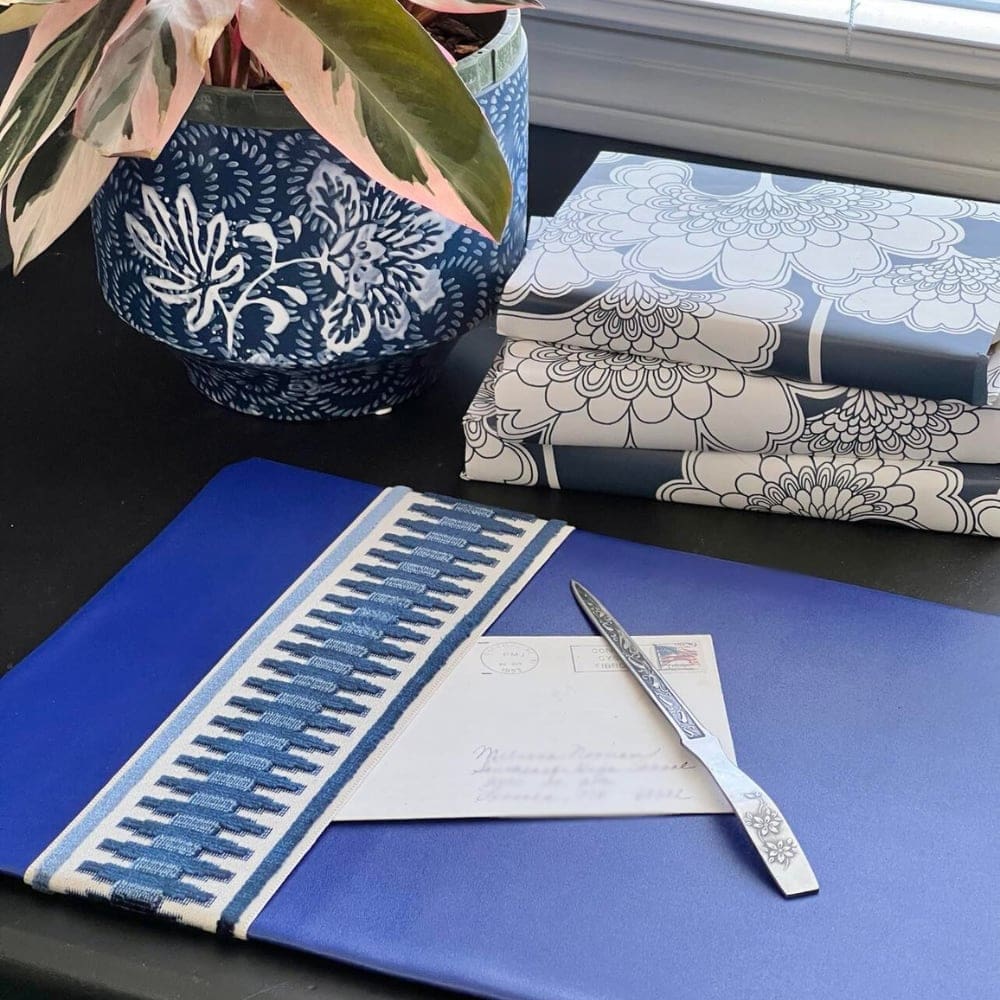
A DIY Desk Pad Fit for Lizzie B.!
Elizabeth Bennet (and, honestly, Mr. Darcy too!) would love to write a letter at this desk!
With your new desk pad, your desk is ready for action. It’s a great way to protect your space, organize your work area, and add some style to a home office or bedroom writing desk.

Believe it or not, I still like to write the occasional letter.
And this writing desk, complete with a classic but colorful desk pad, is the perfect place for this task!
Give this project a try and let me know how it goes!
Don’t forget to check out the other leather and lace project by the Handcrafted Society down below!
Cheers!

Handcrafted Society Leather and Lace

A Little About Me
Hi! I’m missy. So happy to meet you!
“Decorate with Joy! Live with Happiness”
I truly believe that your home should be a reflection of your personality, a space where you feel free to express yourself and create a sanctuary that feels uniquely yours.
I love creating mood boards, hunting down unique home décor treasures, tackling easy DIY projects, and gathering with family and friends. Homes are meant to be enjoyed, filled with laughter, and shared with the people you love!
– cheers –
Don’t Forget to Pin It!
Pin the image below to your boards on Pinterest (just click the Pin button in the top left corner). You can also follow along with me on Pinterest!


Desktop Shoppe

LOVE!! Such a great idea!! What a beautiful color you chose and I do love how it makes a desk just ‘feel’ more put together.
Thanks, Rachel! Now I just need to keep it tidy. I’m famous for piles of paper on my desk!
Love this idea so much, Missy! I have a small writing desk that I’ve been having the hardest time finding a blotter for so I’m super excited to make my own now. I love the color leather you chose and the fabric embellishment you added too. It’s beautiful and would make a fabulous gift idea too! Thanks for the inspiration, CoCo
Thanks, CoCo! My desk is also small so it was nice to be able to customize the shape. Thank you for your sweet words! I love being in the Handcrafted Society with you!
Hi Missy, this is such a great idea to elevate the look of a desk! The color leather you chose is so pretty and the decorative fabric tape adds so much interest! Love your creativity!
Thank you, Donna! I was thrilled to find all sorts of colors in the faux leather! Have an awesome week!
What a beautiful project, Missy! I love the color of leather you used, and the trim is just perfect! This is such a creative idea!
Thanks, Kim! I should say that the leather drove the project. But it was really the trim that inspired me! I was lucky to find leather to match!
Missy – First, I love how you always incorporate bright colors into your projects. It’s such a signature style. When I see an image of something you create – right away I know -“Oh that must be by Missy”. Thanks for the idea of creating a desk pad! Such a useful item and fairly easy to make. Plus I like that it can be customized to reflect a person’s style or interests. Always fun participating in the HCS with you. Have a fabulous week.
You are SO SWEET, Anna! Your kind words really made my day! I’m so glad we are in the Handcrafted group together. It has been so fun to get to know you and your style! Wishing you an amazing week!
What a fun group to belong to! It would be fun to create with others like you do! I love your project, and the vision of Miss Bennett at her writing desk 😀💛
Hi Michelle! I’m a little obsessed with “Pride and Prejudice”! lol. Fun to decorate with a little literary inspiration! Wishing you an amazing day!
What a beautiful piece — and I love the color, Missy! I’ve never thought about making my own deskpad. GENIUS!
You are too sweet, Kelly!
Your desk pad turned out absolutely beautifully, Missy. I love the pretty deep blue color you chose! So pretty!
Thank you, Jen! I found the ribbon first, fell in love, and then got lucky with the blue leather!
What a fantastic guide on transforming your workspace! This easy DIY desk pad project is perfect for anyone looking to refresh their setup. It’s a great way to enhance the functionality and style of small L shaped desks. Thank you for sharing these simple yet effective tips!
I love the idea of using this on an L shaped desk! I would love to see how you use it if you try the project!
Love this DIY — super inspiring without being over the top 👍 I never thought making my own desk pad could be this easy or stylish.
Thank you so much!