

DIY Pumpkin Decor: A Creative Pumpkin Kissing Ball for Fall
Are you looking for a fun and unique way to spruce up your fall decor? This DIY pumpkin decor project is the perfect solution! In just a few simple steps, you can create a beautiful pumpkin kissing ball that will bring charm and warmth to your outdoor spaces this fall season.
Whether you’re decorating your porch or patio, this creative piece is sure to be a standout addition to your autumn home decor. Let’s get started!
This blog contains affiliate links. This means a small commission is earned if you make a purchase by using this link. The price you pay will be the same whether you use the affiliate link or go directly to the vendor’s website using a non-affiliate link. As an Amazon Influencer, I earn from qualifying purchases.
This blog contains affiliate links. This means a small commission is earned if you make a purchase by using this link. The price you pay will be the same whether you use the affiliate link or go directly to the vendor’s website using a non-affiliate link. As an Amazon Influencer, I earn from qualifying purchases.
Once fall hits, it seems like the world becomes one big pumpkin!
Pumpkin spice latte…
Charlie Brown’s “The Great Pumpkin”…
Plastic pumpkins for trick-or-treating…
And my favorite, DIY pumpkin decorations!
I’m so excited to share one of my favorite pumpkin DIY projects…
It is an easy pumpkin DIY project that anyone can do.
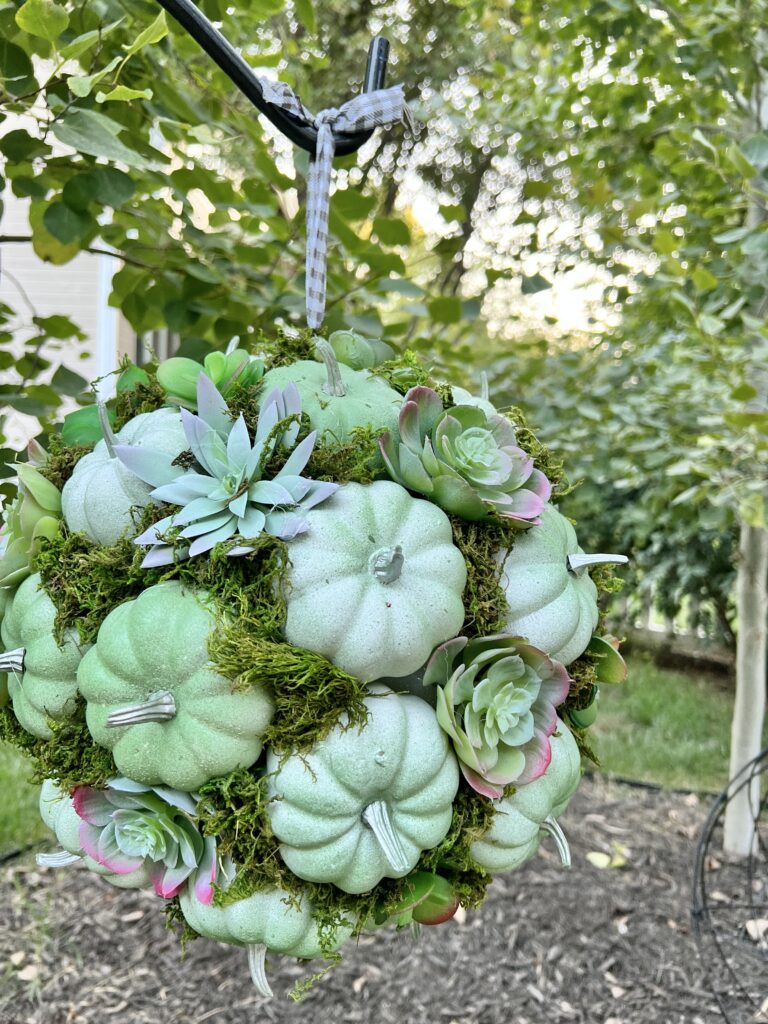
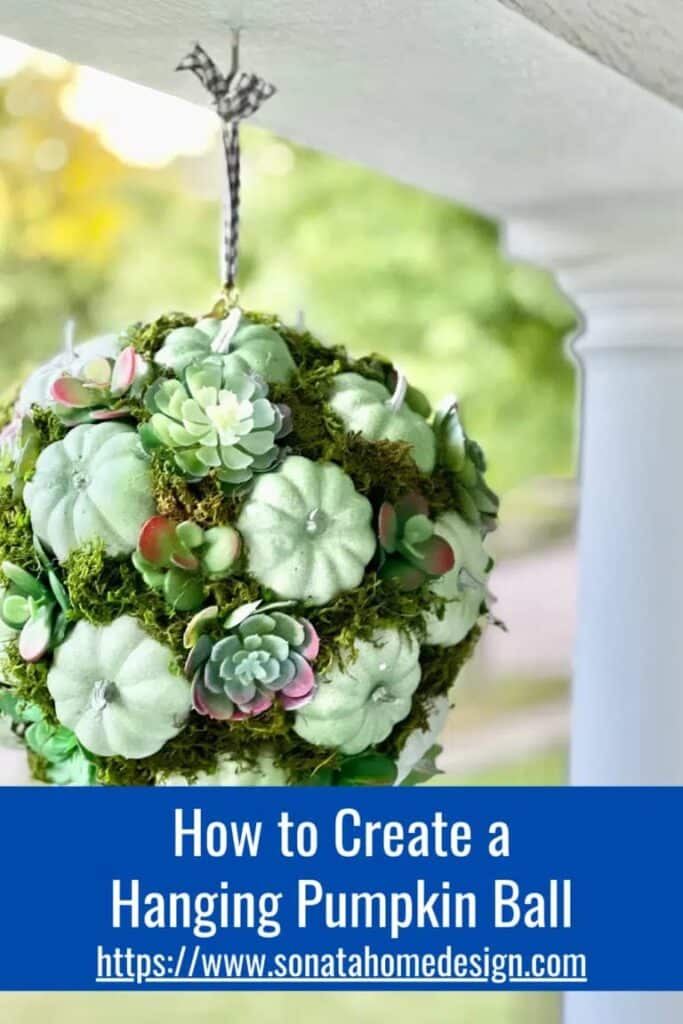
A showstopping outdoor hanging Pumpkin Kissing Ball!
Stay with me here…
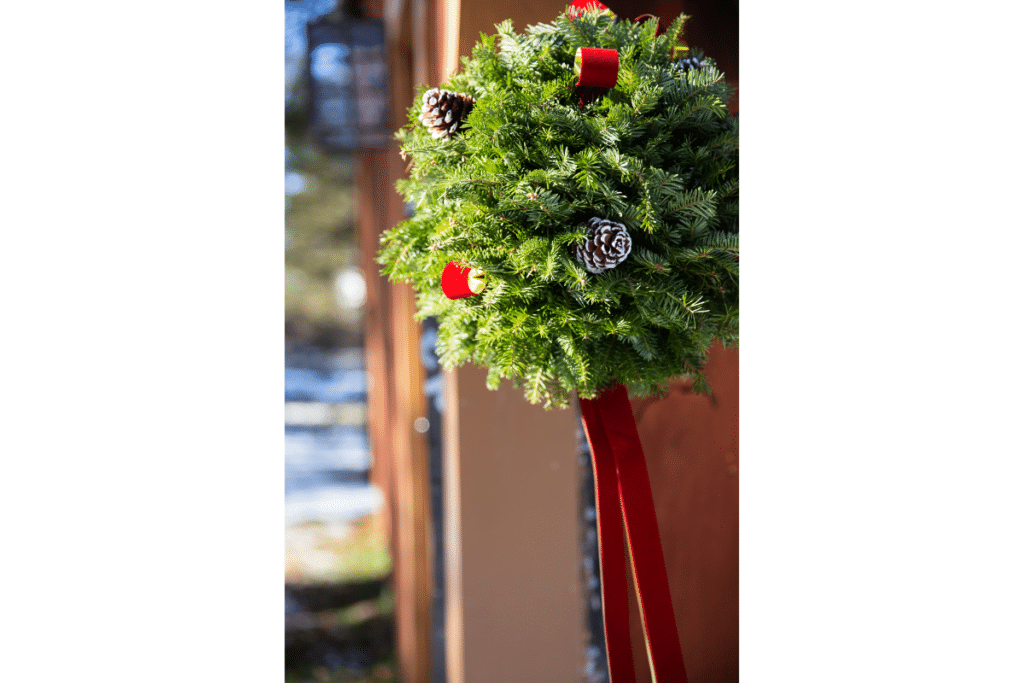
Jump ahead to the Christmas season and think of a beautiful hanging “Kissing Ball” that hangs so elegantly from an archway in a beautifully decorated home.
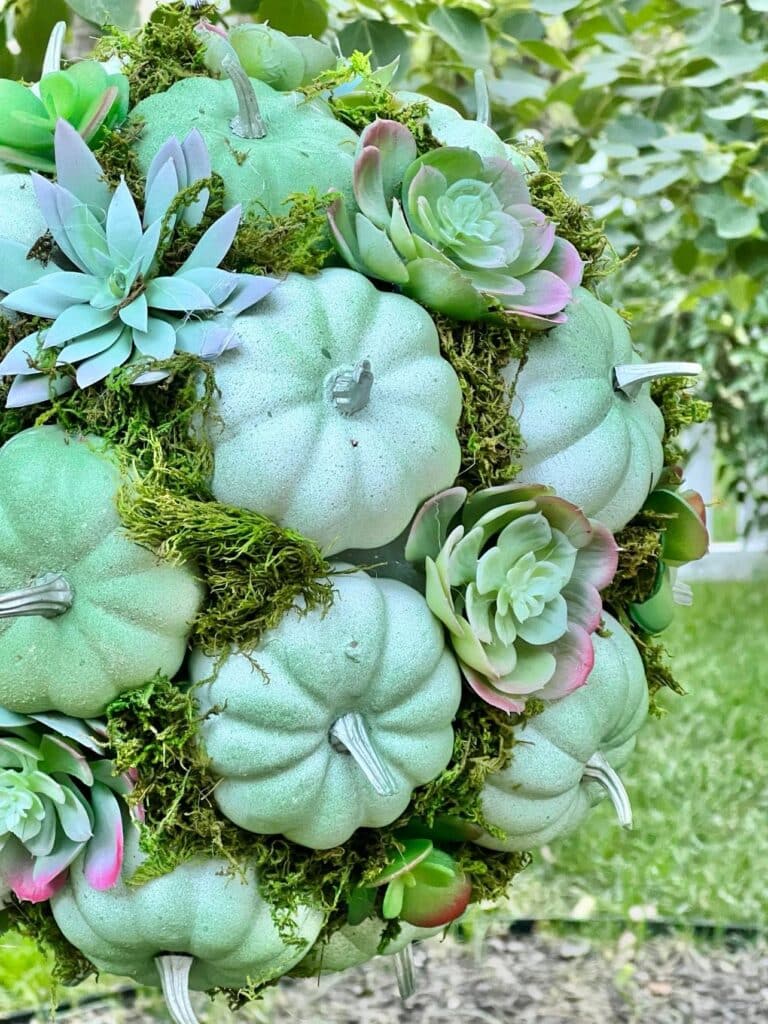
A hanging pumpkin ball is just like that only…you guessed it! With faux pumpkins and succulents!
And the best part? This project uses inexpensive pumpkins and materials easily found online or from your local craft store or dollar store!
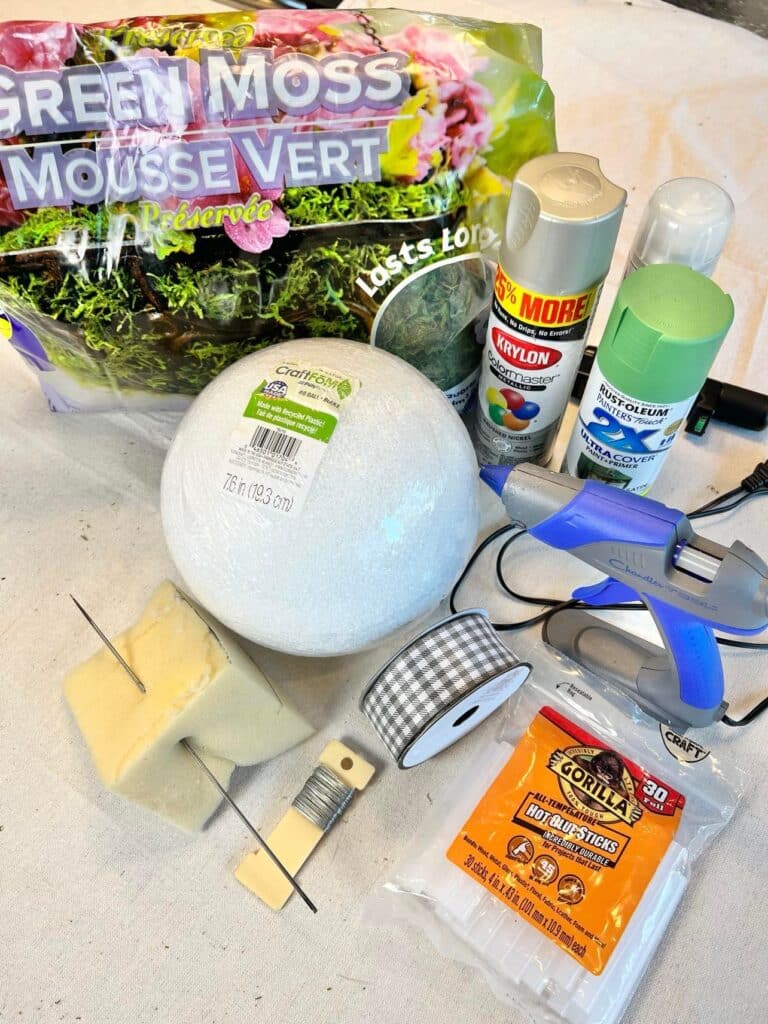
DIY Pumpkins Supply List
Here’s what you’ll need:
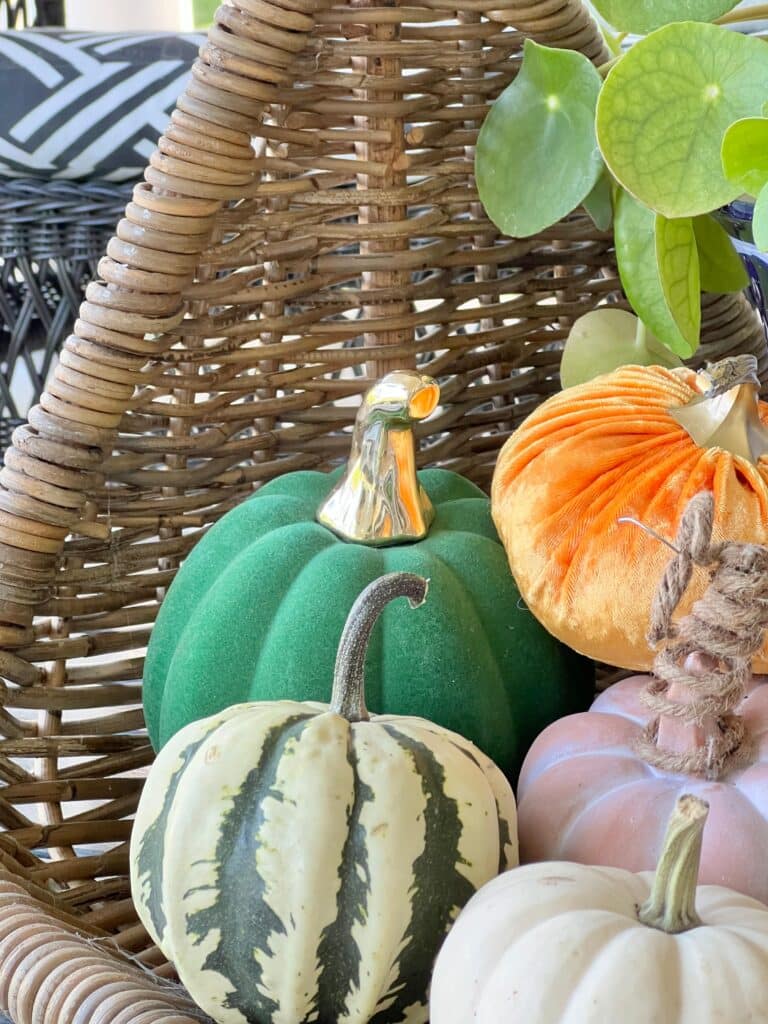
- Small faux pumpkins (White pumpkins work best for customizing. But orange works too.)
- Small faux succulents (I found mine at Dollar Tree.)
- Floral Wire
- Spray paint
- Styrofoam ball
- Glue Gun
- Glue Sticks
- Scissors
- Optional: long straight needle
First, let’s prep the pumpkins!
Plastic pumpkin stems always look…well, like plastic!
So, I removed the stems by just pulling them from the pumpkins. Then, I spray painted them with a subtle silver nickel spray paint.
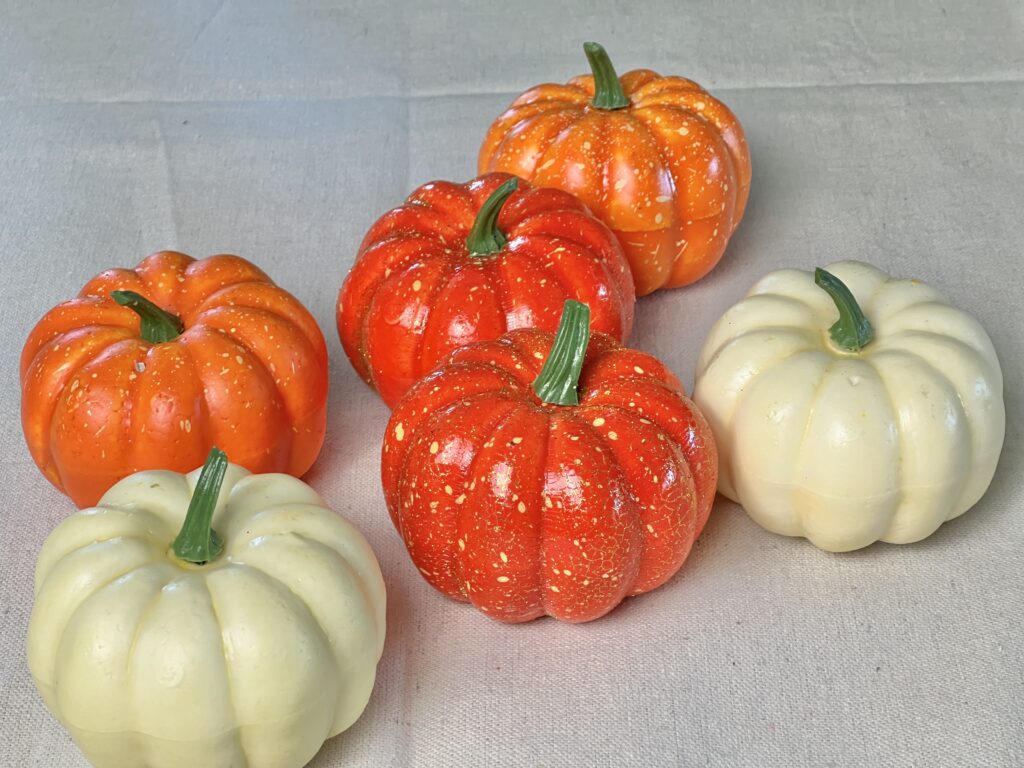
If you are happy with the color of the pumpkins, you can just leave them as is. However, I was thinking of something other than bright orange. How about a multi-layered sage green color?
To start, I spray-painted all of the pumpkins with Rust-Oleum white spray paint.
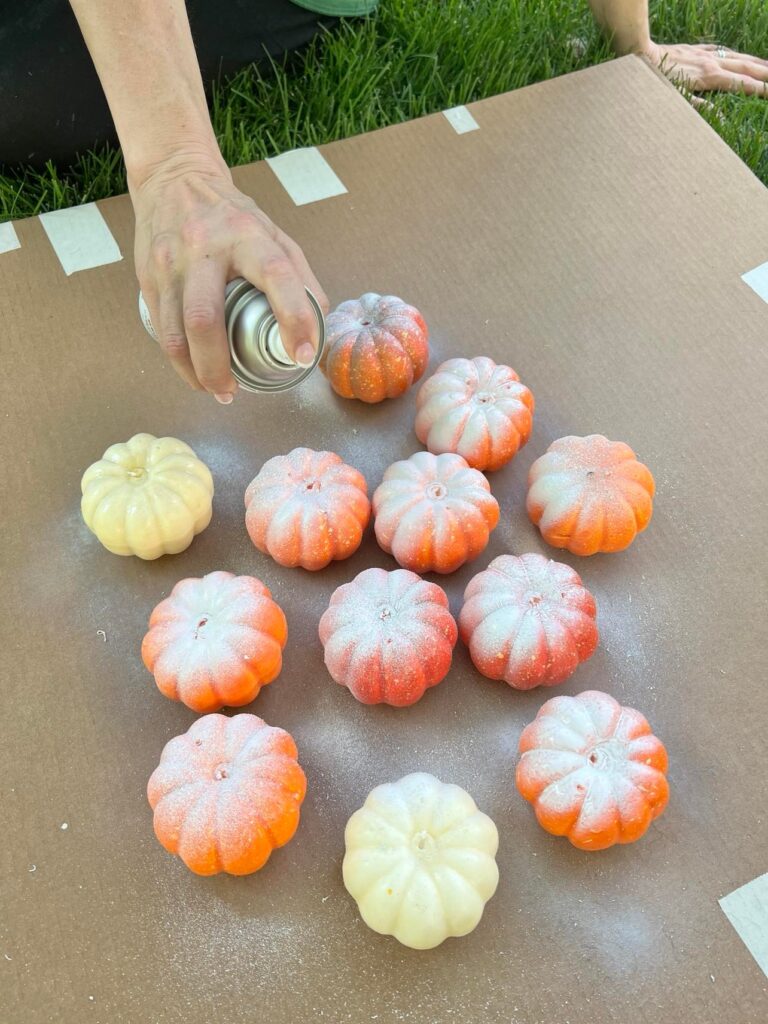
Once they dried completely, I lightly sprayed the pumpkins with Rust-Oleum “Leafy Green” spray paint.
I layered the pumpkins with light dustings of green paint until I got the shade that I wanted. They ended up a lovely shade of sage green and I love it!
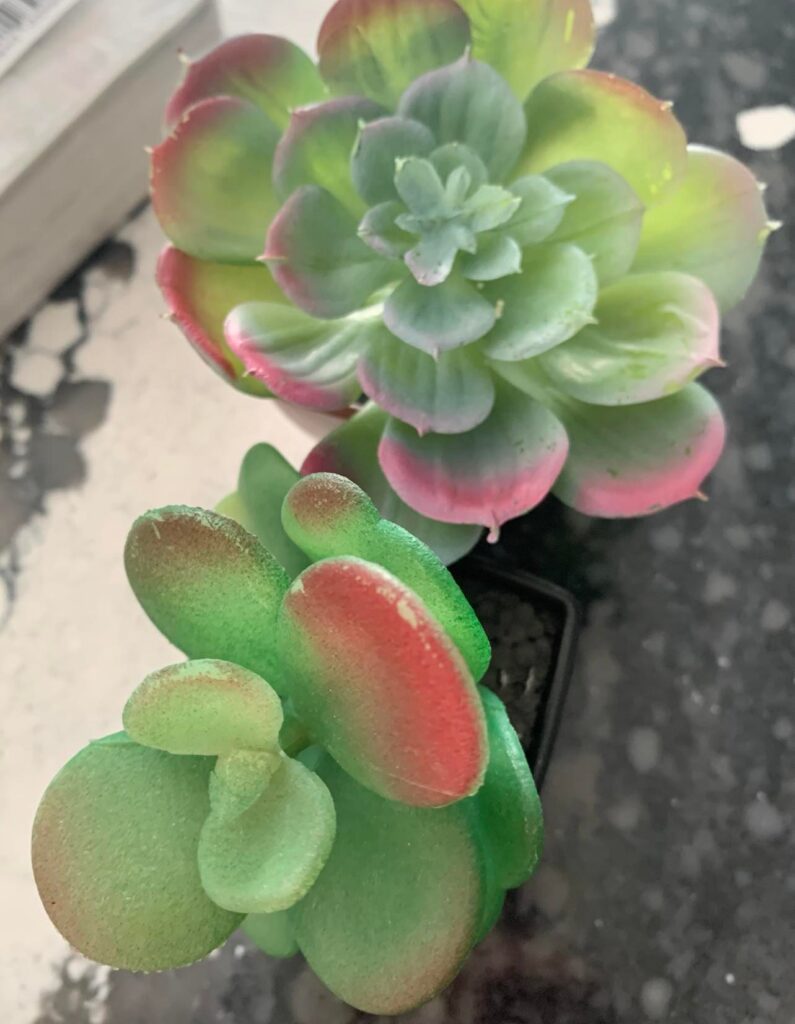
They pair so beautifully with the faux succulents!
A Little Engineering…
For the next step, you will want to create a loop to hang the finished ball. It is important to do this before you start attaching the pumpkins.
Pierce the ball with a long needle ( I used an upholstery needle because my styrofoam ball is pretty big!). Cut some floral wire into a length that is about twice as long as the styrofoam ball.
Push the folded end of the wire through the ball and pull it out on the other side. Twist the wire at the base to create a loop. On the other end of the ball, pull the wire “tails’ up the side of the ball and stick them into the sides of the ball. You have a wire loop and can hang the ball when finished!
Now the Fun Part!
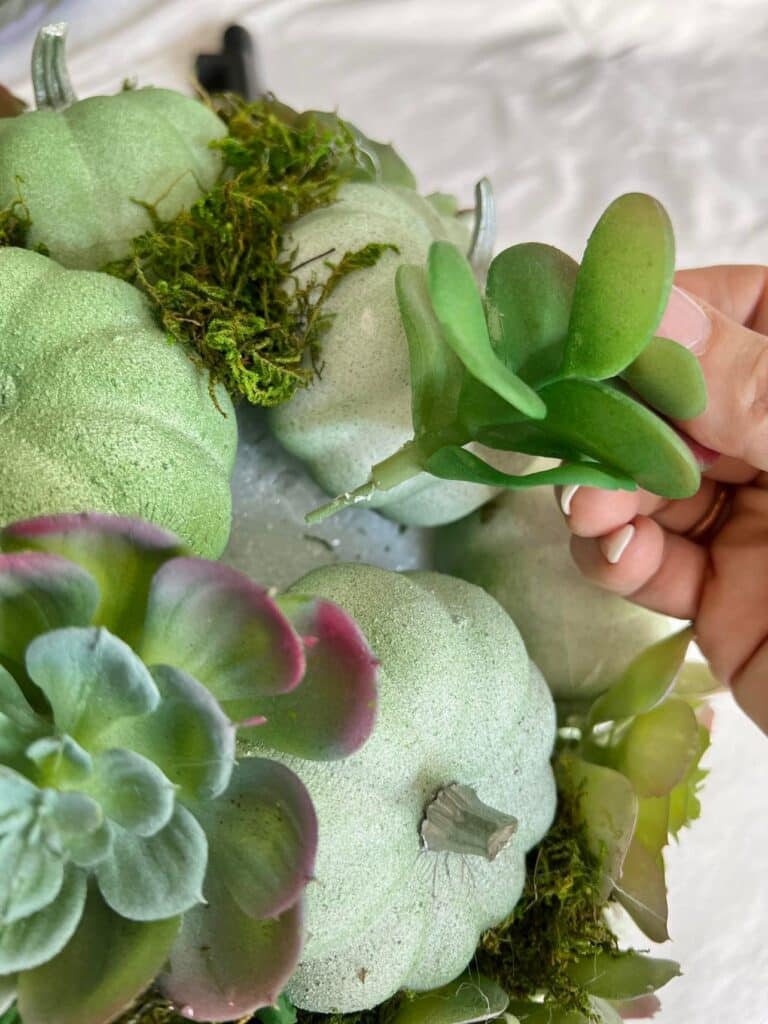
Time to glue the pumpkins and succulents!
(Now is a good time to push the silver-painted stems back into the pumpkins now that they don’t look so “plastic-ey!)
There is no real pattern for gluing the pumpkins. However, it helps if you think of the pumpkins in groups of three with a succulent in the center. This way you have an even distribution of pumpkins and succulents.
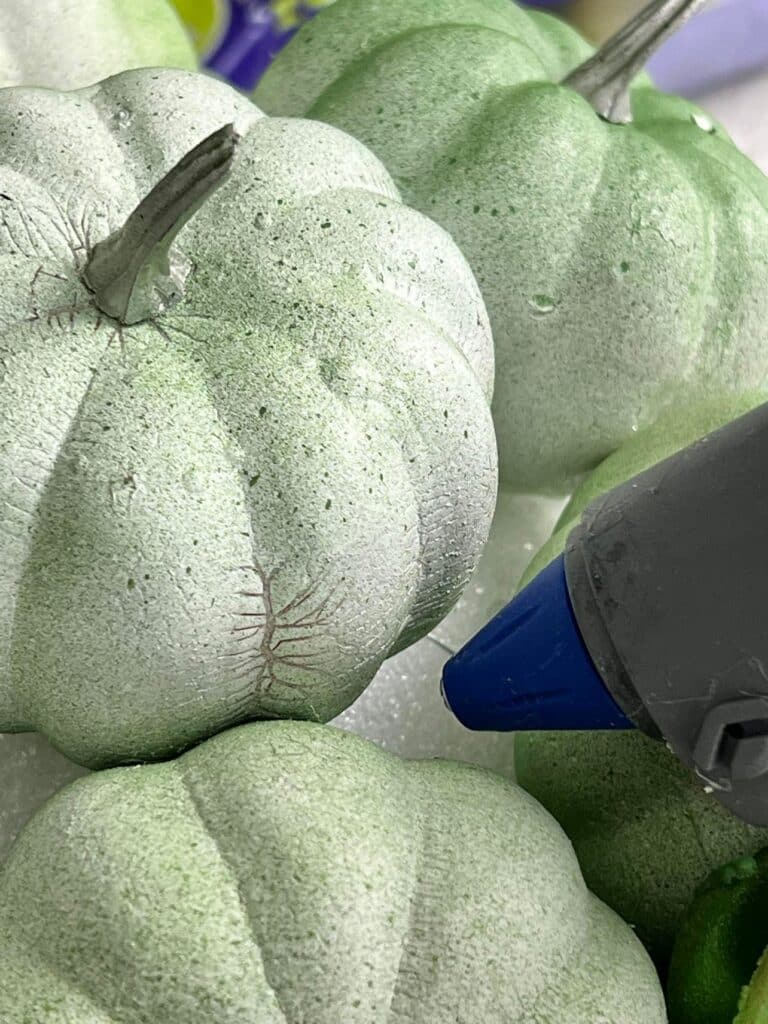
To attach each pumpkin to the ball, use a hot glue gun to apply glue to the bottom of the pumpkin. Press onto the styrofoam ball. Hold in place until each pumpkin is set.
Be careful not to burn your fingers!
As you glue the pumpkins, you will create spaces for the succulents. The dollar store succulents that I found had a long enough stem so I could just poke them into the ball. Every once in a while, I needed to glue a leaf to keep the succulent anchored.
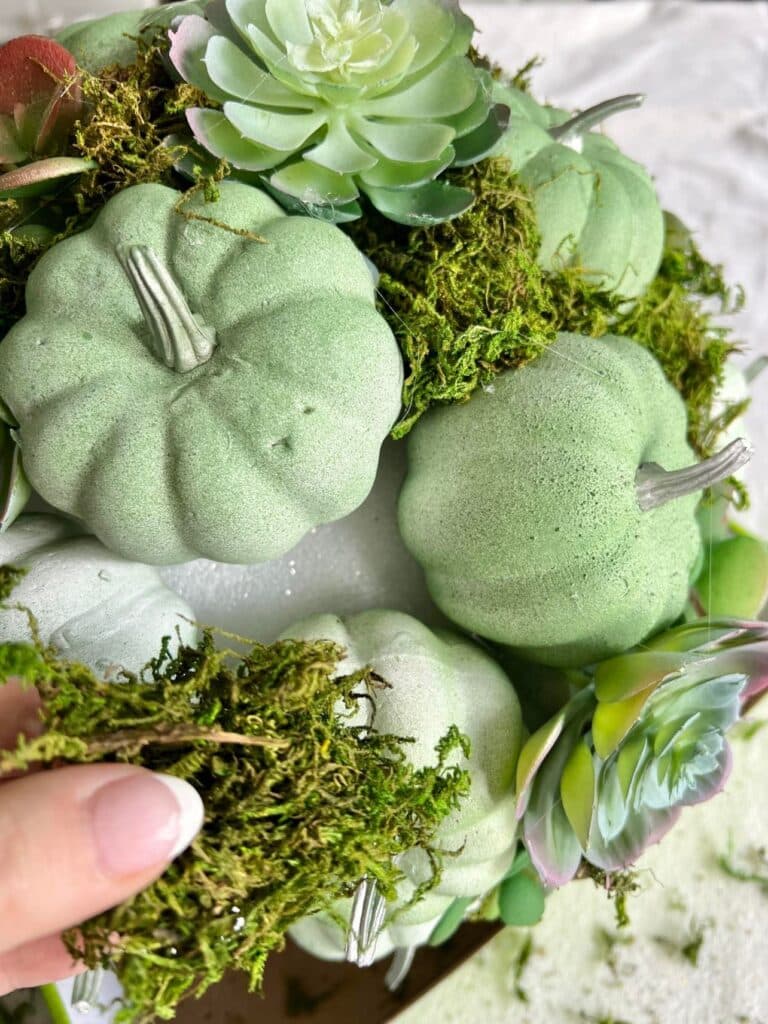
Once the pumpkins and succulents are glued to the ball, you will notice there are still nooks and crannies. Fill these with moss! A little hot glue is all you need to attach the moss and fill the spaces!
I think this is my favorite part of the project because I can really see what the ball is going to look like!
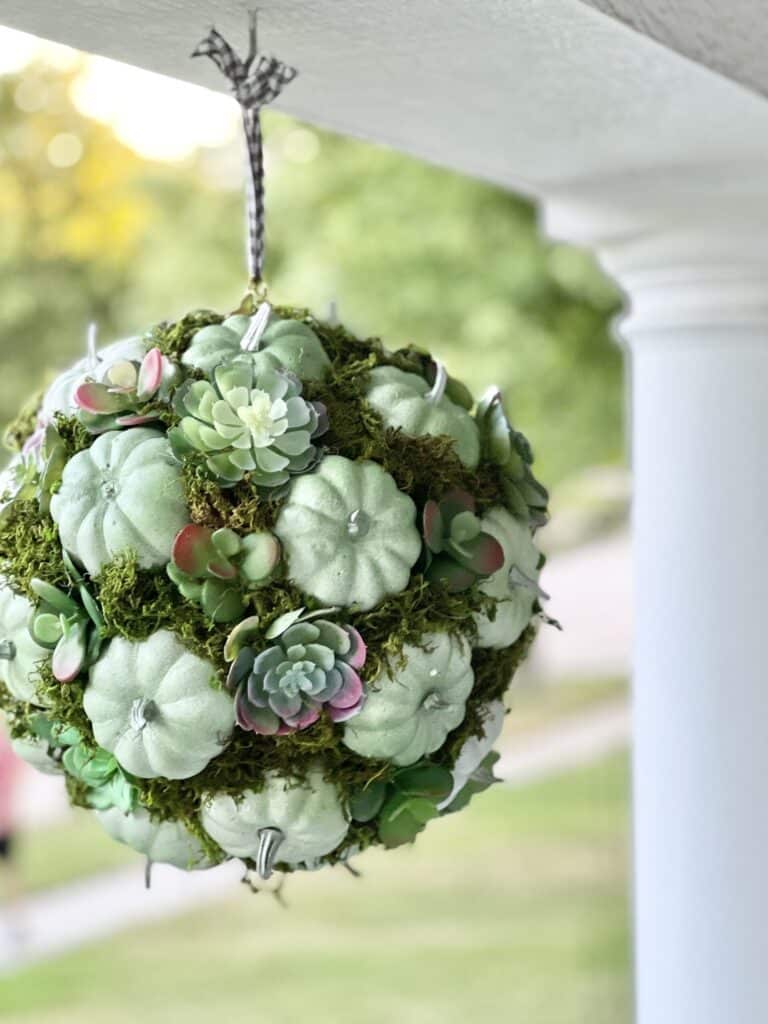
Last, tie a simple ribbon to the wire loop and you now have a beautiful pumpkin ball ready for hanging!
Hang It Up!
The final step! I was so excited when I finished the hanging pumpkin ball!
In fact, I paraded it around the house and showed it off to everyone…everyone being my husband, our dog, and our cat.
They all loved it!
Outside I went…
Here it is hanging from a shepherd’s hook in our backyard. I nestled it among our aspen trees and it was a perfect addition!
This is so beautiful with late summer outdoor colors and will continue to be so when fall colors continue to change throughout the season.
I love seeing it in the yard!
But…
It also looks great on our front porch as well.
I can’t decide!
Where do you think I should hang it?
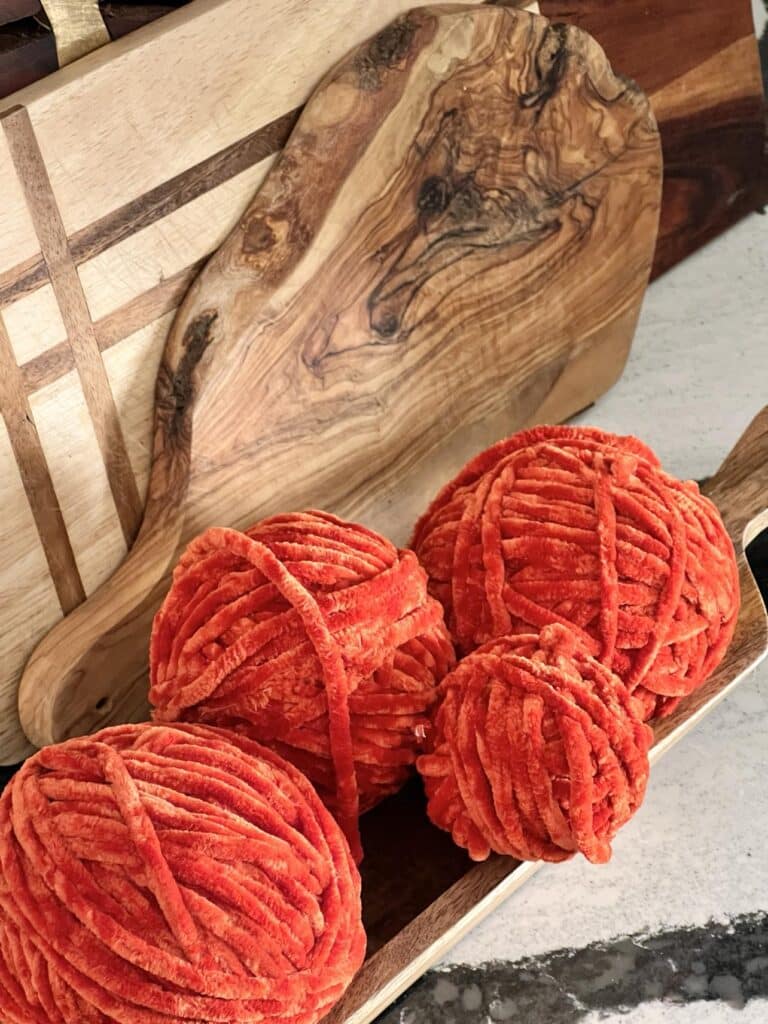
Bonus DIY Pumpkin Decor Project: Yarn Pumpkins
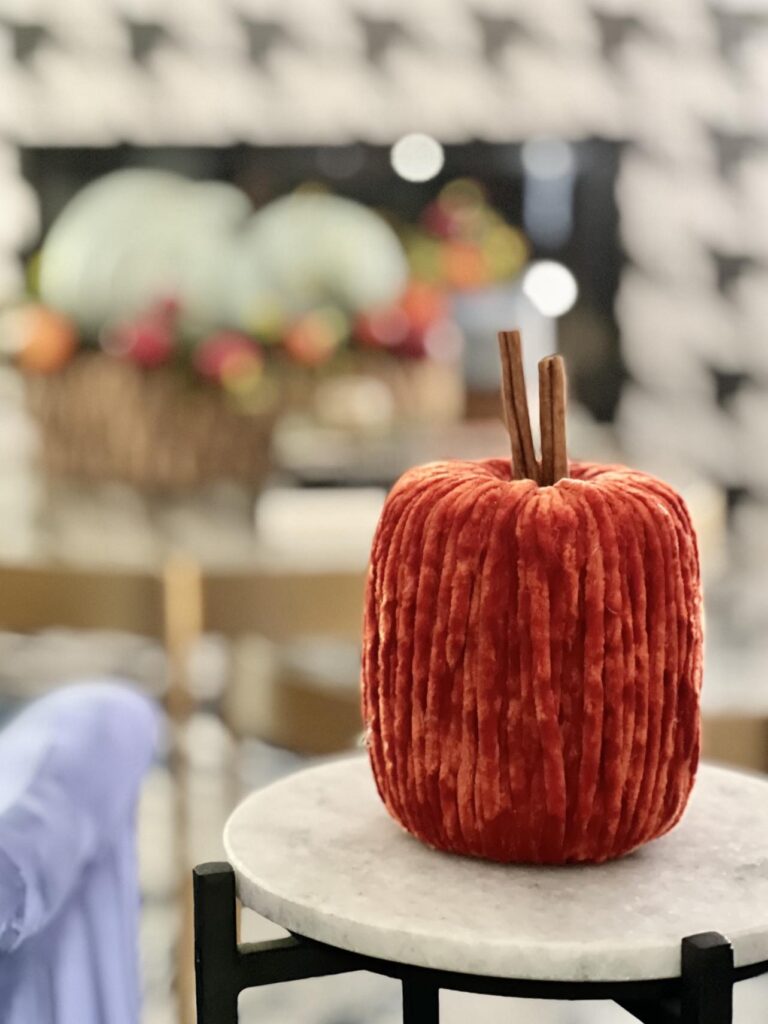
Looking for another diy pumpkin decor project? How about easy-to-make yarn pumpkins? All you need is yarn and a toilet paper roll!
Make a TP Pumpkin
Grab some yarn…
Find some fall-colored yarn that has a soft cozy texture. You can find this at your favorite craft store or maybe in your craft closet at home!
Chenille is my favorite kind to use…soft as a cuddly kitten!
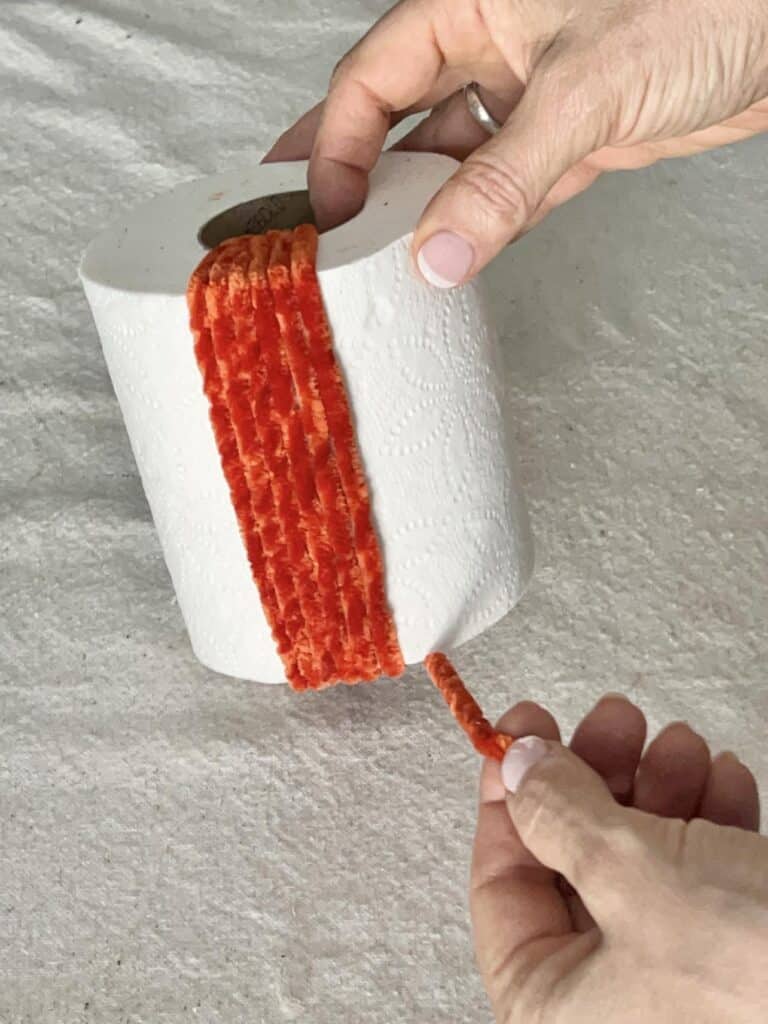
Wrap it up!
Start to wind the yarn through the center of the toilet paper roll and just keep winding. I started by winding with my hands and then switched to using a long upholstery needle to pull the yarn through the middle.
The beauty of this is you can make this pumpkin as thin or thick as you want!
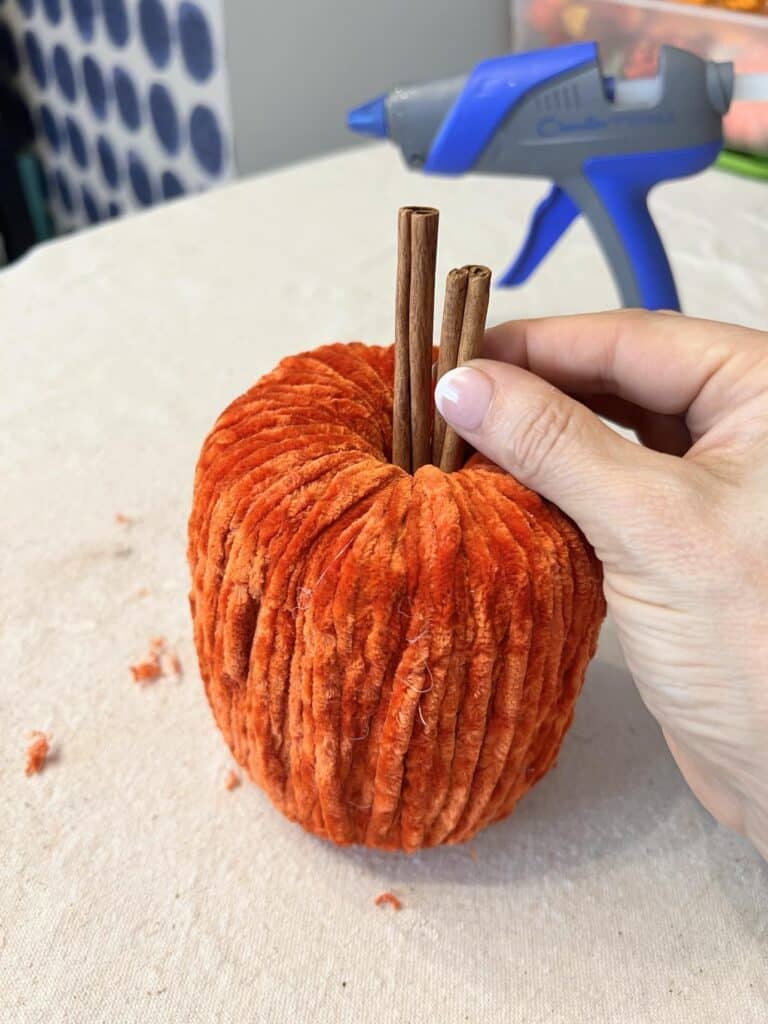
The Finishing Touch
Using a hot glue gun, glue a couple of cinnamon sticks into the top of the pumpkin for a scented finishing touch. You could add some faux fall leaves or leave it simply unadorned like I did.
No one will know this pumpkin is made from a roll of toilet paper!
Deck the Fall Halls
Fall is here, and it’s time to deck the halls (or in this case, the porch) with all things pumpkin! This beautiful pumpkin kissing ball is a fun and easy DIY project that’ll add a touch of fall magic to your outdoor space.
Whether you’re a seasoned crafter or just starting out, this project is a breeze. All you need are a few small pumpkins, a styrofoam ball, and a little bit of creativity. You can customize it to match your personal style, using different colors of pumpkins, ribbons, and embellishments.
So grab your crafting supplies and get started on this pumpkin-filled adventure! You’ll be hanging your beautiful kissing ball in no time!
Cheers!

A Little About Me
Hi! I’m missy. so happy to meet you!
“Decorate with Joy! Live with Happiness!”
I truly believe that your home should be a reflection of your personality, a space where you feel free to express yourself and create a sanctuary that feels uniquely yours.
I love creating mood boards, hunting down unique home décor treasures, tackling easy DIY projects, and gathering with family and friends for a delicioHomes are meant to be enjoyed, filled with laughter, and shared with the people you love!
– cheers!-
Don’t Forget to Pin It!
Pin the image below to your boards on Pinterest (just click the Pin button in the top left corner). You can also follow along with me on Pinterest!
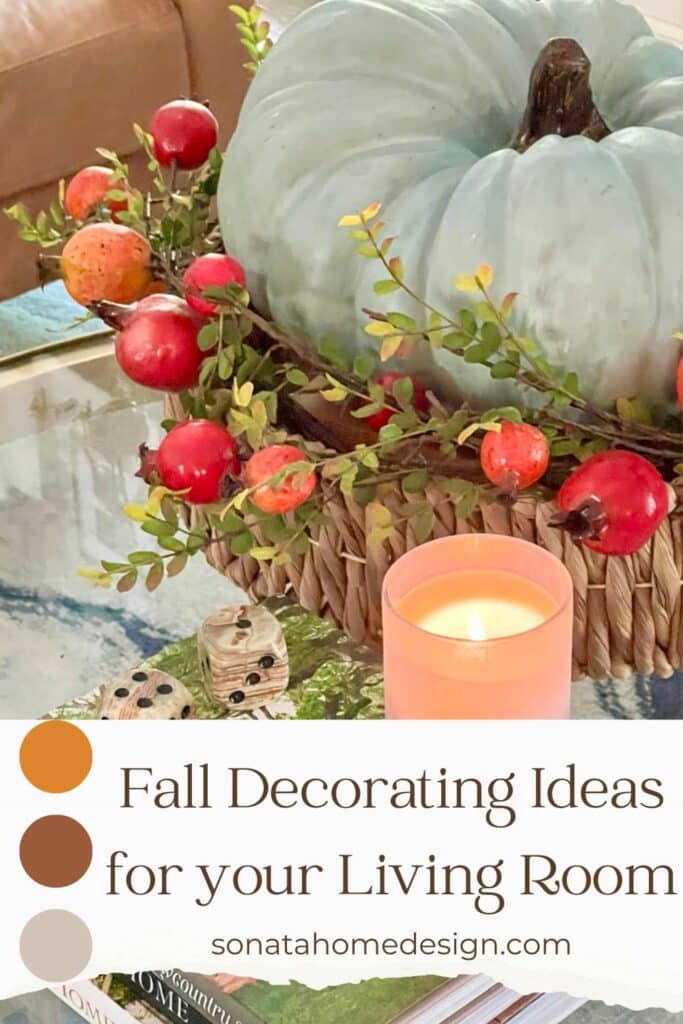
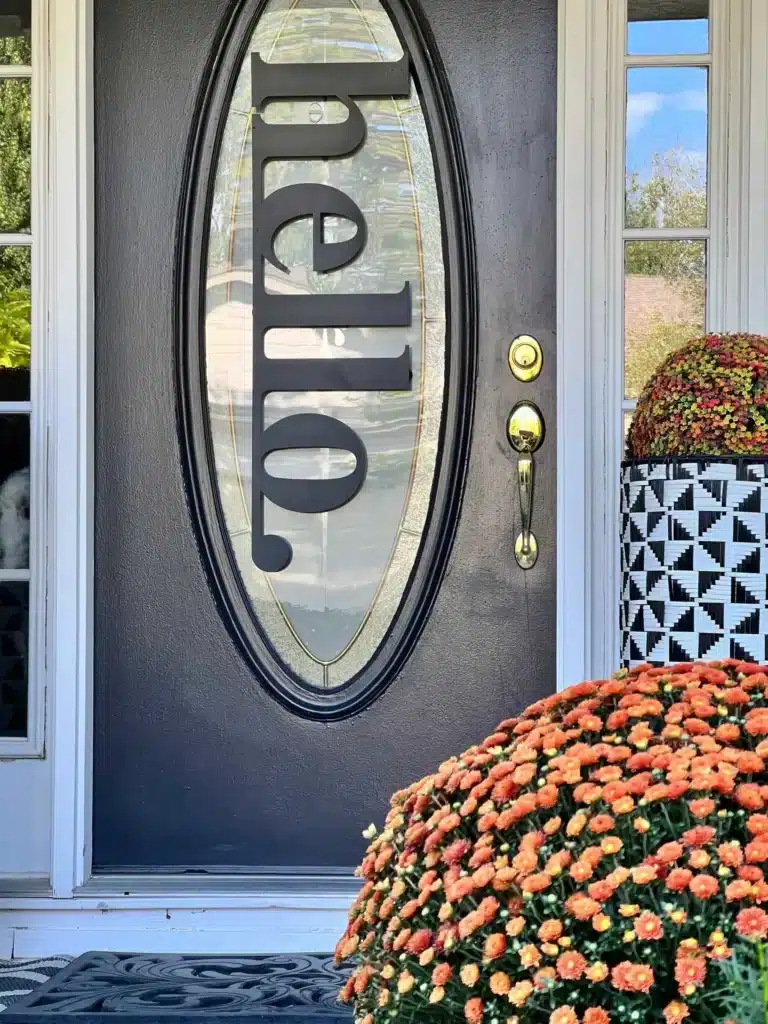
Fall Decorating at Home
Simple and Cozy Fall Decorating Ideas for Your Living Room
Easy Fall Front Porch Decorating Ideas on a Budget

Fall Shopping
